Home Page
Showing posts with label Main Courses. Show all posts

Thursday, April 8, 2010

Penne with Chickpeas, Tomato and Feta


Way back in the olden days, when I was young and crazy, I used to post to this blog everyday. CRAZY! Because my family couldn't eat decadent, rich dishes all the time, this blog saw a lot more everyday, healthy things.

So, as proof that we still enjoy a mostly clean eating lifestyle, I am posting an everyday dinner recipe. In life, I tend to follow the 90/10 rule. 90% of the time I eat healthfully and mind my portion sizes, and 10% of the time I eat what I want, in massive, astonishing quantities. Since about 10% of my total calorie intake comes from the stuff I eat 90% of the time 90% of my calorie intake come from the stuff I eat 10% of the time, I figure it all equals out to zero (or something like that). Maybe I should write a diet book... what do you think?

Anyway, here's a nice healthy dinner recipe, that lands squarely in the 90% - healthy eating category. Based on my math equation above, you are now entitled to finish this meal off with about a half a chocolate pecan pie topped with whipped cream and an irish coffee. Enjoy.

Whole Wheat Penne with Chickpeas, Tomatoes and Feta
adapted from Cooking Light Magazine, March 2010
Serves 4 (with leftovers if two are finicky children)

8oz whole wheat penne
1 tbsp olive oil
1/2 cup chopped onion
3 cups halved cherry tomatoes
3 cloves garlic, minced
1 yellow bell pepper, julienned
1 (15oz) can chickpeas
3oz feta, crumbled
1/3 cup fresh basil leaves
1/2 tsp lemon zest
1/2 tsp salt
freshly ground black pepper

1. Cook and drain pasta. Reserve about 1/4 cup of the cooking liquid.

2. In a large skillet, saute onions and garlic until translucent. Add peppers and chickpeas, saute another minute or so. Add in tomatoes and continue cooking for two more minutes.

3. Stir in the cooked pasta and reserved cooking liquid. Continue to cook until everything is heated through.

4. Remove from heat and toss with lemon zest, feta, basil and season with salt and pepper.


Wednesday, February 24, 2010

Chicken B'stilla


I adore Moroccan food. The smell that envelopes your house when you are cooking a Morrocan Tagine is, in my books, way up there with Glade Plug Ins, popcorn, and white glue! I also love the way so many Moroccan dishes incorporate dried fruits and nuts (two of my favourite food groups). I have recently invested in a real ceramic Tagine, and a couple of Moroccan cookbooks and I've experimented with some different types of salads, couscous, and stews. I haven't posted any of these recipes yet but I will (someday).

Both of my Moroccan cookbooks have recipes for Chicken B'stilla (pronounced Bisteeya). Everytime I flip through those books, I hang on those pages, drooling over the pictures, but despairing over how complicated (and caloric) the recipe seems. And so, I dog ear the page (again) for another time.

When I was in New Zealand on vacation over the holidays, I was happy to see there was a Moroccan restaurant in Rotorua. I went on-line and noticed that they had Chicken B'stilla on their menu. My heartrate went through the roof (hey, I get excited about food!). This was a perfect opportunity to taste this dish without having to slave over it all day, and without being able to go back for seconds (or fourths)...which I knew was going to be a serious risk...

Sadly, our travel companions weren't so fussy about the whole Moroccan food idea, and so I didn't get to go. I've been mourning that Chicken B'stilla ever since. There aren't too many Moroccan restaurants here in Ottawa, and to my knowledge, none serve Chicken B'stilla.

And so, when I noticed that the 2009 Holiday edition of the LCBO Food and Drink Magazine had a recipe for Chicken B'stilla, I new it was fate. I ran out right away and bought the ingredients before I could come to my senses. I even made one last ditch attempt to subvert my own plans. That morning at breakfast I asked my husband Mario, "so what would you like for dinner tonight, poached plain chicken breasts with boring steamed vegetables and dry boiled potates OR Chicken B'stilla?"

He answers (with conviction) Chicken B'Stilla! And then, "so what exactly IS Chicken B'stilla again?".

This is Chicken B'stilla.


Chicken B'stilla

(Note: the original recipe called for chicken with the skin on, and for 1/2 cup of butter, I used skinless chicken and cut the butter in half and the recipe did not suffer at all from these alterations. At least I don't think it did... I'd have to actually try it the original way to know for sure.... oh geez....)

2 tsp vegetable oil
4 chicken breasts
4 onions, finely chopped
1 tbsp garlic, finely chopped
1 tbsp ground cumin
2 tsp ground ginger
1 tsp ground cloves
1 tbsp ground cinnamon
1/4 tsp chili flakes
1/4 tsp turmeric
1 cup chicken stock
salt and pepper
3 eggs, beaten
1 cup dates, coarsely chopped
1/4 cup raisins
1/2 cup slivered almonds, toasted
9 sheets phyllo pastry
1/4 cup unsalted butter, melted (or more if you run out)
Icing sugar for garnish

1. In a large frying pan with a cover, heat vegetable oil and brown chicken breasts on both sides. Remove to a plate.

2. In the same pan add onions and cook about 10 minutes. Add garlic, cumin, ginger, cloves, cinnamon, chili flakes and turmeric. Stir for 30 seconds.

3. Place chicken back in pan with onion mixture and add the chicken stock. Cover with lid and simmer over low heat for 20 minutes, until chicken is cooked through.

4. Remove chicken from mixture and let cool. When cool enough to handle shred the meat into bite-size pieces.

5. Stir chicken back into the onion mixture and add eggs, dates, raisins, and almonds. Combine well and season to taste. (Steps 1-5 can be completed ahead of time).

6. Place one sheet of phyllo pastry horizontally on your work surface, brush lightly with melted butter.

7. Place a second sheet on top of this, vertically to form a plus sign (this is symbolic of the clothing sizes you will soon need if you eat to much of this). Brush with butter and place the third sheet diagonally, and so on until 8 sheets are used up. The eighth sheet does not need to be buttered, unless you are a rebel, in which case, I won't stand in your way.

8. Place the sheets in a greased 9-inch springform pan. Fill pastry with chicken mixture and spread out evenly. Enclose by pulling the overhanging pastry up and over the chicken. (Note: This is where I used that 9th sheet of phyllo. My eight sheets did not reach up far enough to fully enclose the filling, so I buttered that ninth sheet, folded it in quarters and placed it on top of the filling, before I folded my other eight sheets in.) Then brush the whole top with melted butter.


9. Bake the B'stilla for 50 minutes at 375F or until pastry is golden and chicken mixture is heated through.

10. Serve hot with sifted icing sugar overtop.


One other funny note. Before I assembled the B'stilla, I lined my springform pan with a circle of parchment paper (I didn't want to take any chances of sticking). When I was cutting the wedges for dinner, I forgot, and cut right through the parchment. So each person got a little triangle of parchment paper on their dinner plate underneath their B'stilla. When I was doing the dishes, I noticed that mine was the only plate that still the had paper on it! (I guess I've trained my family well not to complain about my cooking!!!)


"mmmmm.... parchment paper"


Friday, September 18, 2009

Salmon with Tuscany Beans and Heirloom Tomatoes


Last night for dinner, I made a delicious Salmon recipe from the July/August edition of Clean Eating Magazine, my new FAVORITE cooking magazine. I have already made 3 recipes from this issue alone. This is unheard of for me, usually I buy cooking magazines a couple at a time (I have a cooking magazine habit) and then I will read them, drool over the pictures, chose a few that I want to make, then throw the magazine in a pile and never make the recipes. So when I find a magazine like this, that is actually worth the $6.99 cover price, I might actually subscribe!

This salmon was delicious. Marco ate it all up, he loved the bean salad, and was cajoled into eating the salmon with the lure of a chocolate covered jube jube from Candy Mountain (does that make me a bad mother? Hey, he ate the salmon! That's good for him right?). Unfortunately, Claire, at the mature age of 10 is no longer susceptible to such cajoling and would eat nothing on her plate. She went to bed hungry, I'm sure.

Will this prevent me from making this dinner again? Not a chance. My kids eat what they're served (or not), but I refuse to cater to their finickiness. Besides, my theory is that you will never LEARN to like something if you never eat any of it...


Salmon with Tuscany Beans and Heirloom Tomatoes
Serves 4

1 15oz can of white kidney beans
1/2 onion, thinly sliced
1 large red pepper, chopped
4 salmon filets
1/2 cup fresh dill, minced
cooking spray
2 large heirloom tomatoes, chopped (I used about 400g)
1/4 cup olive oil
1/4 cup balsamic vinegar
2 shallots, minced (I used 1/4 cup chives - that's what I had)
4 cloves garlic, minced
2oz capers, drained and rinsed (I didn't have any on hand)
salt and pepper to taste

1. To make the marinade, mix the olive oil, balsamic vinegar, shallots, garlic, and capers.

2. Pour half of the marinade over the salmon and sprinkle with the dill. Let the salmon sit for about 30 minutes (or up to a full day in the fridge).

3. In a bowl mix the beans (rinsed well) with the onion, and red pepper and toss with the remaining marinade. Let sit. Right before you are ready to serve, toss in the chopped tomatoes and season with salt and pepper to taste.

4. In a non stick pan, misted with cooking spray, cook the salmon (5-7 minutes per side depending on the thickness) until it is cooked through.

5. Serve with bean salad.


Thursday, September 3, 2009

Huevos Rancheros


This isn't really much of a recipe and it's probably not all that authentic, but I wanted to post it anyway, due to it's deliciousness...

I made this for dinner the other night because I had to throw something together quickly for myself before Mario and the kids ate... I didn't have high expectations, having had scrumptious huevos rancheros at a local restaurant called George's Kitchen in Belize...

BUT... it was pretty darned good and very healthy. You can use homemade salsa with fresh tomatoes (if you want to feel more like you actually made a recipe) but mine was good with bottled salsa...

Huevos Rancheros
Serves 1

1 flour tortilla
2 eggs
1/4 cup grated Monterrey Jack Cheese (about 15g)
1/2 cup salsa
chopped fresh cilantro
cooking spray
salt and pepper to taste

1. Heat your oven to 300F, put the tortilla on a dinner plate and throw it in to warm up both the plate and the wrap...

2. Heat up the salsa (in the microwave if you want... gasp!)

3. Fry the eggs in a non-stick pan coated with cooking spray. I did mine sunnyside up (season with salt and pepper).

4. Remove the plate and tortilla from the oven (put on oven mitts first - OUCH) and slide the eggs onto the tortilla. Spoon the hot salsa around the eggs, and sprinkle with cheese and cilantro.


Wednesday, August 26, 2009

Penne with Roasted Tomatoes and White Beans


No, your computer monitor is not on the fritz!! I am actually posting TWO DAYS IN A ROW!

I just had something else to post, and I figured I'd better get it up now, before I forget.

About a month ago, I suggested to my husband Mario that we start having one meatless dinner per week. He was a little reluctant, but as long as I promised not to feed him anything strange (by his definition strange would include tofu), I managed to convince him that this was a good idea (or at least not a horrible idea)...

So, I'm working hard to show him how good meatless meals can be, and I think this dish went a LONG WAY towards that. It was delicious, and he went back for a second huge helping!

This recipe is from Ellie Krieger, and I got it from the Quick and Fresh, Fine Cooking Magazine. I remained true to the recipe, only I cut down the olive oil from 3 tbsps to 2 tbsps.

Penne with Roasted Tomatoes, Garlic, and White Beans

3 large ripe tomatoes (2 pounds)
6 cloves garlic, unpeeled
2 tbsp olive oil
salt to taste
Pepper to taste
1 15.5 ounce can of white kidney beans, drained and rinsed.
8 ounces of penne pasta
2 tbsp fresh lemon juice
1/3 cup fresh basil, chopped
1/4 cup freshly grated Parmesan

1. Slice each tomato into wedges and discard the seeds (I forgot to seed mine, and it made my sauce a little juicier, which was OK). Toss the tomatoes in 1 tbsp of the olive oil and spread on a baking sheet.

2. Throw the unpeeled garlic cloves on the baking sheet too.

3. Roast at 450F for about 35-40 minutes until the tomatoes are starting to char.

4. Bring a large pot of water to a boil, and cook the penne. When the penne is about 1 minute from cooked throw in the drained and rinsed beans (to get them hot).

5. Drain the pasta and beans and return to the pot.

6. For the sauce, remove the garlic from the baking sheet and squeeze the flesh out into a small bowl. Mash it, and add the lemon juice, 1 tbsp olive oil and a dash of salt. Stir to combine.

7. Add tomatoes to beans and pasta. Add the roasted garlic sauce and the basil. Season with salt and pepper to taste.

8. Serve with Parmesan.


Tuesday, August 25, 2009

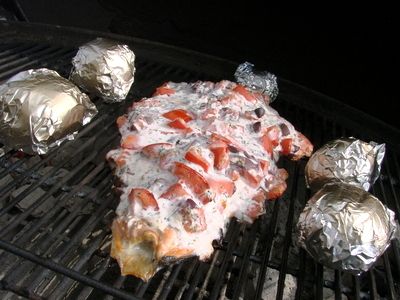
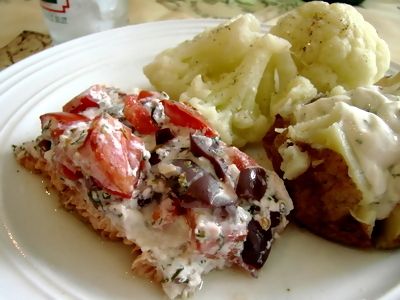
Salmon with Yoghurt Dill Topping


My apologies for going so long without posting. It has been a busy busy summer. And yes, we have still been eating all summer long, but I've been a little boring with my recipes (reverting mostly to old already posted faves). I have also been trying to eat a cleaner, healthier diet... which often leads to less food-porn worthy blog material.

This meal here was healthy while also meeting my other unofficial blog material criteria... (1) I actually remembered to take pictures before I was halfway finished eating; (2) It is something new; and (3) It was picture worthy.... oh yeah and of course, (4) It tasted good.

We all loved this (kids included), and it will be making an unbloggable return appearance in my recipe line-up!


Salmon with Yoghurt Dill Topping

1 1/4 cups plain fat free yoghurt
20 kalamata olives, chopped
15 cherry tomatoes, chopped
1 1/2 tsp dried oregano
6 cloves garlic, minced
2 tbsp chopped fresh dill

1. Mix all ingredients together in a bowl.

2. If you are barbequeing this, as we did, it is easier to put the salmon on the barbeque and add the topping after (rather thay trying to transfer it onto the grill without spilling). So... arrange your barbeque for indirect grilling and cook the salmon with the topping for about 20 minutes (until is cooked through). Your cooking time will depend on the thickness of the salmon.

3. Alternatively, you can put this on a baking sheet in a 400F oven until cooked through.


Friday, June 19, 2009

Roast Leg of Lamb with Tahini Sauce


When I was little, I really didn't like lamb, and consequently I avoided it completely for years. But then about 5 years ago my Mother-in-Law made a Rack of Lamb with a rosemary biscuit-like crust on it, and I loved it! I'll have to make and post that recipe sometime. Since then, I can't get enough, lamb has become one of my "go-to" favorites, especially when we are out in restaurants.

We are planning a trip to New Zealand for this upcoming December, and the part of our trip I am most looking forward too (aside from getting to visit with my Sister-in-Law and her Husband, of course)... is getting to eat lamb, lots and lots of lamb....

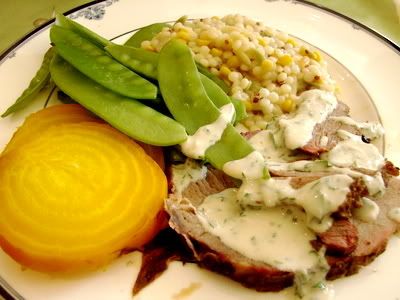
This meal, here, combines some of my favorite things - lamb, and Middle Eastern flavours. The next night for dinner, I made pita sandwiches with the left over lamb and tahini sauce with tomato, lettuce and onion. They were fabulous! It was actually pretty funny, I wrapped the sandwiches up using squares of waxed paper. My kids did not eat the lamb the first night, when it was served as in the picture, above (with roasted golden beets, steamed snow peas and Israeli couscous). However, when I made it into the wraps, they gobbled them up.

At one point while we were eating the sandwiches, I said to my husband, Mario, "This is the closest I've ever come to a good homemade shawarma sauce". Claire (looking a little stricken) says, "What do you mean, HOMEMADE, didn't these come from a restaurant?? How come they are wrapped in this paper???" I explained that I just did that myself to help make them easier to eat. Well, their enthusiasm for the meal vanished immediately and we had a job getting them to finish. How could they love something one minute (when they thought it came from a restaurant), and then hate it the moment they realized I made it! I was mortally offended (as I am most nights when they turn their noses up at my cooking!!).

Roast Leg of Lamb with Tahini Sauce
from Eating Well Website

8 medium cloves garlic, divided
2 1/2 tsp salt, divided
2 tbsp olive oil
1 1/2 tsp ground mace
1 tsp ground cardamom
1 tsp paprika
1 tsp ground cinnamon
1 tsp ground cumin
1/2 tsp cayenne pepper
1 4lb boneless leg of lamb, butterflied and trimmed
1/2 cup fresh lemon juice
1/2 cup tahini
1/2 cup minced fresh parsley
1/2 cup nonfat plain yogurt
1/2 teaspoon freshly ground pepper

1. Mince 6 garlic cloves. Place in a small bowl with 1 1/2 tsp salt and mash into a paste using the back of a spoon. Stir in the oil, mace, cardamom, paprika, cinnamon, cumin and cayenne until combined.

2. Lay lamb out flat, with the cut side up. Spread three-quarters of the spice paste over the cut surface. Roll the lamb closed and tie in several places so it is about the shape of a large football. Spread the remaining paste over the outside. Loosely cover with plastic wrap and refrigerate for 2 hours.

3. Mince the remaining 2 garlic cloves. Combine with the remaining 1 teaspoon salt in a medium bowl with lemon juice, tahini, parsley, yogurt, and pepper. Refrigerate until ready to serve.

4. About 20 minutes before you are ready to grill, preheat a gas grill (with all burners lit) to 400°F or build a fire in a charcoal grill and let it burn down to medium heat (about 400°F).

5. Roast Lamb in BBQ over indirect charcoal until it reaches an internal temperature of 140 degrees. (You can use a gas BBQ, by turning off the burners on the side where the lamb is, or roast in the over at 400F). Total cooking time will vary, but will be approximately 1 hour.

6. Transfer lamb to a platter and let stand for 10 minutes before slicing. Serve with the tahini sauce.


Monday, June 1, 2009

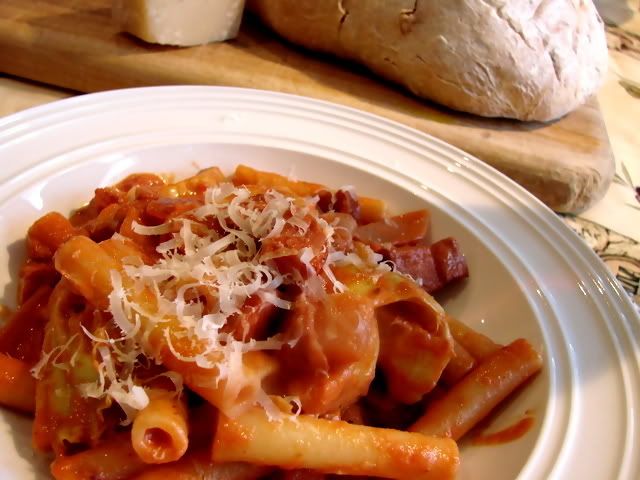
Tomato Cream Penne with Artichokes and Chorizo


I apologize, everyone must be getting so bored with seeing this same soup bowl over and over again. I'll have to start trying to be more creative with my photo staging.

Years ago when Mario and I were in University, we had a standing date night every Wednesday with another couple at a local Italian restaurant. This restaurant, which is now closed, had half price night on Wednesdays. The four of us would order 1 medium pizza with Italian Sausage, Tomatoes and Onion and have a slice each for an appetizer, and then we would each have a main course. Mario and I usually ordered the same thing (a testament to how good this meal was, because normally Mario won't order the same thing as me). We loved a dish called "Tortellini Hayden", it had bacon, artichoke hearts, onion, and tortellini in a tomato cream sauce. It was so good and it came with a nice hunk of baguette toasted with garlic butter (all this for around 10$ a person).

I have made numerous attempts over the years to re-create "Tortellini Hayden", sometimes more successfully than others, but I have never recorded exactly what I did, so each time I have to start from scratch figuring it all out.

This dish isn't exactly the same, it has chorizo along with the bacon and penne instead of tortellini, but overall it was inspired by the original "Tortellini Hayden" and if anything, the chorizo was an improvement.

This time, I wrote it down...

Tomato Cream Penne with Artichoke and Chorizo

1 can artichoke hearts (quartered)
4 slices bacon, chopped
1 cup chopped chorizo sausage
1/2 cup chopped onion
1 clove garlic
1/2 tsp oregano
1/4 tsp each basil and thyme
ground black pepper to taste
1/2 lb dry penne
2 cups strained tomatoes
1/2 cup heavy cream
Freshly grated Parmesan

1. Saute bacon and drain fat, reserving about 1 tsp of the drippings.

2. Return bacon and tsp of dripping to pan and add chorizo, garlic and onion. Saute until onion is soft.

3. Put penne on to boil.

4. Add artichokes, tomato sauce and spices and allow everything to simmer while pasta cooks.

5. Drain pasta and add to sauce along with cream. Stir until cream is incorporated and heated through.

6. Sprinkle with fresh grated Parmesan and serve.


Sunday, April 12, 2009

Fish and Brewis


I made fish and brewis (pronounced "bruise") for dinner on Good Friday. This is a meal that has a lot of nostalgic appeal to me. I associate fish and brewis with my childhood, and it is something that my Mom made fairy often whenever she could find the ingredients. The recipe originated a long time ago in Newfoundland, where it was prepared by sailors who were often at sea for long periods of time without access to fresh ingredients. Fish and brewis is very simple to make, as it only has three ingredients. Some of the ingredients are only readily available in Eastern Canada, but nowadays thanks to the internet, I can order them on-line.


Here are the ingredients: Purity Hard Bread, Dried Salt Cod, and Salt Pork Fat. The hard bread is a hard block of dried biscuit that will literally crack your teeth if you try to bite into it (sounds yummy eh?)... wait, it gets better. The Pork Fat gets fried up into little bits of heaven that Newfie's like to call, "scrunchions". So, you have to soak both the hard bread and the salt fish overnight to make them edible and then the next day it all gets fried up in the fat that has been rendered from the scrunchions. In Newfoundland, this meal is often served for breakfast to patients undergoing cardiac and pulmonary rehabilitation. OK, I made that last bit up (about the cardiac patients, not the breakfast!)

I can honestly say that this was one of my all time favorite meals as a child (yes, I was a peculiar child). Apparently, my own children are NOT as peculiar because they hate fish and brewis. It is actually a little stressful for them, you see they hate the fish, but like the bruise. Problem is, once the dish is prepared, the two are pretty much indistinguishable. So the kids will be sitting there examining, and sniffing each morsel of food trying to determine what the heck it is...half the time they get it wrong, and fish comes flying back out in a projectile fashion, "nope not bread". Oh well, what can I say... they are "mainlanders".

Fish and Brewis

3 hard bread cakes
1 lb dried salt cod
1 cup cubed salt pork fat back (about 100g)

1. Soak the hard bread in a large bowl of cool water overnight at room temperature. Make sure you add a lot of water because these suckers really swell up.

2. Soak the dried salt cod overnight in cool water at room temperature. In the morning, you can change the water to help remove more of the salt.

3. When you are ready to eat, drain the fish and boil it for about 20 minutes in a fresh pot of water.

4. Meanwhile, fry up the cubes of pork fat in a large non-stick frying pan until they are golden brown and crispy. Remove the scrunchions with a slotted spoon and set aside.

5. Drain the hard bread, and the fish and add it to the frying pan with all the fat from the scrunctions. Fry this whole mixture up for about 5 minutes, breaking the larger chunks of fish and bread up with your spatula. Right before serving you can either mix the scrunchions back in, or sprinkle them on top.

6. Serve with a homemade tomato relish or chutney of some sort (mine is pictured with a caramelized onion chutney).

Wednesday, December 3, 2008

Shrimp and Sausage Jambalaya


Back in September, Mario and I decided to start a new tradition. We established a regular Friday restaurant night for our family. We didn't want this to be a fast food night, we believe the kids are getting old enough, and can be well behaved enough to eat in some nicer places. We also think that it's a good idea to expose them to some different cuisines.

So far we've taken them out for Indian, Lebanese, Cantonese and most recently we took them out to a Cajun restaurant. They loved all of it. Interestingly, they seem much more willing to sample new things when they are in a restaurant, than when they are at home. They loved the Indian food the most. Imagine that! I don't think I even tried Indian food until I was in my 30's.

As usual, I am making a really short story very long. What I am leading up to is the fact that I often get inspired by these dinners out, and when I saw my kids devour the healthy looking Jambalaya at the Cajun restaurant, I decided this dish would make a great addition to my at home repetoire.

So I set about finding a good recipe. I ended up using bits and pieces of several recipes that I found on-line. This recipe had quite a bit of kick, so if you don't like the heat (or if your kids won't eat spicy food) then ease back on the cayenne and paprika.

Shrimp and Sausage Jambalaya
(makes about 6 cups of Jambalaya)

1 tsp salt
1/2 tsp black pepper
1/4 tsp cayenne
1/4 tsp hot paprika
1/2 tsp thyme
1/2 tsp basil
1/4 tsp oregano
1 tbsp butter or oil
1 cup diced Andouille sausage
1/2 cup diced onion
1/2 cup diced pepper
1/2 cup diced celery
1/2 cup diced tomato
3/4 cup long grain white rice
1/2 cup tomato sauce
1 1/4 cup chicken stock
1 tbsp Worcestershire sauce
3-4 cloves garlic
1 1/2 cups shrimp (about 1/2 pound)
3 tbsp green onion

1. Mix the spices and seasonings together (first 7 ingredients).

2. Preheat the oven to 350F.

3. In a large oven proof dutch oven or skillet, saute onion, celery, green pepper and garlic in butter for a few minutes until softened.

4. Add sausage and cook another minute or so. (Note: I wasn't able to find Andouille in my local grocery store, so I used a lean Kolbassa instead, it worked fine, but Andouille would be the more "cajun" choice... or at least less "polish").

5. Add the tomatoes, tomato sauce, rice, stock, spices, and worcestershire. Bring to a boil and then set the pot in the oven uncovered for 25 minutes (most of the liquid will be absorbed).

6. Add the shrimp and the green onion and return to the oven for 10 more minutes, or until the shrimp is cooked through.


(Note: I weighed everthing with my digital food scale as I added it and calculated the nutrional information to be roughly 215 calories per 1/6th of the recipe. The recipe makes about 6 cups.)

Tuesday, August 26, 2008

Stuffed Calamari with Roasted Jalapeno Sauce


I've never bought whole squid before. I've bought the little frozen rings and made breaded calamari or pasta with them, but this was my first experiment with whole squid. It was a great success!

We loved this recipe, which I got from Emeril Lagasse. As usual, I made a few small changes (e.g., he used poblano peppers, real mayo and shallots... I couldn't find poblanos, wanted something lower fat than mayo, and was too lazy to go buy shallots).

The only issue we had was that the squid cooks so fast that the stuffing inside really only got warm and not hot. I'd be afraid to cook them any longer for fear of making the squid tough. For me this didn't take away from the taste at all, I still loved it, and will make it again. Next time, I might not let the filling cool down as much before I stuff the squid. Also, I might warm the sauce a bit (or at least make sure it is room temperature, and not chilled). The sauce was great, we loved it! There was enough leftover that we had it the next night on fish tacos, and we used some as a spicy sandwich spread.

Needless to say, Mario and I had this meal on an evening when we weren't eating with the kids. About once a week, we try to feed the kids and put them to bed early and then have a nice late dinner on our own. It's usually a nice quiet, CALM meal. Marco, my 5 year old always says, "Mommy and Daddy are having an o-mantic dinner tonight". He keeps asking when he can have an "o-mantic dinner" with me. I wonder if that means I have to put Mario to bed early? He might be OK with that.

Stuffed Calamari

4 large whole calamari
2 cloves minced garlic
1/2 cup finely chopped onion
1/2 cup goat cheese, crumbled
1 roasted red pepper, diced small
1/2 cup soft fresh bread crumbs
Salt and pepper
2 tsp olive oil

Roasted Jalapeno Sauce

2 jalapeno peppers, roasted, peeled, seeded, and diced
2 cloves garlic, minced
1 cup mayonnaise (I used light miracle whip)
Juice of one lemon
Salt and pepper

1. Preheat the grill.

2. For the sauce, combine the roasted jalapenos and
garlic in a food processor and puree until smooth. Add the mayonnaise,
lemon juice and season with salt and pepper. Set aside.

3. In a saute pan cook the onions and garlic until soft. Season with salt and pepper. Set aside to cool slightly.

4. In a medium bowl, combine goats cheese, roasted red pepper, and bread
crumbs. Mix in the onion and garlic.

5. Stuff each calamari tube with the filling until nice and plump (secure the larger end with a metal skewer or toothpick). Brush each stuffed tube with a little oil to prevent from sticking on the grill.

6. Grill each tube for 1-2 minutes on each side, leaving pretty grill marks on
each side.

7. Cut each tube into five nice pieces on the bias. Spoon a nice amount of the sauce over the top.


Thursday, August 7, 2008

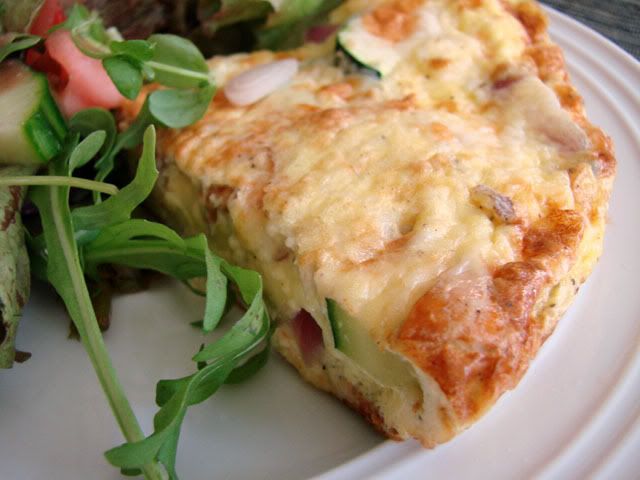
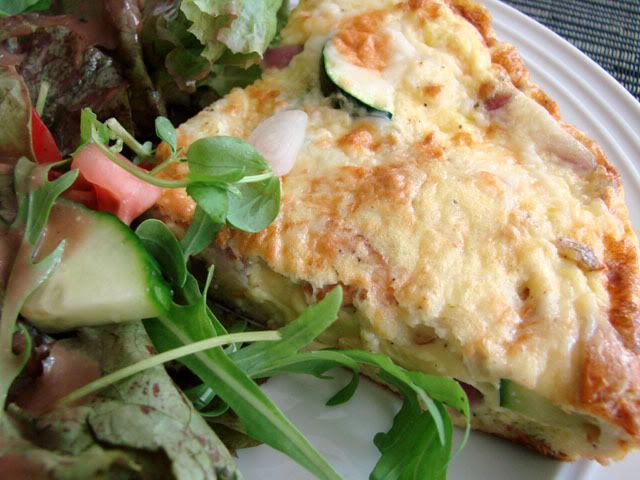
Chanterelle and Zucchini Frittata


I have started making lots of frittata's for dinner. This summer I signed up for a local organic farm weekly CSA delivery, and frittata's are a great way to use up vegetables that I otherwise would have no idea what to do with. In fact, there have been times that I didn't even know what the vegetables were. Those nights we have "mystery frittata". Also, the kids will eat just about ANY frittata. So I can hide all sorts of obscenely healthy stuff in there!

I generally follow the same basic frittata recipe and add in my chosen veggies/cheese/meat for the night.


Chanterelle and Zucchini Frittata

1 cup fresh golden chanterelles, chopped
1 small zucchini, chopped
1 small onion, chopped
1 clove garlic, minced
1 tbsp butter
8 eggs, beaten
1/4 cup skim milk
1/4 tsp each salt and pepper
dash hot sauce
1oz finely grated grano padano cheese

1. Saute onion, garlic, zucchini and chanterelles in butter until soft in a 8" non-stick skillet (make sure the handle of your skillet is oven proof).

2. Beat eggs with milk, salt, pepper and hot sauce. Pour over veggies in skillet.

3. Cook over med-low heat until bottom and edges of frittata are set (about 7 minutes). Sprinkle with cheese and place skillet until broiler until eggs are set in the middle and the cheese is golden brown.

4. Slice into 4 slices (a lot of frittata recipes say that they serve 6, but if you're eating this as a main dish, I'd say 4 is a more realistic serving size).


Monday, July 28, 2008

Turkish Chicken Thighs


This recipe was fabulous! I made this for the first time the other night, and it was a huge hit. I have been experimenting quite a bit lately with yoghurt based marinades for meat, because they really tenderize without adding much additional fat to your meal... and well, because they taste really good!

I found this recipe for Turkish Chicken Thighs on the website Eating Well which has tons of great healthy recipes. I had to go out and buy some hot paprika (I found "Hot Hungarian Paprika") and WOW, was it good. It was so much more flavourful than regular paprika. I threw all the rest of my regular paprika out, and I will only be using "Hot Hungarian Paprika" from now on.

Right after I mixed the marinade and tasted it, it had quite a kick to it, and I thought, "uh oh, the kids will never eat this", but after 24 hours in the fridge marinating, it mellowed and the kids never complained about the heat.

The chicken was tender and juicy and the flavour was really great.

The kids were really confused by the name of the recipe, "Turkish Chicken Thighs". Claire said, "well Mom what is it? Like, make up your mind, TURKEY or CHICKEN...." (yes she really did say "like" and she rolled her eyes too). So I explained that Turkey is a country and this recipe combines flavours and spices that are sometimes used in Turkish cuisine. Marco pipes up, "So turkey's eat chicken?" Sigh. This made me think I should try making a Turducken sometime.... THAT would be a fun one to explain.

Turkish Chicken Thighs

8 skinless chicken thighs (I used boneless)
1 tbsp lemon juice
1 cup low-fat plain yogurt
2 cloves garlic, minced
1 tbsp minced fresh ginger
2 tsp hot paprika
1 1/2 tsp dried mint
1/2 tsp salt

1. Mix together lemon juice, yogurt, garlic, ginger, paprika, mint and salt.

2. Place the chicken in a ziploc bag and pour the yogurt mixture over the chicken. Close the bag and mush it around.

3. Refrigerate overnight.

4. Preheat barbeque grill to med-high. Remove chicken from ziploc bag and discard marinade. Grill until chicken is juicy but cooked through (about 15 minutes).

5. Alternately, you could place the chicken on a broiler rack in the oven at 400F for about 15 minutes until cooked. Serve immediately.


Monday, July 21, 2008

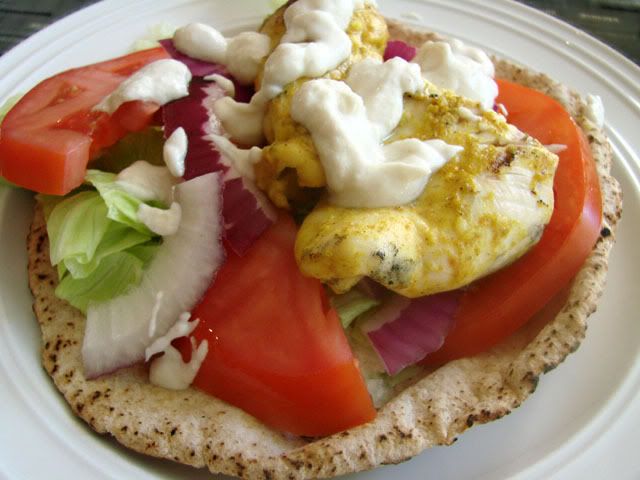
Chicken Shawarma


Mario and I have always been big fans of Lebanese food. In particular, we love shawarmas. There is no shortage of Lebanese take out places here in Ottawa where we live and when we were in University, we frequented many of them (usually in the early hours of the morning).

I have experimented several times with making shawarmas at home, but I think it's just one of those things that you will never quite get right without the proper equipment, techniques and of course the secret recipe for that amazing garlic sauce (yum).

When I saw this recipe for chicken shawarmas in the July 2008 issue of Cooking Light magazine, I knew I had to try it. It didn't quite have the taste of an authentic Lebanese shawarma, but we thought this recipe was very good in its own right. The marinade on the chicken was great, and I could eat my chicken breasts just marinated and grilled this way anytime. The sauce was very good, and was probably way healthier than the sauce you would normally get on a shawarma.

Overall, we thought this recipe was a keeper.

Chicken Shawarma
adapted from Cooking Light Magazine, July 2008

Chicken:
2 tbsp fresh lemon juice
1 tsp curry powder
2 tsp olive oil
1/2 tsp salt
1/2 tsp ground cumin
3 cloves garlic, minced
1 lb chicken breasts, cut into strips

Sauce:
1/2 cup fat free plain yoghurt
2 tbsp tahini
2 tsp fresh lemon juice
1/4 tsp salt
1 clove garlic, minced

Other ingredients:
Pita bread
Chopped lettuce
Tomato slices
Chopped red onion

1. Combine first 6 ingredients of marinade. Cut chicken into strips (I cut each breast into 3 strips) and pour marinade over chicken in a Ziploc bag. Marinade in fridge all day (or overnight).

2. To prepare sauce, combine yoghurt and next 4 ingredients. Mix well. The sauce can be made ahead and stored in the fridge.

3. Preheat barbeque grill. Shake the excess marinade off the chicken and thread on barbeque skewers. Grill for approximately 4 minutes per side until chicken is cooked through.

4. Place pita bread on the grill for a minute or two to warm.

5. To serve, place lettuce tomato and onion on top of the pita bread. Top with chicken and drizzle with sauce.


Monday, December 10, 2007

Beef Bourguignon


It has been a little while since my last post. I want to tell everyone not to worry... Janet is STILL hungry. I have a few excuses for my lack of updates. Would you like to hear them? No? Too bad...

The first one is laziness, I have just been feeling a little lazy these last few weeks (call it winter blahs), the second is that for a while I had lost my camera case, along with that little cable (the very important cable) that connects my camera to the computer. So while I have still been cooking and taking tons of pictures, I have been unable to get any of those picture off my camera.

Well lo and behold I finally found the cable and the case, in one of my little bugger's beloved children's bedrooms, the cord was tied around the neck of one their stuffed animals, like a leash.

The good news is, I now have a backlog of recipes (enough material to last until Christmas) so I had better GET POSTING.

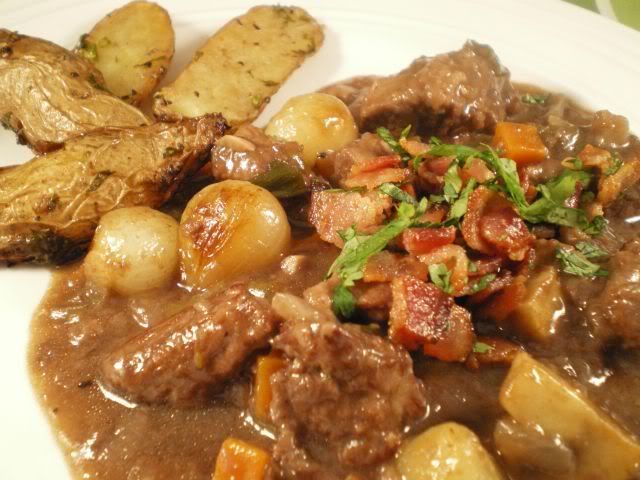
This first one is a Beef Bourguignon. I was never a big fan of stews growing up. I found the meat tough and a little "stewy". Then one night we were invited to a dinner party. My friend's wife, we'll call her "Angela" (OK, that's ACTUALLY her name) made beef bourguignon, it was an epiphany for me. A real eye openner. It was so good. I've been missing out. This isn't Angela's actual recipe, I use one from the Williams Sonoma Kitchen Library book on "Beef".

I served this with roasted fingerling potatoes (roasted with olive oil, red wine, garlic and parsley) and a rosemary focaccia for mopping up the extra gravy.

Beef Bourguignon

1/2 lb bacon
8 green onions, chopped
2 onions, diced
2 carrots, diced
2 cloves garlic, minced
2 cups flour
1 tsp nutmeg
salt and pepper
3 lbs cubed stewing beef
olive oil
1/4 cup Cognac
2 cups beef stock
2 fresh thyme sprigs
3 cups dry red wine
1 bay leaf
24 pearl onions
5 tbsp butter
2 tbsp sugar
1 lb mushrooms
chopped fresh parsley for garnish

1. Chop raw bacon into small pieces. Cook in a non-stick frying pan over medium heat until browned. Remove with a slotted spoon and set aside.

2. Add enough oil to the bacon fat to make 1/4 cup and add diced onions, carrots, green onions and garlic. Saute until soft. Transfer to a large oven proof pot.

3. In a large dish mix the flour, nutmeg, salt and pepper. Toss the cubed beef in flour to coat. Add to frying pan with enough oil to prevent sticking (I had to do 2 batches). Brown well and transfer meat to the large pot with the veggies.

4. Use the 1/4 cup cognac and some of the beef stock to deglaze the frying pan over high heat. Scrap all the bits of good stuff off the bottom and then pour into pot.

5. Add remaining beef stock, wine, thyme and bay leaf. Bring to a boil. Once boiling, transfer covered pot to oven and bake at 325F for 3 hours.

6. In the meantime, peel the pearl onions (easier if you blanche them for 30 seconds or so). Saute them in 2 tbsp butter with 2 tbsp of sugar until browned. Remove to a dish, in the same pan saute mushroom with remaining butter. Transfer to dish with onions.

7. 30 minutes before ready to serve, add onions and mushrooms to the stew. Continue baking.

8. Serve and garnish with bacon bits and chopped parsley.


Tuesday, November 20, 2007

Grilled Chicken with Pineapple Relish


I have a couple of favorite recipe sources (a few blogs, a book, and my Mom). You know how you have a couple of great successes with recipes from your sources, so you keep going back to the same place, over and over again? Well my sources are great that way - they have never let me down.

I wish I didn't have to reveal my sources, so you'd all think I was a GENIUS recipe comer-upper-wither. But, I guess in the interests of not STEALING other peoples ideas, I do have to site the source for this one. I got it from my all-time favorite cookbook, The New Dieters Cookbook, from Better Homes and Gardens.

I picked this recipe for a couple of reasons. First, I had just picked up one of those cast iron grills that fits over two elements on my gas stove and I was excited to try it out. Second, I love the combination of meat and fruit.

I did screw this recipe up, just slightly. I read it wrong. No, actually that's not true... I didn't read it at all. I've done this before, I look at the ingredient list then just assume that since I am such a great cook, I don't need further instruction... WRONG!

I made the pineapple relish ahead of time and let it sit, because I thought it looked like the sort of thing that would get better with some time for the flavours to ameldinate (I made that word up). The recipe called for 2 tsp of olive oil, so I went ahead and added it to the relish.

Then later, when I was cooking the chicken, I realized that the oil was SUPPOSED to be brushed on the chicken, so it wouldn't stick to my new fan-dangled grill!! Oops! So I added 2 MORE teaspoons of oil to the chicken. I know this totally throws off the calorie and fat content of the meal, but it was so good, my advice to you is.... throw caution to the wind and use 4 TEASPOONS of oil in this recipe!

Grilled Chicken with Pineapple Relish

4 boneless skinless chicken breasts
3/4 tsp cordamom
1/2 tsp salt
1/2 tsp pepper
2 tsp olive oil
1 1/2 cups roughly chopped fresh pineapple
1/2 red pepper, chopped
1 green onion, chopped
1 jalapeno (seeded and diced)
2 tbsp chopped fresh cilantro
juice of 1/2 a lime

1. Make pineapple relish: mix together the pineapple, red pepper, green onion, jalapeno (I used bottled jalapenos) and cilantro. Mix in lime juice (and 2 tsp olive oil if you didn't read the recipe right).

2. Mix cordamom, salt and pepper together. Brush chicken with 2 tsp of olive oil and sprinkle with cordamom mixture.

3. Grill chicken until cooked through. Serve with pineapple relish.


Friday, November 9, 2007

Savoury Chicken Tart


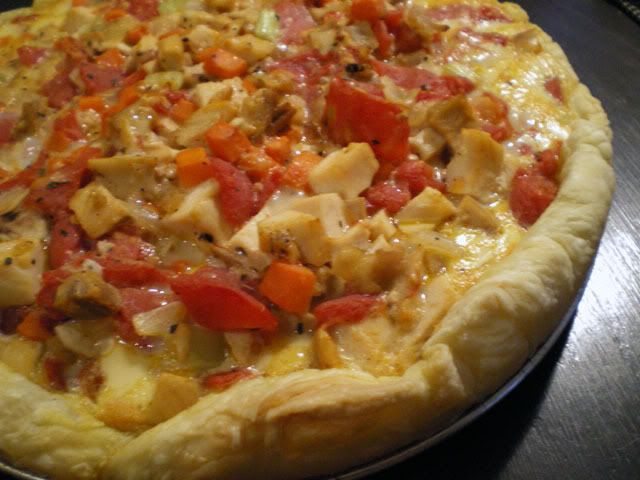
I made this chicken tart the other night for dinner. Let me explain what I did. I took a recipe that I found on Deborah's Blog... Taste and Tell... and I wrecked it. Well that might be a little harsh, what I did was make is LESS good. So if you want to make this the correct, yummy way - go see her blog. If you'd like to stay here and let me lead you astray.... read on.

This recipe just looked so yummy delicious to me, I couldn't help but want to try it. I decided to use diced chicken breast instead of sausages and skim milk instead of cream to lighten it up. That was silly, you can't lighten anything up when it's stuffed inside puffed pastry! It's sort of like putting a dollop of fat free cool whip on a huge slab of Pecan Pie... you might as well just pile on the REAL whip cream and enjoy it by that point!

The recipe also called for fresh tomatoes and fresh basil. I didn't have any, so I used canned tomatoes and dried basil (gasp).

OK so now I was done destroying a perfectly good recipe, I went on to make it. Well the recipe said to roll the puff pastry out into at 13" circle. The puff pastry I had in the freezer was already a 10" square, so I had a lot of fun trying to get into a circle. I folded in the corners and ended up with a 13" stop sign.

Then I was too lazy to blind bake the crust with my pie beads. So I just poked some holes in the crust and threw it in the oven as is. Well after 10 minutes I had a huge stop sign shaped pillow. I scratched my head for a few minutes trying to figure out where the heck I would put my filling. I ended up just mashing down the middle of the tart, I am using the word "tart" very loosely. Then I piled my filing in the centre.

When I was all done, I decided it was all still too fattening anyway, so while Mario and kids ate it, I had a plain chicken breast and a spinach salad. Despite my best attempts to destroy this dinner, Mario and the kids loved it!

Savoury Chicken Tart

1 package (8oz) refrigerated puff pastry
1 lb diced cooked chicken breast
1 cup canned diced tomatoes
1 tsp dried basil
1 clove garlic, minced
2 tbsp grated Parmesan cheese
1/4 cup Mozzarella cheese, grated
2 eggs
1/2 cup milk
1/2 tsp salt
1/4 tsp pepper

1. Roll puff pastry on a floured surface into a circle that is 13" in diametre. Press dough into tart pan and fill with dried beans or pie beads. Bake 8-10 minutes at 425F.

2. Meanwhile, mix together the chicken, tomatoes, garlic, basil, cheeses, eggs, and milk. Season with salt and pepper.

3. Pour into baked "tart" shell and bake for 15 minutes. Reduce oven temperature to 350F and bake for an additional 10-12 minutes until egg mixture is set.

4. Cool 5-10 minutes before slicing.


Tuesday, November 6, 2007

Individual Mexican Meat Cups


I think I've written before about the difficulty I have sometimes with naming recipes that I've created myself. You can either give something a meaningless name like, "Beef a la Janet" or you can try to capture what it is you've made in the title of the recipe. Hence, "Individual Mexican Meat Cups".... although, that name does make me think of a Made in Mexico Jock Strap... oh well, lets try not to dwell on that image, and concentrate on the recipe... shall we?

I got the idea for using flour tortillas as cups from another blog, the Culinary Chase, but I created my own filling.

This recipe was VERY popular. Mario and the kids LOVED it. I ate a stupid frozen Lean Cuisine meal while they ate it. That is because this blog is making me FAT. Yes that's right, I entirely blame the BLOG, not all the artery clogging fattening food I shovel in... don't ask, I have issues.

Individual Mexican Meat Cups

1 lb ground beef
1/2 medium onion, chopped
1 tbsp oil
1 can rice and black beans
2 medium tomatoes, seeded and chopped
2 tsp taco seasoning
1/2 cup water
1 cup grated cheddar cheese
6 flour tortillas
cooking spray

1. In a non stick skillet, brown the beef and onions in a small amount of oil. Drain any fat and add the rice and black beans, tomatoes and taco seasoning. Add 1/2 cup water, and simmer on low for about 10 minutes.

2. Fit tortillas inside 6 large muffin tins. Spray lightly with cooking spray and bake at 400F for 10 minutes.

3. Fill tortilla shells with meat filling and top with cheddar cheese. Bake another 10 minutes at 400F or until cheese is all melted. (hint: the filling was still hot when I put this in the oven, if you make it ahead and the filling has cooled, it might need a bit more cooking time).

4. Serve with sour cream.


Wednesday, October 31, 2007

Dinosaur Egg Chicken


Unfortunately I have to start off this post by telling everyone that I am a moron (As if everyone doesn't already know)! In my last post, I thought I had a brilliant spur of the moment idea for a contest.... one that would send all my readers scouring through my archives, reading all my old recipes looking for that elusive can of soup. Well, I had my winner exactly 2 minutes and 42 seconds after I published the ill-fated post. AND, as I discovered, any enterprizing individual who wanted to go to Google and type in "Janet is Hungry can of soup" would have had the results returned to them in 0.23 seconds.

Mario sent me an e-mail: "Sweetheart, you might want to think your contests through a little better in future"... yeah thanks, hon. But its OK, I think I just ran my first and last contest on Janet is Hungry. (Don't quote me on that, I'm a notorious liar).

So without further ado, first prize of my favorite cookbook goes to Deeeeeeena who writes the blog, Miche Mache. (Deeeeeena send me an e-mail using the "Contact Me" button with your mailing address).

An honourable mention goes to Suzanne, a coworker of mine, who found BOTH recipes that use canned soup. Pork Chop and Rice Bake and Chili.

Today's recipe is one that I have been meaning to try for a long time. I've seen this prepared several times before. The recipe that I used came from Laura Calder.

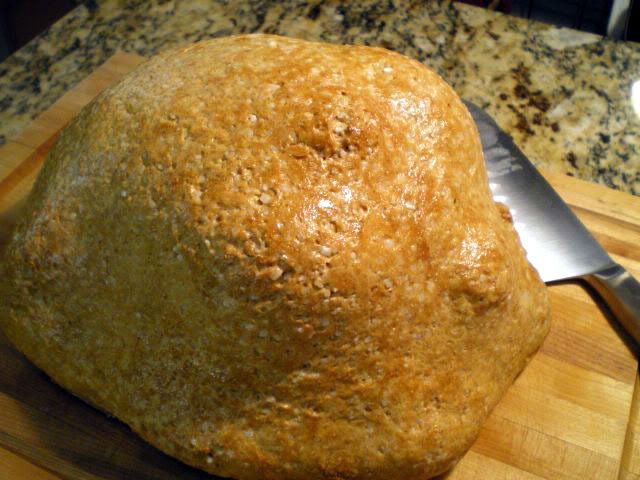
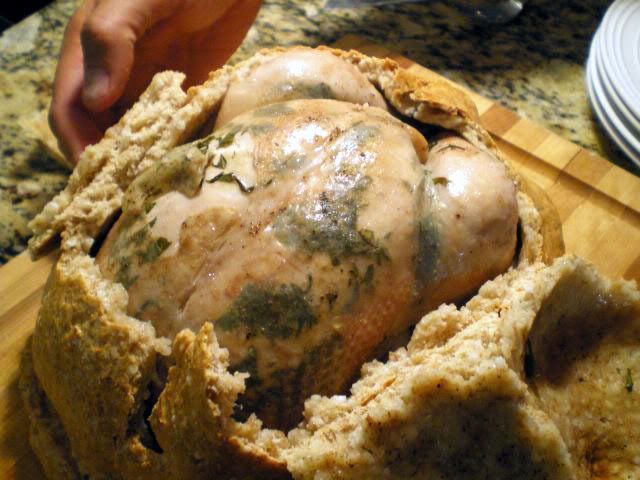
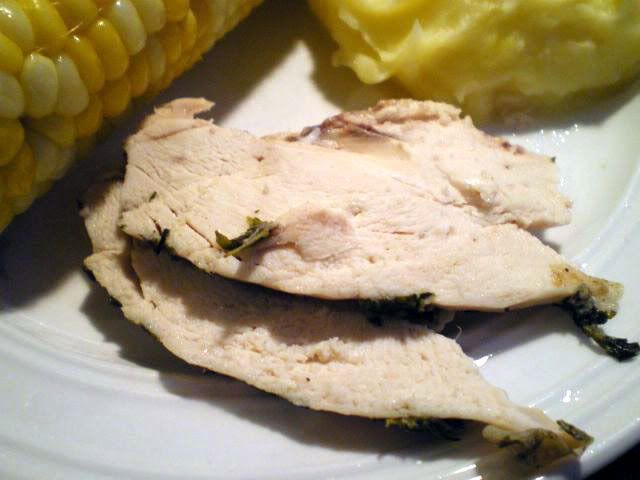
Although the skin doesn't crisp up at all, the meat of the chicken stays so moist and juicy and the flavours from the fresh herbs really penetrate. My kids actually did think I'd cooked a dinosaur egg... they were gathered around me in a sort of "hushed awe" when Mario and I were cracking it open (those are HIS hand in the picture for anyone who thought I might have "Man-Hands"). I think the kids were actually expecting a baby dinosaur to pop out... boy were they disappointed when it was only a chicken. Yet still confused... Claire: "Um, so do you think it was the Mommy or the Daddy that was a chicken"...


Dinosaur Egg Chicken

3lb whole chicken
Fresh herbs (I used rosemary and thyme)
4 - 5 garlic cloves, minced
pepper to season
A drizzle of olive oil

Salt Crust:
4 cups flour
6 egg whites
500g coarse salt (about 2 cups)
Water
1 egg yolk

1. Slide plenty of herbs under the chicken skin. Put garlic in the cavity, along with any remaining herbs. Rub the chicken with pepper and olive oil.

2. Make the crust: mix the flour, egg whites and salt well, then add enough water to make a pliable dough (the consistency of play-doh).

3. Roll out 1/4 the dough to make a base for the chicken to sit on. Set the dough base on a baking sheet. Lay the chicken on top. Roll out the remaining dough, drape it over the chicken, and seal the edges. Becareful to patch any holes or rips. Add a splash of water to an egg yolk and paint the pastry case all over.

4. Bake for 1 1/2 hours at 325ºF. Let the chicken sit out of the oven 10 minutes before serving.

5. Cut off the crust and discard it. Carve the meat and serve.


Monday, October 29, 2007

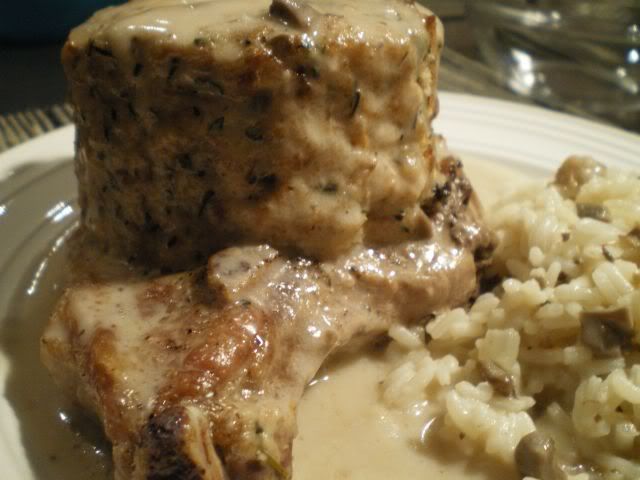
Pork Chops and Stuffing


This is yet another old favorite of mine. I love the way the pork comes out so tender... it's just like cutting butter with a knife!

I may have gotten a little carried away with the massive pile of stuffing on top of the pork chop. I just love the stuffing and I guess my eyes were a little bigger than my stomach (as usual). I had extra breadcrumbs so I made more stuffing than the recipe called for and I split it between 3 pork chops instead of 4.

I actually don't often cook with cans of soup. I would usually prefer to make my own creamy sauce for a recipe that calls for a can of soup. If you go back through the near 200 recipes I have on this site... you will only find ONE other recipe (I think)that calls for a can of soup. Can somebody please find it and report back to me?

Actually, this is a perfect opportunity to kick off the first CONTEST on Janet is Hungry. The first Janet is Hungry reader to locate another recipe on my site that calls for a can of soup and leave it in the comment section wins a PRIZE. The prize will be a copy of one of my favorite cookbooks! I will announce the winner in my post tomorrow (if anyone bothers)...

Pork Chops with Stuffing

4 pork chops
1 tbsp oil
3 cups soft bread crumbs
3 tbsp dried summer savory
1/2 onion, chopped fine
1/4 cup butter
1/3 cup water
1 can cream of mushroom soup
1/2 can of water

1. Brown pork chops in oil for a few minutes on each side. Place pork chops in a greased casserole dish that has a cover.

2. In a large bowl, mix breadcrumbs and summer savory. Melt butter in the microwave with the onion. Stir into breadcrumbs. Add water to breadcrumbs.

3. Form breadcrumbs into a ball. Or press into a mold (I used a 3/4 cup measuring cup... but a 1/2 cup or 1/3 cup measuring cup would give you a more reasonable portion of stuffing). Place a ball of stuffing on top of each pork chop.

4. Mix soup with 1/2 a can of water and pour over pork chops and stuffing. Bake for 1 hour at 350F. This is really good served with rice, because you can use some of the extra sauce on the rice.