Home Page
Showing posts with label Cakes. Show all posts

Tuesday, September 8, 2009

Camping Chocolate Orange Cakes


This is not a great picture, because it was taken in the dark, but I just really wanted to share this recipe. It was great.

We were camping last weekend, and my daughter's 10th birthday fell on the Saturday so I made these campfire cakes for everyone. The cake was cooked inside an orange peel and it just gave such a yummy refreshing orange flavour to the cake. I served the cake with a little bit of whipped cream. It was also fun to scoop your cake out of the orange peel with a spoon. You could also make this in the oven at home, and I intend to try that sometime (it was too good to save only for camping).

Campfire Chocolate Orange Cakes

1 package Devil's Food Chocolate Cake mix (enough for a one layer cake)
egg, oil and water etc (whatever is needed to prepare the cake according to the directions
8 medium size navel oranges (thick skinned are best)
Tin Foil
Whipped Cream

1. Slice the top off of each orange and scoop out all the flesh (a grapefruit knife and grapefruit spoon worked well). Keep the lids matched up with their respective orange peels. Don't throw all that great orange flesh out. I saved it in a ziploc bag and made orange creamsicles for the kids when we got home.

2. Prepare the cake mix according to the package and spoon it into the orange peels. Don't fill them more than about 2/3 full. (Hint: Set the oranges in plastic cups so they stand up while you fill them, muffin tins would work too).

3. Replace the lid and wrap the orange in tinfoil.

4. Place on the barbeque for 25 minutes. You could also put the foil wrapped orange right in the coals of the campfire. This gives off a fabulous orange aroma.

5. Wait a few minutes for the cakes to become less scorching hot and top with whipped cream.


Sunday, November 2, 2008

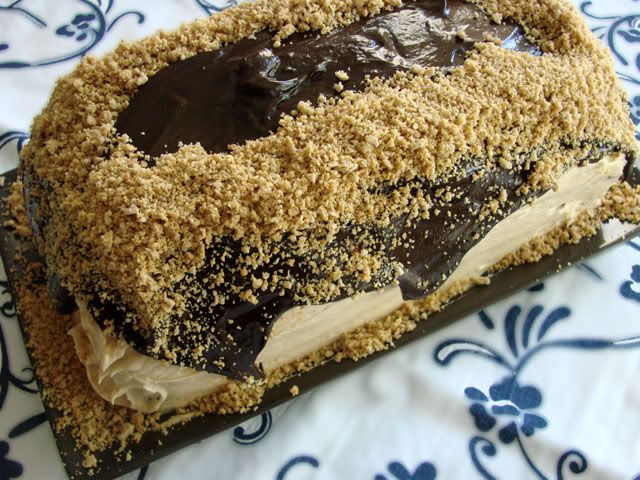
Peanut Butter Chocolate Cake


This year for Claire's 9th birthday, I told her that I would bake her ANY kind of cake she could dream up... Claire is lucky she didn't ask for anything too complicated, it could have been a major flop.... but baking an "invented cake" was fun.

Claire was quite precise, she wanted a chocolate cake with peanut butter in the middle and chocolate on top and then crushed Oreo cookies on top of that.

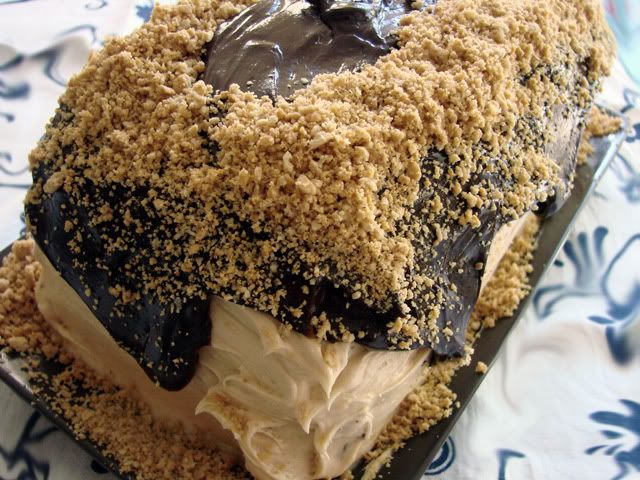
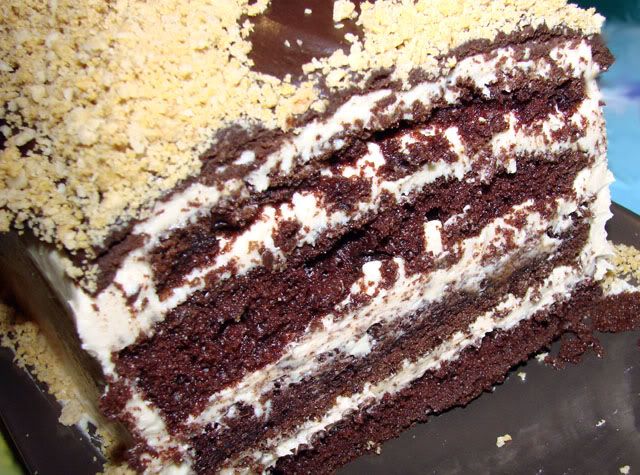
I thought I could improve slightly on Claire's inspiration. I made a four layer cake with peanut butter cream cheese icing with a chocolate-peanut butter ganache and crushed Pirate cookies on top. (Note: Pirate cookies are a peanut butter cream filled cookie made by Christie... you can probably find an equivalent, if you can't find Pirate's).

This cake was "oh-my-god-good".


This post is really more about the filling and icings, than the cake itself... because I cheated and used a Duncan Hines Devil's Food chocolate cake mix as the base and concentrated on making the icing really good. You know icing is good when you purposefully decide the cake has enough when there's still a half cup in the bowl (which you cannot let go to waste). So you sneak out of the kitchen with the bowl and a rubber scraper and come back three minutes later and yell to the kids, "who wants to lick the bowl?". They come running over, and peer hopefully into the bowl in which you've managed to leave one or two small streaks of icing!!

I knew that for a family of four, we'd be eating this cake for a week if I made a whole one, so I cooked the cake mix in two 9x9 inch square pans. I froze one for later. That way I was able to make a four layer rectangular shaped cake that I could slice like a loaf of bread. The cake made 8 slices (4 each for two nights) and the pieces were frankly WAY too big (although strangely that didn't stop me from cutting the exact same size pieces the second night). The cake was so rich, I probably should have sliced it into 10 or even 12 pieces.

Chocolate Peanut Butter Cake

1 package chocolate cake mix (prepared according to package directions)
8 pirate cookies, (6 to crush in food processor for decorating, and 2 to eat)

Peanut Butter Cream Cheese Icing
10oz cream cheese, softened
1/2 cup butter, softened
5 cups icing sugar
1 cup smooth peanut butter

Chocolate Peanut Butter Ganache
4oz semi sweet chocolate, roughly chopped
2 tbsp smooth peanut butter
1 tbsp corn syrup
1/4 cup heavy cream

1. Make cake according to package directions in two 9x9 inch loaf pans. Let cool completely. Wrap and freeze one cake (otherwise, double the icing and ganache and make a whole cake - square or round).

2. Slice the remaining cake in half. And then slice each of the two rectangles into two layers, so that you have four rectangular shaped layers.

3. To make the icing, in a mixing bowl beat together the cream cheese and the butter until creamy. Add the icing sugar about 1 cup at a time, beating between each addition. Stir in the peanut butter. Taste. Sigh.

4. Place the first cake layer down on your chosen cake plate. Spread a layer of icing (Sorry, didn't measure how much I put between each layer), but make it about 1/4 inch thick, there's lots of icing, so you don't need to worry about running out. Repeat with the next layer, and then again with the third layer. Place the last layer on top and then frost the entire cake with the remaining icing. (Note: if you are lucky, you will have about 1/2 cup of icing left over - tee hee)

5. Chill the cake while you are making the ganache. Melt the semi-sweet chocolate in a double boiler and stir in the cream, peanut butter and corn syrup. Let cool a few minutes, but not too much, it should still be pourable.

6. Pour the ganache over the cake and spread slightly with an icing knife to encourage it to drip down over the sides a bit.

7. While the ganache is still wet, sprinkle the cake with crushed Pirate Cookies.

8. Chill until ready to serve.


Thursday, December 13, 2007

Apple Ginger and Hazelnut Coffee Cake


This coffee cake was delicious. I was a little wary when I first read the recipe, there is so much ginger, I thought it might be overpowering. But it wasn't, it was perfect. I also found that this cake got better the next day. The first night, I served it warm with vanilla ice cream. The next day, it was still delicious and even more moist. (moist? moist? moister? that's a strange word anyway, if you ask me)...

I didn't think the kids would like this cake. There is just a little too much going on in terms of healthy stuff and alcohol, and not nearly enough going on in terms of candy or chocolate. But as usual I was wrong, and they really liked it. I brought the leftovers in to work, and they disappeared pretty quick.

Apple Ginger Hazelnut Coffee Cake
from LCBO Food and Drink

1/3 cup dried cherries (I used cherry flavoured dried cranberries)
1/3 cup dark rum
1/4 cup butter, softened
1 1/2 cups brown sugar, packed
1 egg
1 tbsp freshly grated ginger
2 1/3 cups flour
2 tsp ground ginger
1 tsp baking soda
1 tsp salt
3 cups peeled and diced apples (2 large)
1 cup sour cream

Topping:
1/3 cup brown sugar
1 tsp ground ginger
1/2 cup toasted hazelnuts, coarsley chopped

1. Soak dried cherries in rum for at least 20 minutes.

2. Beat butter and brown sugar. Add egg and fresh ginger and blend until mixed.

3. Sift together the flour, 2 tsp ground ginger, baking soda, and salt. Stir into butter mixture. Stir in diced apple, cherries and rum, and sour cream. Mix until well incorporated.

4. Spread batter in a greased 9" x 13" pan.

5. Stir together topping ingredients and sprinkle over batter.

6. Bake for 40 minutes at 350F, or until a toothpick inserted in the middle comes out clean. Cool and cut into squares.


Thursday, September 13, 2007

Chocolate Sheet Cake


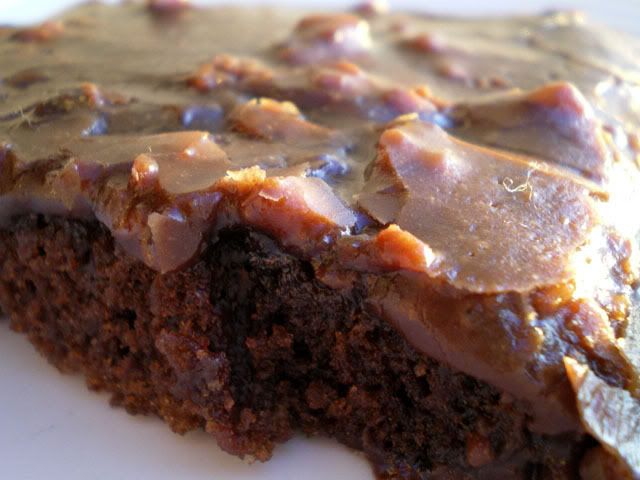
First of all, I just wanted to say... if you look closely at the picture you can see a fuzzy little hair on top of the icing on the right hand side of the cake. Well, we did NOT serve cake with fuzz on it, that is dust on your computer monitor... so go ahead and brush it off.... (right now as you are reading this, my Mom is sitting in her kitchen reading this post on her laptop, and she's trying to brush the dust off her monitor. Aren't you Mom?)

This cake was Mario's contribution to the dinner party that we had a few weekends ago. It is taking me a while to get all the posts together, but in my defense, as the evening wore on and the wine was flowing more freely, my pictures started to get a little blurry. At the time I thought it was just my eyes that had lost focus not the camera. But unfortunately most of my pictures look exactly like they were taken by a slightly off-kilter tipsy person....so I need to 're-make' a few of the recipes to get better pictures.

Mario spent forever choosing his recipe for the party, at which all the men did the cooking. I think he wanted to impress everyone... you know show everyone that I am not the only one in our family who can cook. And he's right, he is a good cook, and he likes to cook. If I wasn't around, I am very confident that our children would continue to eat well. Perhaps a lot of the same things over and over, but they would be home cooked and healthy.

First Mario was going to try Crepes Suzette because he really wanted to "Flambee" something. Eventually I vetoed that, because I was having nightmares involving 18 drunk people and open flames...

So what I did was point Mario in the direction of one of my favorite food blogs. I sat him down in front of the computer and pulled up the blog. I told him he could make anything from that blog and it would be guaranteed to turn out good. The blog was....The Pioneer Woman Cooks. I love this blog for two reasons. First, it is piss your pants funny; second, the recipes are wicked; and third, (OK 3 reasons) the photography is impressive. I have tried several recipes from this site - check out the Olive Cheese Bread, and I've never been disappointed. I also thought it was good for Mario since there aren't hundreds of recipes on there, so it wouldn't be overwhelming for him to choose.

Mario picked the Chocolate Sheet Cake. It was a perfect choice, and it made enough to give a generous slice to all 18 guests with a few pieces leftover (we cut the cake into 20 pieces). The cake was delicious, it was moist and perfect (with all that butter, it better be!)

Chocolate Sheet Cake
from The Pioneer Woman Cooks

2 cups flour
2 cups sugar
1/4 teaspoon salt
2 sticks (1 cup) butter
4 heaping tbsp cocoa
1 cup boiling water
1/2 cup buttermilk
2 eggs, beaten
1 tsp baking soda
1 tsp vanilla

Icing:
1/2 cup finely chopped pecans
1 3/4 sticks butter (1 cup minus 2 tbsp)
4 heaping tbsp cocoa
6 tbsp milk
1 tsp vanilla
1 lb minus 1/2 cup powdered sugar

1. In a mixing bowl, combine the flour, sugar and salt.
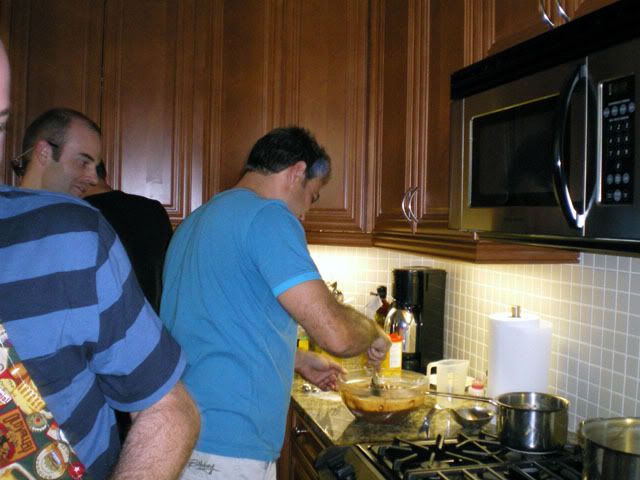

2. In a saucepan melt, 1 cup of butter, add cocoa, and water. Let mixture boil for 30 seconds, then turn off heat.

3. Pour chocolate mixture over flour mixture and stir lightly.

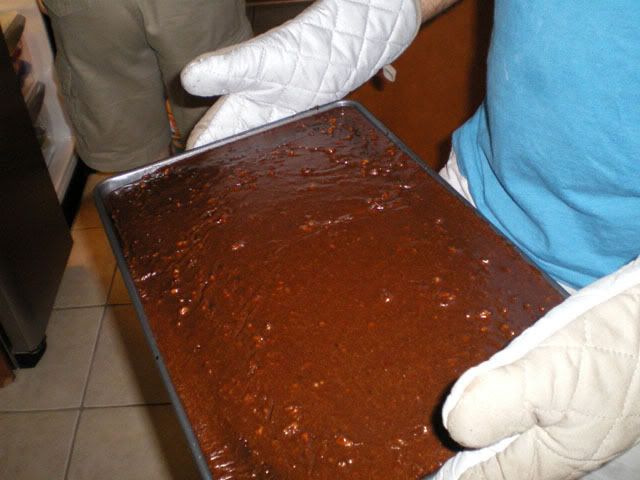
4. In a measuring cup, mix buttermilk, baking soda, eggs and vanilla. Stir buttermilk mixture into cake batter. Pour into sheet pan (use a large cookie sheet with a rim or a jelly roll pan. Mario used a cookie sheet that is about 11" x 17").

5. Bake at 350F for about 20 minutes.

6. While cake is baking, make icing. Melt 1 3/4 sticks of butter (equals 1 cup less 2 tbsp) in a saucepan. Add cocoa and stir to combine. Turn off heat.

7. Add milk, vanilla, and icing sugar. Add pecans and stir together. Pour over warm cake. Use a spatula to spread out to the edges, if necessary.

8. Cut into squares and serve.


Monday, August 20, 2007

Walnut and Ricotta Cake


Well I am back from camping and my week away from the computer (it was hell), I think I may be obsessed with checking my comments and my blog traffic. So, I'm back, and I'm never leaving again, I promise!!

As today is my birthday, I thought I would post a cake recipe. This isn't a traditional birthday cake, but it is a favorite of mine. It is light and moist and just yummy perfection. I actually made this cake a week or so ago for our wedding anniversary. I will make some other sort of cake today, for my birthday.

We are on holidays this week and I was looking forward to sleeping in this morning, but Marco woke me up at 6am to tell me it is my birthday, he was beside himself with excitement. I think it is because of the present he picked out for me.

Mario took the kids shopping yesterday and let them each pick out presents for me (translation, I am getting some gaudy unwearable piece of costume jewelry that I will have to pretend to love and wear everyday for the next month). I will let you all know tomorrow what my presents were.


Walnut and Ricotta Cake
from "Mediterranean Food of the Sun" by Jacqueline Clark and Joanna Farrow

1 cup walnut pieces
2/3 cup unsalted butter, softened
2/3 cup sugar
5 eggs, separated
finely grated rind of 1 orange
2/3 cup ricotta cheese
6 tbsp flour

To finish:
4 tbsp apricot jam
2 tbsp brandy
2oz bitter or semi-sweet chocolate, grated.

1. Preheat the oven to 375F. Grease and line the bottom of a 9" springform pan.

2. Roughly chop and toast the walnuts (I toast in a dry frying pan over medium heat for just a few minuted until the nuts start to brown slightly).

3. Cream together the butter and 1/2 cup of the sugar until light and fluffy. Add the egg yolks, orange rind, ricotta cheese, flour and walnuts. Mix together.

4. Whisk the egg whites in a large bowl until stiff. Gradually whisk in the remaining sugar. Using a large metal spoon, fold a quarter of the egg whites into the ricotta mixture, then fold in the rest.

5. Turn the mixture into the prepared springform pan and bake for about 30 minutes until risen and firm. Leave the cake to cool in the pan.

6. Transfer the cake to a serving plate and heat the apricot jam in a small saucepan with 1 tbsp water. Press through a sieve and stir in the brandy. Coat the top and sides of the cake with the brandy mixture. Decorate generously with chocolate shavings.


Monday, April 23, 2007

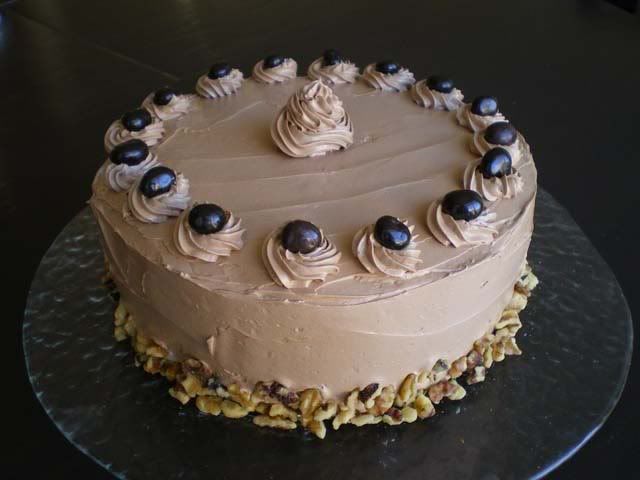
Walnut Mocha Torte


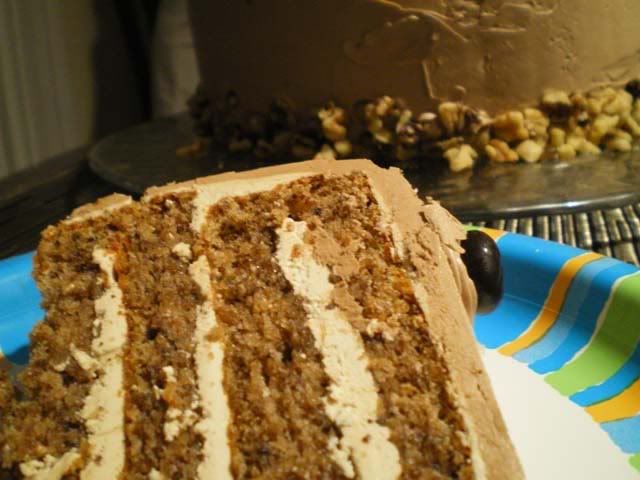
Well, when I figured out I was having 20 or so people to the house for cake on Mario's birthday, I realized that one cake wouldn't be enough. Hooray! An excuse to try a new cake. I found the recipe for this cake in the May 2007 issue of Canadian Living Magazine. I loved it, and the finished product looked very polished.

This cake used mostly ground walnuts and only a little bit of flour. I couldn't find ground walnuts in the store so I made my own. Since I don't have a nut grinder, I used my food processor and this worked fine. In order to prevent the walnuts from turning into "walnut butter" I added a tbsp of sugar from the 1 cup needed for the cake to the nuts when I processed them. The sugar absorbs some of the oils from the nuts. I did the nuts in three batches and I only used the "pulse" button. It took one 400g bag of walnut pieces to make enough ground walnuts.

Warning: This recipe dirts a LOT of dishes!

Mocha Walnut Torte

Cake:
1 tsp instant coffee granules
1 tsp vanilla
8 eggs, separated
1 cup sugar
1 tsp lemon rind, grated
2 1/2 cups ground walnuts
1/4 cup flour
1/4 cup dry bread crumbs

Sugar Syrup:
1/4 cup sugar
1/4 cup water
1 tbsp cold strong coffee

Buttercream:
5 egg whites
1 cup sugar
2 1/4 cups butter
4 tsp instant coffee granules
1 1/2 tsp vanilla
1 1/2 oz bittersweet chocolate, melted

Garnish:
16 chocolate coffee beans
1/2 cup coarsely chopped toasted walnuts

1. For cake: Grease and line the bottom and sides of two 9 " cake pans.

2. In small bowl, dissolve coffee in vanilla. Set aside.

3. In large bowl beat egg yolks with 1/2 cup of sugar until light. Beat in coffee and vanilla, and lemon rind.

4. In another bowl, beat egg whites until foamy. Beat in remaining sugar, 2 tbsp at a time until stiff peaks form.

5. In yet ANOTHER bowl, whisk together walnuts, flour and bread crumbs. Fold into egg yolk mixture, alternating with egg whites. Make 3 additions of walnut mixture and 2 of egg whites. Pour into prepared pans and bake at 325F for 35 to 40 minutes.

6. For sugar syrup: Bring sugar and water to a boil over medium high heat. Stir until sugar is dissolved. Boil until clear (about 1 minute). Stir in coffee and let cool.

7. For buttercream: In large heatproof bowl, whisk egg whites with sugar. Place over saucepan of simmering water and cook, whisking often until opaque and mixture reaches a temperature of 110 degrees. Remove from heat and beat with electric mixer until cool (about 10 minutes). Beat in butter, 2 tbsp at a time until satiny (will curdle a bit at first).

8. In small bowl, dissolve coffee in vanilla; beat into buttercream. Transfer 1 3/4 cups of buttercream to another bowl and beat in melted chocolate until smooth.

9. Cut cake into layers horizontally. Place one layer on cake plate and slide strips of wax paper around edges to avoid getting icing on the plate. Brush cake with syrup. Spread with 3/4 cup of buttercream. Add another cake layer, brush with syrup and spread with 3/4 cup of buttercream. Repeat again, and then top with last layer. Spread a thin layer of buttercream over entire cake. Chill for 30 minutes.

10. Transfer 1/3 cup of chocolate buttercream to a piping bag, and set aside. Spread the remaining chocolate buttercream over top and sides of cake. Pipe 16 rosettes on top and place a chocolate coffee bean on each one.

Sunday, April 22, 2007

Chocolate Banana Cake


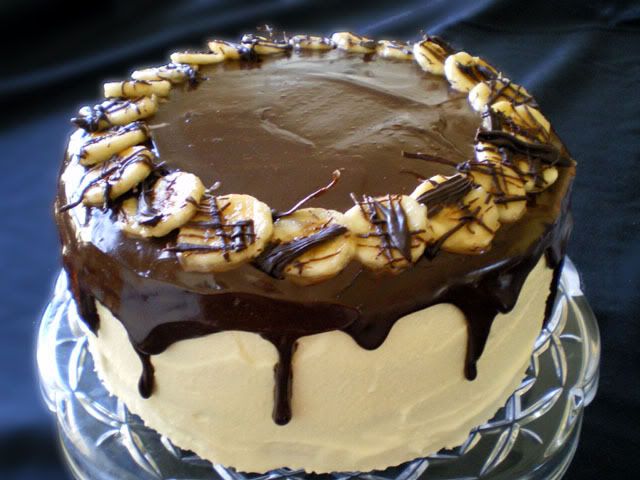
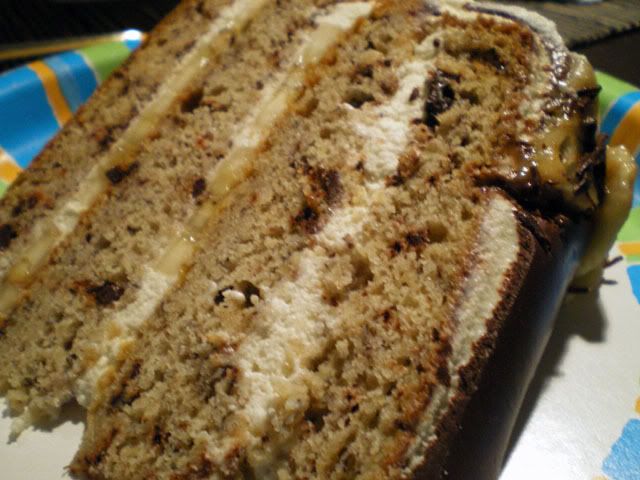
The first time I made this cake was 15 years ago. I remember because it was for my Dad's 50th birthday. I made it again for my husband when we started dating. He says it was the reason he married me. So I made it last night for his birthday (never hurts to remind your husband why he married you). I had about 20 people over last night for cake, so I made two cakes, the other was a walnut mocha cake. I will post the walnut mocha cake tomorrow, but the chocolate banana was by far the more popular with our guests.

I won't lie. This cake is labour intensive. I got the recipe originally from an issue of Canadian Living Magazine, and I have never changed a thing.

Chocolate Banana Cake

Cake:
3/4 cup butter, softened
1 cup sugar
3 eggs
1 1/t tsp vanilla
1/2 cup sour cream
3 cups cake flour
1 1/2 tsp baking soda
4 oz semi-sweet chocolate, chopped
1 1/2 cups mashed bananas

White Chocolate Icing:
3 cups whipping cream
10 oz white chocolate, chopped
1 tsp vanilla

Dark Chocolate Ganache:
1/2 cup whipping cream
4 oz semi-sweet chocolate, chopped

Garnish:
4 bananas, sliced
1 oz melted chocolate

1. For cake: Cream butter and sugar until fluffy. Beat in eggs, one at a time, then vanilla. Beat in sour cream and banana. Combine flour, baking soda and chocolate. Add in 3 additions to creamed mixture. Mix until wet.

2. Spoon into two greased 8 1/2 inch cake pans. Bake at 350F for 35 to 40 minutes. Let cool on rack for 20 minutes. Remove from pans. Let cool completely.

3. For white chocolate icing: In sauce pan, bring half of cream to a boil, pour over chocolate in bowl, whisking until melted. Add vanilla. Chill until cooled (1 hour, whisking often).

4. Beat chocolate and cream just until ridges hold shape. Beat remaining cream just until soft peaks form. Gently fold cream into chocolate cream.

5. Slice cakes in half horizontally. Spread each layer with about 3/4 cup of white chocolate icing and a layer of sliced bananas. Using a palette knife cover cake with a remaining icing and chill until firm (about 1 1/2 hours).

6. For ganache: bring 1/2 cup cream to a boil, pour over chocolate. Whisk until melted and let cool 20 minutes until room temperature but still pourable. Pour over cake, letting some run down the sides.

7. Drizzle melted chocolate over remaining banana slices and arrange on top of cake.

Tuesday, April 10, 2007

Double Chocolate Honey Dome Cake


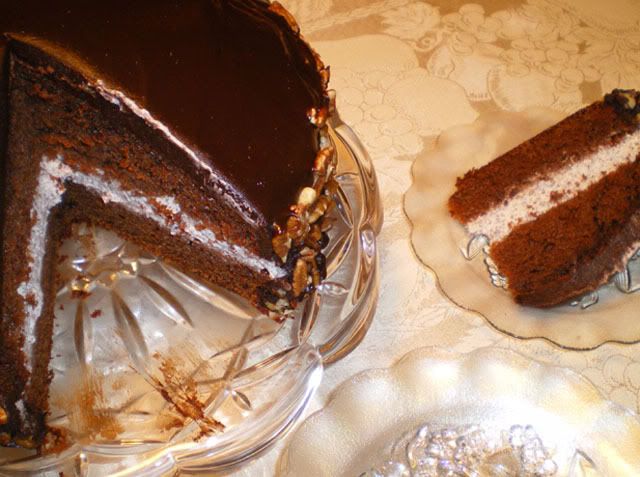
I brought dessert to my Mom's house for Easter dinner. I decided to try a new recipe from the April 2007 edition of Bon Appetit Magazine (please follow that link, if you'd like to see what that cake was supposed to look like, if prepared by a pastry chef and photographed by a professional photographer). Regardless, mine tasted pretty good, and I've made far worse looking cakes before. This recipe took a while to get ready, and I had a few problems. I am always scared of over-whipping the cream and making butter. Sometimes this leads to not whipping it enough. Luckily the icing in the middle layer of the cake has some gelatin which helped it firm up after a few minutes. I had to add the middle layer in two stages though, or else I think I would have had a big mess in my fridge. I put half the icing on the bottom layer, and chilled for 10 minutes, then added the rest on top and chilled for 10 minutes. Then I added the top cake layer. I also had some issues with the chocolate glaze. I followed the directions, but had trouble getting it to stay on the sides of the cake. Overall, it was a good cake and Mario said "It was fine." (yeah, I know... and yes we are speaking again now).

Double Chocolate Honey Dome Cake

Cake:

Cooking Spray

2 1/4 cups flour
1/4 cup cocoa powder
1 tsp baking soda

1/2 tsp salt

3/4 cup sugar
1/2 cup honey
2 large eggs

1 tsp vanilla
3/4 cup oil
1 1/2 cup buttermilk


Cream Filling:
1 tbsp water
1 tsp unflavoured gelatin

1 1/4 cups heavy whipping cream
1/2 cup sour cream

3 tbsp honey
1/2 cup finely grated bittersweet chocolate (about 1 oz)

Chocolate-Honey Glaze:
10 oz bittersweet chocolate, chopped
1 cup heavy whipping cream

1/2 cup honey
1 cup pecans, toasted, chopped

1. Preheat oven to 350F. Spray a 9" round cake pan and line bottom with parchment paper.

2. Whisk: flour, cocoa, baking soda and salt in medium bowl. In another bowl whisk: sugar, honey, eggs and vanilla. Stir oil into the egg mixture. Add dry ingredients and buttermilk into egg mixture and mix until wet. Pour into prepared pan. Bake 55 minutes or until toothpick comes out clean. (The sides of my cake pan weren't high enough, so my cake developed a "muffin top". I sliced that off with a sharp knife and gave the scraps to the kids.)


3. For the cream filling, cut the cake in half horizontally. Place one tbsp of water in a small bowl and sprinkle with gelatin (let sit 10 minutes). Bring 1/4 cup of the cream to a boil and remove from heat. Stir in gelatin. Let come to room temperature, stirring occasionally. Meanwhile, beat whipping cream, sour cream and honey until peaks form. Beat in gelatin mixture and grated chocolate.

4. Spread filling on bottom half of cake. The middle layer ends up being almost an inch thick, but the filling is still pretty runny in the beginning, so you might have to do this in two stages. Place top half of cake over filling and chill overnight.


5. The next day... place chopped chocolate in a large measuring cup, bring cream and honey to a boil. Pour cream and honey over chocolate and stir until melted. Let sit about 20 minutes, stirring occasionally until thickened a bit. Place cake on a cookie rack with a cookie sheet underneath. Pour chocolate over cake (you might have to scoop up the chocolate that ran right off the cake to the cookie sheet, and use it to fill in the sides). Press nuts around the sides.


6. Chill before making ANY attempt to move the cake into a pretty cake plate.