Home Page
Showing posts with label Quick Breads. Show all posts

Friday, November 28, 2008

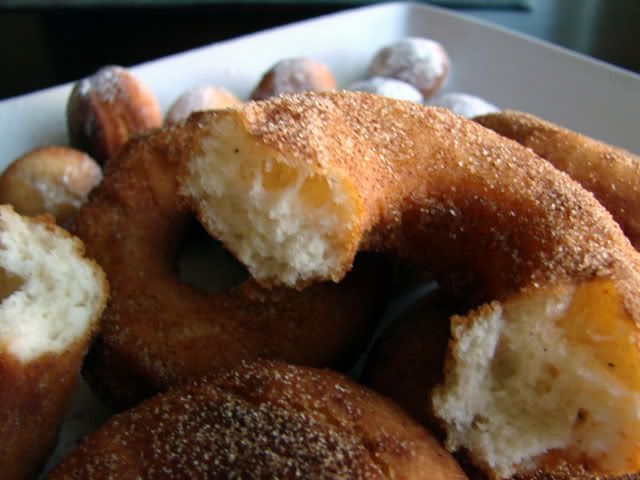
Old Fashioned Cake Doughnuts


Nothing beats homemade doughnuts. Well, that is nothing except for Muskoka Cookies, Peach Squares, Peanut Butter Chocolate Cake, Butter Tart Squares, Fresno Pudding, and Chocolate Banana Cake. Not my Haupia though, joking aside, please don't ever make my Haupia, make somebody else's Haupia.

(Note: I hope everyone CLICKED on all those links! That's why I put them there people! And I can check, you know - well I think I can, anyway, well maybe not... I mean I'm sure I could if I was at all technology savvy, but I should probably just stick to cooking.... and rambling, I'm good at that - the rambling that is.)

OK, so where was I? Doughnuts. Right.


So the doughnuts are yummy.

You can either douse them in cinnamon sugar or icing sugar. I always keep a spice bottle in my cupboard filled with cinnamon sugar that I make with 3 parts sugar to 1 part cinnamon (for anybody who might be fractionally challenged that means I would add 1 tablespoon of cinnamon to 3 tablespoons of sugar). This is great to have on hand to sprinkle on toast. I used the whole bottle on these doughnuts.

These are best served still warm.

Old-Fashioned Cake Doughnuts

1 cup sugar
4 tsp baking powder
1 1/2 tsp salt
1/2 tsp nutmeg
2 eggs
1/4 cup butter, melted
1 cup milk
4 cups flour (plus a little more if dough is sticky)
oil for frying (lots)
Cinnamon Sugar (tons)

1. In a large bowl mix the sugar, baking powder, salt and nutmeg.

2. Add eggs, milk and melted butter. Beat well.

3. Add 3 cups of the flour, beating until blended. Add one more cup of flour and beat well. The dough should be soft and sticky but firm enough to handle. If you feel its necessary, add up to 1/2 cup more flour.

4. Cover with plastic wrap and chill for one hour (I once got a question from a reader as to whether when I said "chill" I meant in the refrigerator... um yes that's what I meant, but I can see how this could be confusing, I could have meant "Like OK, cover with plastic wrap, and then um like chill, ya know on the couch, for like an hour... like OK?")

5. After you're done chilling on the couch, remove your dough from the fridge and begin heating about 1" of oil to 360F in a large metal skillet. I actually don't have one of those fancy schmancy candy thermometres (hello Santa are you reading?)... somebody remember to ask me after Christmas how many candy thermometres I get...

6. Working half the dough at a time, roll it out on a floured surface to about 1/2" thickness. Cut out circles using a doughnut cutter. If you don't have a doughnut cutter (Santa?) then use a regular cookie cutter and cut out the hole with the screw cap off a 40oz bottle of Newfoundland Screech.

7. Decide that you are too cool for school and take a big swig of the Screech for no good reason. Once the burning subsides and you stop crying and sputtering, push the scraps of dough back together, re-roll and repeat steps 6 through 7 over and over until (a) all the dough is used up or (b) you pass out.*

8. Gently drop the doughnuts in batches into the hot oil. Flip them over as they puff and turn them a couple more times as they cook. They will take 3-4 minutes in total and they will be lovely and golden brown all over.

9. Remove from the oil and set them on paper towels (that removes all the fat, you know). Sprinkle generously with cinnamon sugar. Enjoy them hot, and eat at least four, you need some carbs in your belly to soak up all that Screech.


*Janet is Hungry will not be responsible for any mishap (foreseeable or unforeseeable) that may arise as a result of drinking alcohol in close proximity to a pan of hot oil.

Thursday, November 22, 2007

Cornbread


The night before last, we decided to have chili for dinner. Lately, I've been serving the kids chili on top of toasted buns (sort of like Chili Sloppy Joe's), but this time I decided to try them out with some cornbread. I have always loved cornbread, and I figured they would too. I've made it for them before, in the form of Pogo Stick Muffins, and they ate that.... so....

I found this recipe for cornbread on The Pioneer Woman Cooks website. I decided to try her recipe because I thought, given she lives on a ranch and all, that she'd make some good authentic cornbread. She did not steer me wrong (she never has and I've made lots of her recipes).

Normally, I would have used butter in cornbread, but I went ahead and made it almost exactly as she suggested, so I used shortening. It was very good.

Marco didn't eat it. He tried it, and said that he didn't like cornbread. I usually don't argue too much when Marco says he doesn't like something. He usually eats ALMOST everything, and he always tries stuff. So I figure, at 4 years old, he's allowed to have a few things he won't eat.

Claire loved the cornbread. So I gave her some in her lunch the next day with some cold cuts and sliced cheese and carrot sticks alongside. She decided to try to saw the cornbread in half with the side of her hand so she could make a little cornbread sandwich. It all fell apart, and then she wouldn't eat it. When I picked her up she ACCUSED ME of giving her crumbled cornbread... Sigh, poor Claire what did she ever do to deserve a wicked cornbread crumbling Mom like me??

Cornbread

1 cup yellow cornmeal
1/2 cup flour
1/4 cup plus 2 tbsp shortenning
1 tsp salt
1 cup buttermilk
1/2 cup milk
1 egg
1 tbsp baking powder
1/2 tsp baking soda

1. Preheat oven to 400F and place 8x8 inch dish in oven to heat.

2. Mix flour, cornmeal and salt.

3. In another bowl, mix buttermilk (you can make a cup of buttermilk by adding a tbsp of lemon juice to the milk and letting it sit for 5 minutes) with regular milk and egg. Stir in baking powder and baking soda.

4. Add wet ingredients to dry ingredients and stir until combined. Melt 1/4 cup of shortenning in the microwave and stir into batter.

5. Remove pan from oven and put 2 tbsp of shortening in the pan, spread around until melted. Pour batter into pan. Return to oven and bake for 20-25 minutes.


Wednesday, September 5, 2007

Flour Tortillas


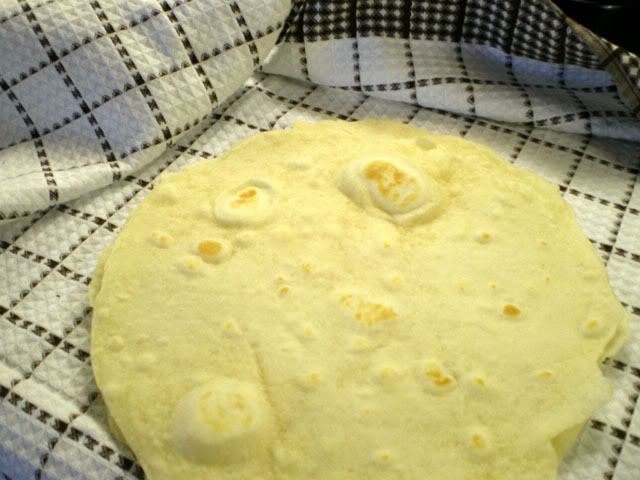
On Monday, we had a large amount of leftover roast beef from the weekend, and I decided to make beef quesadillas. I make them with sauteed onions and peppers, strips of beef, and Monterrey Jack cheese. I serve them with salsa and sour cream.

You know how sometimes you decide in the morning what you are going to make for dinner, and then it's on your mind all day (making you hungry), and you get your heart all set on that exact meal, and then you realize you are missing a key ingredient? Well that's what happened to me, and the key ingredient was very very KEY... the flour tortillas. I almost always have a package or two in the freezer, but when I went to check, I couldn't find any. It was Labour Day and the grocery store was closed.

I was so looking forward to the quesadillas that I just couldn't relinquish the plan, so I made my own flour tortillas from scratch.

I have done this before. It takes a bit of time, but it is overall pretty easy. The thing that happened to me the last time was that when I put the tortilla dough on the frying pan to cook it, it shrunk up. That didn't happen to me this time, and the only thing I did differently was to let the dough rest a bit after I rolled it out.

I have decided that NOTHING quite beats homemade tortillas, they are just so far superior to the store bought ones, it will be hard to go back. I tried freezing the leftovers, so I will be able to determine if they freeze well. If they do, then I can see myself making these in large quantities so I'll never have to go back to store bought. Next, I am going to try some corn tortillas.

Flour Tortillas
makes eight 10" tortillas

2 cups flour
1/4 cup shortening
1/2 tsp salt
1/2 tsp baking powder
1/2 to 3/4 cup warm water

1. Whisk together the flour, salt and baking powder.

2. Cut in the shortening until mixture resembles course meal.

3. Add warm water a little at a time, until mixture forms a soft dough without being sticky.

4. Knead until smooth and elastic. Roll into 8 equal size balls and cover with plastic wrap. Let rest for 30 minutes.

5. Roll each ball out on a lightly floured surface until very thin and about 10" in diameter. Layer them between sheets of plastic wrap and let rest for 10-15 more minutes (or until you are ready to cook them).

6. Place in a dry (no oil please) non-stick frying pan over med-high heat for about 1 minute on each side. You know its read to flip when it starts to puff up a bit.

7. Wrap with a tea towel while you are cooking the rest, so they don't dry out. Serve warm.


Sunday, May 27, 2007

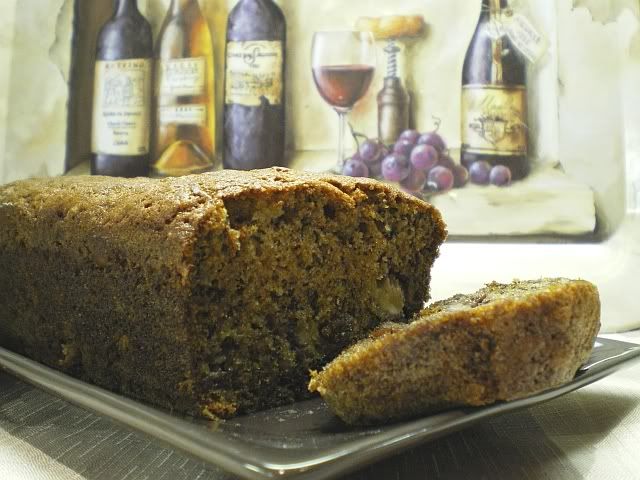
Papaya Bread


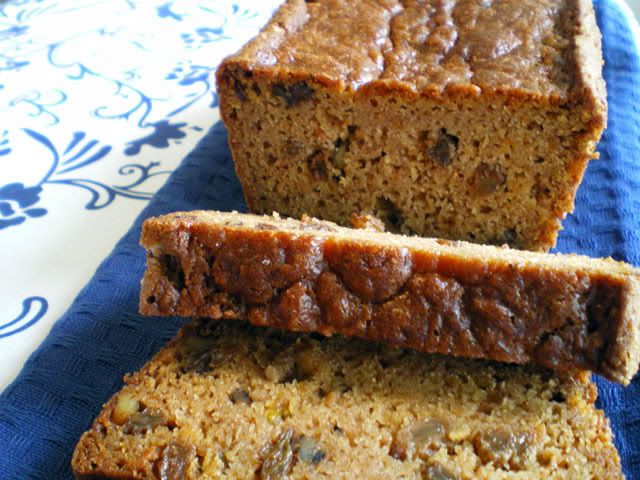
It was when we were on our family vacation in Belize in March that I made the discovery that I love Papayas. The Papayas in Belize were so much better than the ones you would normally get here in Canada. They were big and juicy and delicious.

A few weeks after we got home, I was wandering through the grocery looking for ways to waste money (as I am wont to do) when I saw a lovely huge Papaya with a sticker "product of Belize". They were still very green but I adopted three of them and took them home to sit on my kitchen counter. I lovingly turned them (and squeezed them and smelled them) every day for a week until finally, I deemed them ripe enough to eat. They were good. I ate them morning noon and night. I ran out, I went back to the store, I bought more.... and so on.

At some point during this time, I started to notice some stomach discomfort. It would often happen at the gym when I was running on the treadmill.... I thought I might be allergic to the gym (was hoping). But no, sadly, I eventually made a connection with the Papaya, which I would eat in large quantities for dessert, before I went to the gym.

Anyway, all this to provide a preamble to my Papaya Bread recipe because I needed a way to deal with the two Papayas I still had, which I was now afraid to eat. I did take a chance and try a small bit of the bread. It was delicious and moist, and it didn't give me cramps! My kids and Mario LOVED this recipe, but that's too bad for them, because I'm not buying anymore Papayas.


Papaya Bread (Cramp Free)
adapted from Astray Recipes

1 cup sugar
1/2 cup butter
2 eggs
1 cup mashed ripe Papaya
1/4 cup chopped walnuts
1/2 cup raisins
1 1/2 cup flour
1/4 tsp baking powder
1 tsp baking soda
1/2 tsp salt
1/2 tsp cinnamon
1/2 tsp allspice
1/2 tsp ground ginger

1. Cream sugar with butter until light.

2. Add eggs and beat until fluffy.

3. Mix in Papaya, nuts and raisins.

4. Whisk together the flour, baking powder, salt, cinnamon, allspice and ginger. Add this to the butter mixture.

5. Pour batter into greased loaf pan. Bake at 325F for 1 hour 10 minutes.

Monday, May 21, 2007

Soft Pesto Breadsticks


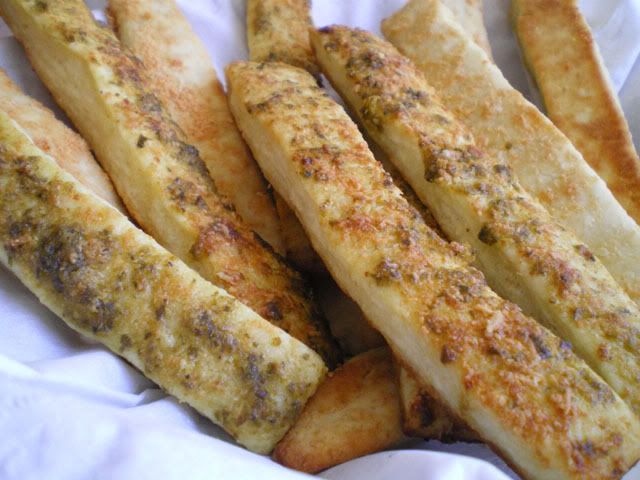
This is a great recipe if you want to have some nice bread alongside your dinner, but you don't have a loaf handy and you don't have time to make a yeast bread. These breadsticks are a real treat and take about 20 minutes from start to finish. I like to paint some store bought Pesto sauce on mine and then sprinkle them with a little Parmesan cheese. You could also sprinkle sesame seeds, cheddar cheese, or whatever else floats your boat. The best part is that these little babies only have about 75 calories each (not including the topping). This time I did half with pesto and half just with Parmesan because Claire and Marco won't eat the ones with the "green stuff".

Soft Pesto Breadsticks

1 1/4 cup flour
1 1/2 tsp baking powder
1 tsp salt
1/2 cup skim milk
2 tbsp butter, melted
your choice of topping (pesto, Parmesan, cheddar, sesame seeds etc).

1. Mix flour, baking powder and salt.

2. Stir in skim milk and mix until dough forms a ball.

3. Roll or pat dough out into a 10" by 6" rectangle and cut it into 12 strips.

4. Paint each stick with butter and place on cookie sheet. Paint on or sprinkle with your choice of topping.

5. Bake at 450F for 14 minutes.

Friday, April 20, 2007

Beer Bread


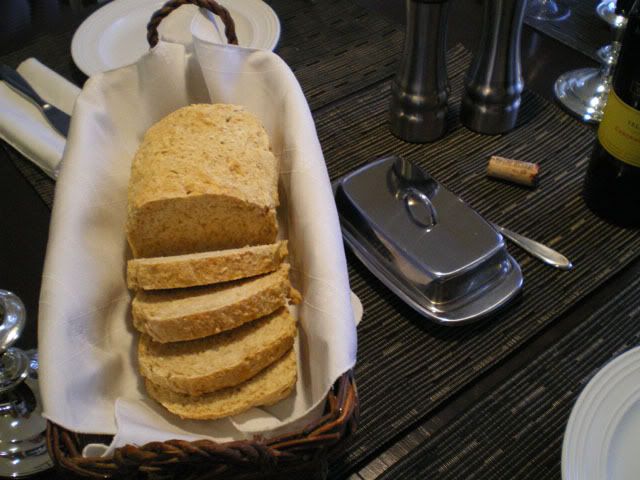
This loaf is a nice savoury compliment to baked beans or chili. It can be whipped up quickly without having to worry about yeast and rising time. The original recipe called for 1 cup of cheddar cheese, but I changed it to 1/2 cup of Parmesan because I think its a better flavour combination with the beer and Dijon. Make sure you serve this one hot out of the oven. The kids loved it, until I told them there was beer in it. Mario's reaction: "please tell me that is NOT my last beer!"..... oops!

Beer Bread

2 cups flour
1 cup whole wheat flour
1 tbsp sugar
pinch salt
1 tbsp baking soda
1 (341ml) bottle of beer (NOT your husband's last one!!!)
1 tbsp Dijon mustard
1/2 cup Parmesan cheese

1. Preheat over to 350F, and grease a loaf pan.

2. Mix white flour, whole wheat flour, salt and baking powder in a large mixing bowl.

3. Stir in beer, cheese and dijon until it makes a batter (it will not be a very wet batter).

4. Turn into loaf pan and bake for 40-45 minutes, until golden brown and firm to the touch.

Wednesday, April 4, 2007

Cinnamon Banana Bread


It always happens the same way. I come home from work and notice a big pile of frightening fermenting bananas (FFBs) sitting on the counter. I head immediately to the internet and start googling: "banana muffins", "interesting banana muffins", "unusual banana bread". This time I googled: "banana and cream of wheat muffins", and there is actually a recipe for that! It had no eggs or oil though, so I was skeptical. Invariably each time I try something interesting and/or unusual, I wish I had stuck to my faithful boring old banana bread recipe. This recipe is moist and foolproof and it can be made into muffins or a loaf by altering the cooking times (20-25 minutes for muffins). Here's a hot tip for FFB's: if you don't have time to turn them into fabulous FFB bread (FFFBB) right that minute, just peel and mash the FFBs and freeze them in ziploc bags, measuring a cup to each baggy. Then you have handy pre-frozen, pre-measured baggies of FFBM (frightening fermenting banana mush).

Cinnamon Banana Bread

1 1/2 cups sugar
3 eggs
3/4 cup oil
2 cups flour
2 tsp baking soda
1/2 tsp salt
2 tsp cinnamon
2 cups FFB, mashed
3/4 cup raisins

1. Preheat oven to 350F. Grease and flour two loaf pans, or muffin tins.

2. Beat sugar and eggs until smooth. Add oil and mix well.

3. Combine dry ingredients (flour, baking soda, salt, cinnamon) and add to wet mixture.

4. Stir in mashed FFBs and raisins. Pour into loaf pans and bake 1 hour or until cake tester comes out clean.