Home Page
Showing posts with label Yeast Breads. Show all posts

Sunday, February 21, 2010

Sourdough Pizza Crust


I have always loved baking bread. Nothing beats the satisfaction of seeing your bread rise, or the smell of bread baking in the oven. I usually bake two loaves at a time and then we eat toasted homebaked bread every Sunday morning for breakfast until its gone. Then I bake more, it's a viscious, kneady circle. Guffaw.

But we also love sourdough bread. LOVE. We eat a loaf a week (and that's in addition to the homemade white bread, and the countless bagels, raisin bread, rye bread, flatbread and sandwich bread that our carb-obsessed family goes through). We use the sourdough on the weekends to make yummy panini sandwiches for lunch, and then Mario will finish up the rest of the loaf, toasted with butter and molasses for his breakfast during the week. I usually just buy my sourdough from the bakery at the grocery store. But, lately I've been thinking (stand back)...if I can make my own regular bread? Why shouldn't I make my own sourdough?

So, I started to research sourdough starters. The first thing I noticed was how many different methods there are out there for getting a sourdough starter going. I am impatient, and I didn't want to devote two weeks to developping a starter that flopped and then have to start all over with a different method. So, I tried ALL the methods at once. That is how my kitchen came to be over run by little smelly, fermenting containers of sourdough starter.


(from left to right: Dudley, Cynthia, Barney, and Abigail)

These are my sourdough babies (not to be confused with sourpatch kids). I've been easily spending an hour each evening in the kitchen, mixing and feeding my little babies, tracking my actions and the reactions of the various potions like a mad scientist.

Guess what? They all took! Wow! I now have several very active and lively sourdough toddlers. And I can't decide which one to keep and which ones to give up for adoption! Seriously. These kids are going to eat me out of house and home! That is, if I can manage to keep them all alive (I don't have such a great track record with house plants...)

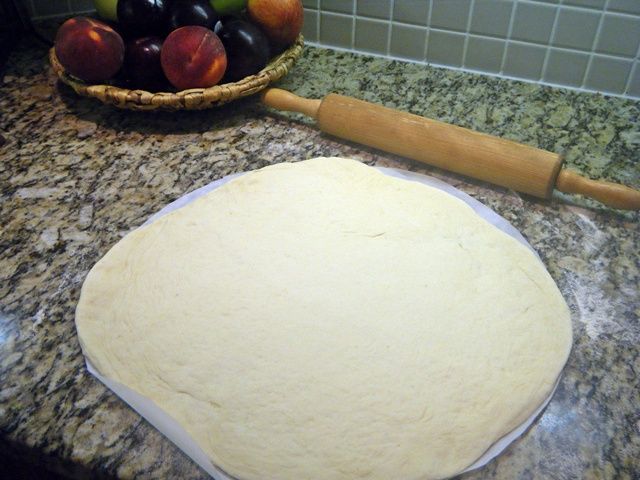
This pizza dough represents my first attempt at sourdough baking. For this recipe I used the sourdough starter that I named, "Abigail". Abigail was my firstborn and she holds a special place on top of my breadbox. Abigail was developped using equal parts plain white (unbleached) flour and bottled water. Everyday, I throw away all but 100g, and then feed her 50g flour and 50g water. Abigail was two weeks old, yesterday.

For a couple nights before I was going to make my pizza, I fed Abigail without dumping half (just to increase the volume of starter). On Saturday morning, I set aside 100g of Abigail to keep, in case she turns out to be "the one", and I fed the remaining portion again. When I noticed Abilgail had gotten all bubbly and foamy, I stirred her down, removed 1.5 cups and made the recipe below:

Sourdough Pizza Crust

1.5 cups active sourdough starter (300g by weight)
1 tbsp olive oil
1.5 cups flour (250g)
1 tsp salt

1. In the bowl of your stand mixer, mix the starter, flour, olive oil and salt until a nice soft dough forms. Depending on the consistency of your starter, you might need to add a little warm water, or a little more flour. Mine seemed good.

2. Knead your dough (either by hand or in the stand mixer) for about 10 minutes.

3. Set the dough in a greased bowl, cover the bowl with plastic wrap and a tea towel and set in a warmish spot (I like to let my dough rise on top of the PVR, it gets nice and warm there). My dough took about 6 hours to double in bulk (sourdough rises a lot slower than breads leavened with commercial yeast).


4. Punch the dough down, and let it rest for about 10 minutes. Roll or pat the dough out to your desired pizza size/shape. I preheated my oven to 450F with the pizza stone inside and rolled my dough out on a piece of parchment paper dusted with cornmeal. Then, I just slid the parchment right onto the pizza stone in the hot oven.

5. I prebaked the crust for 5 minutes and then pulled out the pizza stone and topped it with your favorite toppings. Then I returned it to the oven for 15 more minutes.


This was my dough, after the 5 minute "pre-bake".

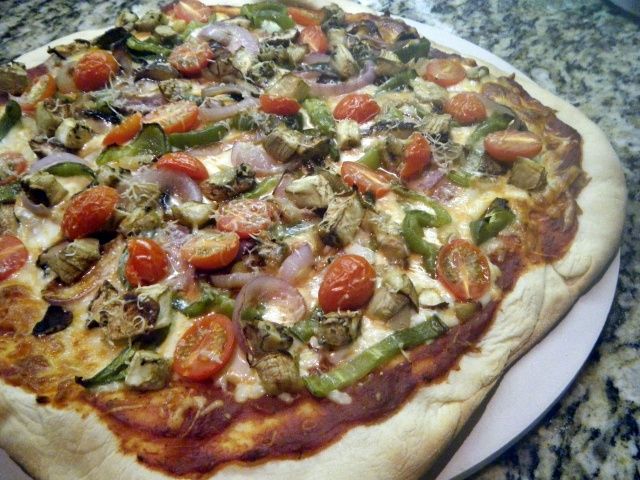
Although not really relevant to this post, for anyone who is curious, the toppings on my pizza were: canned pizza sauce, mozzarella, pre-roasted vegetables (green pepper, onion, eggplant and garlic), halved grape tomatoes and parmesan cheese. Claire and Marco suggested that next time, I make the pizza EXACTLY the same, only add pepperoni and leave out the green pepper, onion, eggplant, tomatoes and garlic. So, in other words, pepperoni pizza, please.

Next weekend, I am going to try baking a loaf of classic sourdough bread using one of the other starters... right now I'm off to water my plants, the leaves are looking a little crispy...
Friday, December 11, 2009

Simple Dinner Rolls


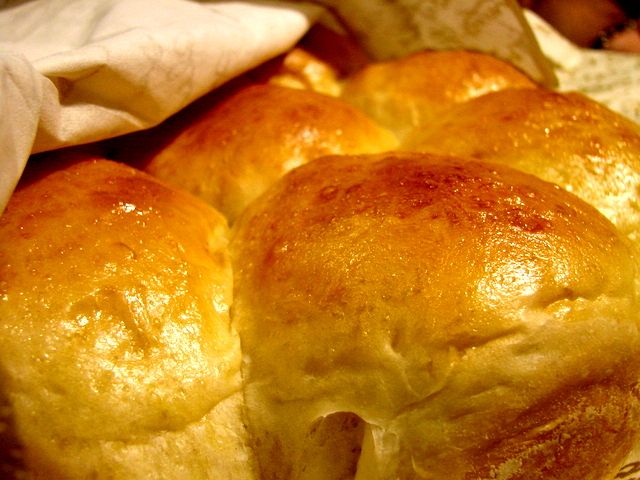
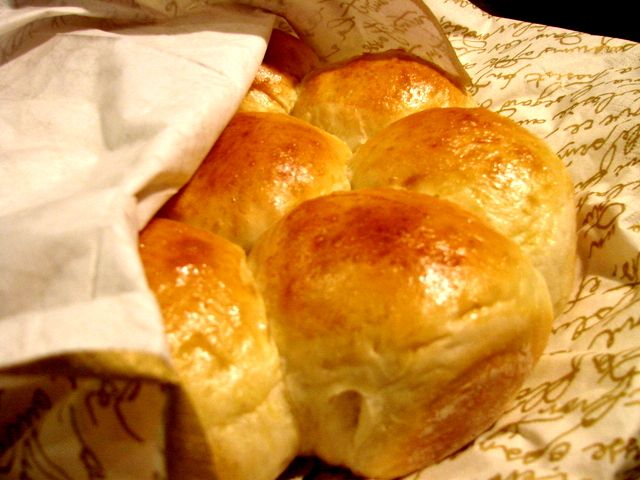
Here is a no fail, super easy dinner roll recipe. The rolls come out light and buttery and simply delicious. They really aren't much work at all, and if I start them about an an hour and half before dinner is ready, then they are fresh out of the oven and straight to the table.

This is my go-to recipe for dinner rolls when I have guests. Homemade bread never fails to impress.


Simple Dinner Rolls

3 1/2 cups flour (plus a bit more during kneading)
2 tbsp sugar
2 envelopes Quick-rise yeast
1 tsp salt
3/4 cups milk
1/2 cups water
1/3 cups butter
1 egg

1. Reserve 1 cup flour.

2. Mix remaining flour, yeast, sugar and salt in large bowl.

3. Warm milk, water, and butter until very warm (approx 115F).

4. Stir warm liquid into dry ingredients and beat in 1 egg.

5. Mix in enough reserved flour to make a soft dough that does not stick to bowl.

6. Knead lightly for about 6 minutes. Adding flour to prevent sticking.

7. Cover and let rest 10 minutes. Shape as desired. (I shape into 18 rolls and put them 8 per pan in 8" round cake pans)

8. cover, let rise about 30 minutes. At this point you can brush butter, or egg on top and sprinkle with poppy seeds, or sesame seeds, if desired.

9. Bake in 375F oven about 20-25 minutes, until golden. Cool on wire rack.

Tuesday, October 9, 2007

Garlic Bread


I'm not sure that anyone actually needs a "recipe" for garlic bread. Actually now that I think about it, if you DO need a recipe for garlic bread, this site probably won't help you much. Get an easy-bake oven!

I have to be really careful serving bread with meals. The main reason is my daughter, Claire, who is 8. Unfortunately (for her bum when she hits puberty) she is exactly like me! She loves things that aren't good for her, and since she is so young, she hasn't yet developped that well honed self-discipline that I have (yeah right!). So if I put bread on the table with dinner, she will fill herself up on that and forsake her meat and vegetables.

Because of this, I will often use dinner rolls instead of a loaf of bread. I'll put out five small dinner rolls, one each for everyone and two for Mario. On occassion, Claire has tried to fight Mario for that fifth roll. She argues the unfairness of Daddy getting the extra roll. I try to explain to her that a little girl weighing 60 pounds couldn't possibly need to eat as much as big man weighing [marriage-saving-self-censorship kicked in].

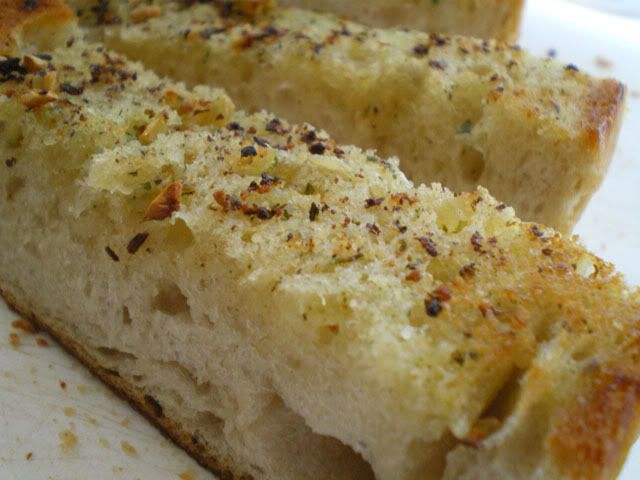
Yet sometimes you are eating one of those meals, like lasagna or pasta where it just wouldn't be the same without a nice warm crusty loaf of garlic bread, and this is how I usually make it.

Garlic Bread

1 loaf dense crusty French bread
2 cloves garlic, crushed
1/2 cup butter
1 tsp Mrs. Dash seasoning
zest of one lemon

1. Cut loaf in half lengthwise.

2. In a microwave dish melt butter, stir in crushed garlic and lemon zest.

3. With a pastry brush, spread garlic butter all over bread. Let it soak in a bit.

4. Sprinkle with seasoning. (At this point, you can freeze half of the loaf for later).

5. Place loaf on a cookie sheet and bake at 350F for about 15 minutes. Turn on broiler and continue baking another 2-3 minutes, until sliced top is nicely browned.


Sunday, September 30, 2007

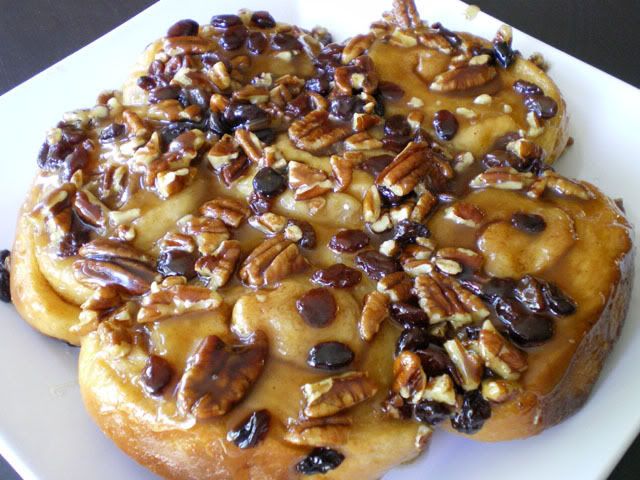
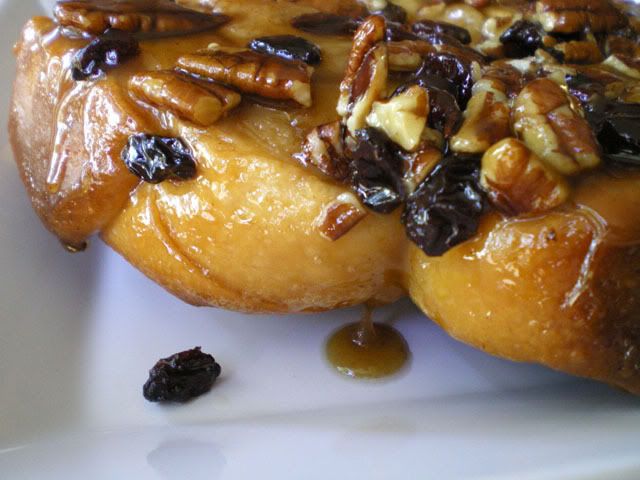
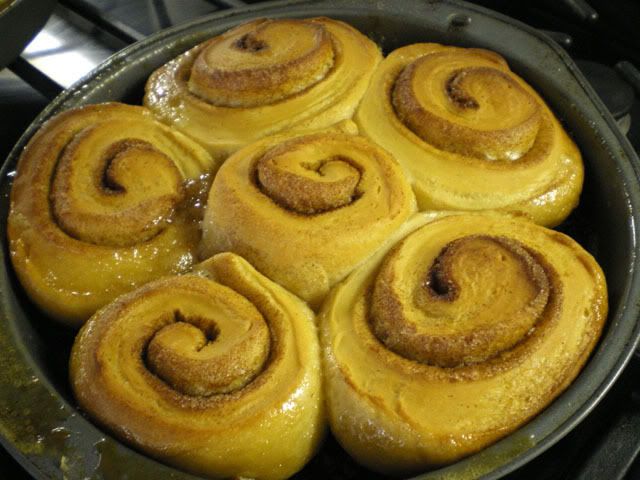
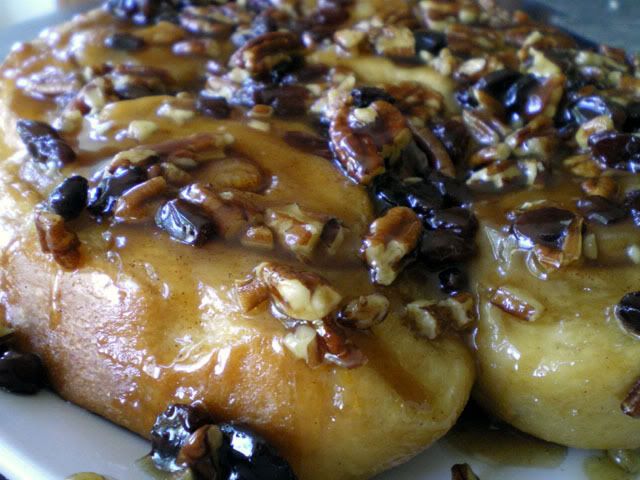
Sticky Buns


I was incredibly excited to see that this month's Daring Baker Challenge was going to be Cinnamon Rolls or Sticky Buns. Sticky Buns are a huge favorite of mine, and something that I have never actually made at home before.

The recipe turned out great, and everything went smoothly, with no hitches. There was a base recipe for the rolls and then everyone had a choice to make cinnamon rolls, sticky buns or a combination of both. I went with the sticky buns, and they were so good, I will probably go back at some point and try out the cinnamon buns too.

Check out all the other Daring Baker posts (I guarantee LOTS of mouthwatering pictures), at the Daring Baker Blogroll.


Sticky Buns
Makes 8 to 12 large sticky buns

6 1/2 tbsp sugar
1 tsp salt
5 1/2 tbsp shortening or unsalted butter or margarine
1 large egg, slightly beaten
1 tsp lemon extract OR 1 teaspoon grated zest of 1 lemon
3 1/2 cups unbleached bread or all-purpose flour
2 tsp instant yeast (also called rapid rise or quick rise)
1 1/8 to 1 1/4 cups whole milk or buttermilk, at room temperature
1/2 cup cinnamon sugar (6 1/2 tablespoons granulated sugar plus 1 1/2 teaspoons ground cinnamon)

1. Cream together the sugar, salt, and shortening or butter on medium-high speed in an electric mixer with a paddle attachment (or use a large metal spoon and mixing bowl and do it by hand). Whip in the egg and lemon extract/zest until smooth. Then add the flour, yeast, and milk. Mix on low speed (or stir by hand) until the dough forms a ball. Switch to the dough hook and increase the speed to medium, mixing for approximately 10 minutes (or knead by hand for 12 to 15 minutes), or until the dough is silky and supple, tacky but not sticky. You may have to add a little flour or water while mixing to achieve this texture. Lightly oil a large bowl and transfer the dough to the bowl, rolling it around to coat it with oil. Cover the bowl with plastic wrap.

2. Ferment at room temperature for approximately 2 hours, or until the dough doubles in size.

3. Mist the counter with spray oil and transfer the dough to the counter. Roll out the dough with a rolling pin, lightly dusting the top with flour to keep it from sticking to the pin. Roll it into a rectangle about 2/3 inch thick and 14 inches wide. Don´t roll out the dough too thin, or the finished buns will be tough and chewy rather than soft and plump.

4. Sprinkle the cinnamon sugar over the surface of the dough and roll the dough up into a cigar-shaped log, creating a cinnamon-sugar spiral as you roll. With the seam side down, cut the dough into 8 to 12 pieces each about 1 3/4 inches thick.

5. Make Caramel Glaze.

Caramel Glaze
1/2 cup granulated sugar
1/2 cup firmly packed brown sugar
1/2 teaspoon salt
1/2 pound unsalted butter, at room temperature
1/2 cup corn syrup
1 tsp lemon extract
Walnuts, pecans, or other nuts (for sticky buns.)
Raisins or other dried fruit

5. In the bowl of an electric mixer, combine sugar, brown sugar, salt and butter.

6. Cream together for 2 minutes on high speed with the paddle attachment. Add corn syrup and 1 teaspoon lemon extract. Continue to cream for about 5 minutes, or until light and fluffy.

7. Coat the bottom of 1 or more baking dishes or baking pans with sides at least 1 1/2 inches high with a 1/4 inch layer of the caramel glaze. Sprinkle on the nuts and raisins Lay the pieces of dough on top of the caramel glaze, spacing them about 1/2 inch apart. Mist the dough with spray oil and cover loosely with plastic wrap or a food-grade plastic bag.

8. Proof at room temperature for 75 to 90 minutes, or until the pieces have grown into one another and have nearly doubled in size.

9. Preheat the oven to 350°F (175°C) with the oven rack in the middle shelf for cinnamon buns but on the lowest shelf for sticky buns.

10. Bake the sticky buns 30 to 40 minutes, or until golden brown
.


Friday, July 13, 2007

Garlic and Olive Oil Bruschetta


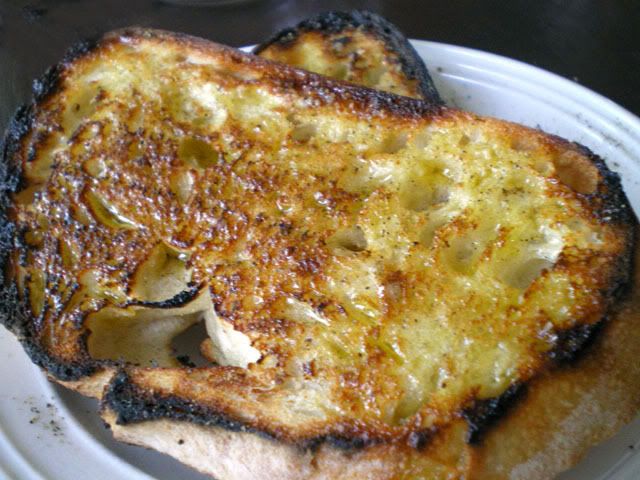
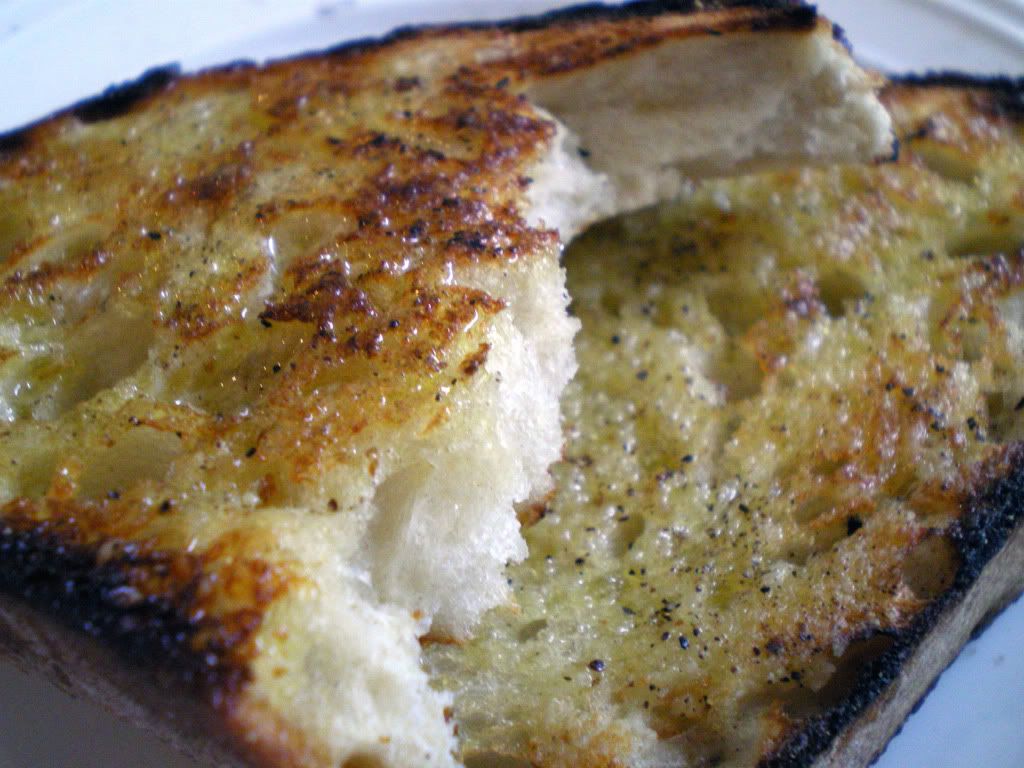
I feel like I am cheating today for posting this recipe. It is not even really a recipe, it is more like an idea and it wasn't even my idea. I guess it was some old Italian person's idea. But, boy was it ever a GOOD idea!! This is "authentic" bruschetta. Although my Bruschetta with Tomatoes is also really good, I actually prefer this more simple bruschetta as a bread to go alongside pasta. The tomato bruschetta is nicer as a starter dish.

This is something that I should do more often, we always have the ingredients around, but I tend to forget about it sometimes. Then every couple of years, I will remember that I haven't made it in a while, and we will we eat it every other night for a month! Then I'll forget about it again for a while. Well right now we are on another Garlic and Olive Oil Bruschetta kick.

We grill the bread on the BBQ and then let everyone fix it themselves so they can control the amount of garlic and oil that goes on it. It is so good, you really have to try it.


Garlic and Olive Oil Bruschetta

1 loaf crusty italian bread
peeled whole garlic cloves (allow about 1 per person)
olive oil (I put some in a bowl on the table with a brush)
freshly ground pepper

1. Slice bread into nice thick 3/4" to 1" slices.

2. Grill bread on the Barbecue (or alternatively broil it in the oven) until is it nicely browned on both sides.

3. Rub each slice with a clove of garlic (I rub until the garlic is about half worn down).

4. After the garlic, brush with olive oil and sprinkle with pepper.


Tuesday, July 10, 2007

Camp Fire Bread


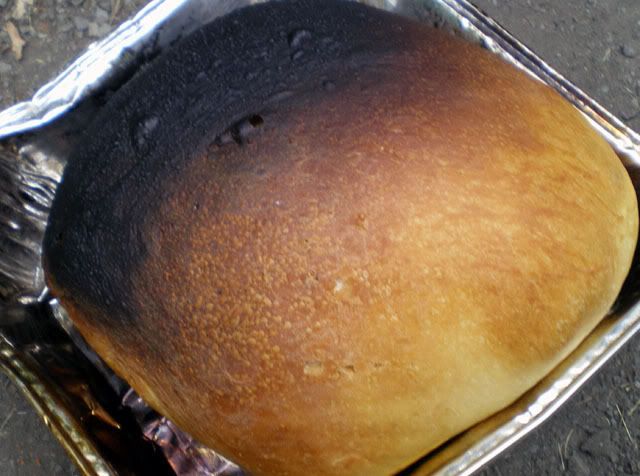
This past weekend we went camping and I decided throw caution to the wind and bake some homemade bread over the camp fire. It was an interesting experiment to say the least. Doesn't that picture above look nice? Well...before you become too impressed, scroll to the bottom of the post for the pictures of the other side of that loaf, and the second loaf. Yeah oops.

I made the bread dough at home the day before we headed out camping. I wrapped each ball of dough in plastic wrap and placed them inside a ziploc bag in the cooler. My plan was to take them out Saturday morning at the campsite to rise. Here comes Mistake #1. I had also pre-baked some potatoes at home in the oven to make homefries for breakfast and I guess they were still a tad warm when I put them in the cooler, right beside my bread dough... (that was dramatic foreshadowing)

When we woke up early Saturday morning and emerged from the tent, the first thing we noticed was that the cooler lid was ajar. OH NO! Racoons! I ran over with dread to survey the damage. My bread had risen inside the cooler, it completely burst through the Ziploc bag (yes it was a GLAD bag not the cheap kind) and then popped the cooler open.

That was some SERIOUS bread! It was all over the cooler, sort of like "attack of the killer bread dough". I managed to gather it back up into balls and I set it to rise. Well, Murphy's Law of course dictated that it wouldn't rise when I WANTED it too..... So I put it in the back of the mini-van with the heater running. Would you like some carbon monoxide with your bread?

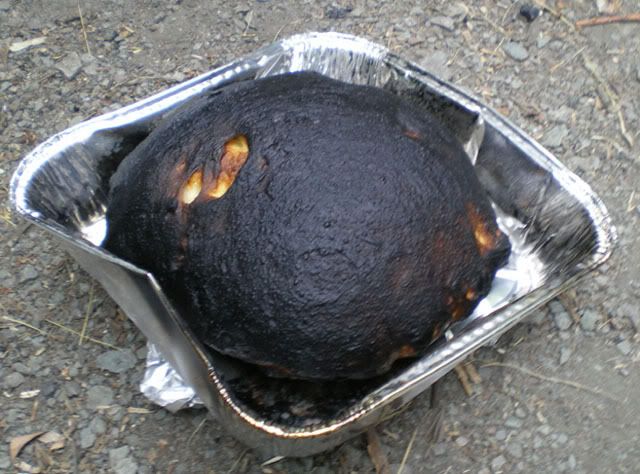
Eventually it doubled in size. Here comes Mistake #2... believing Mario. I told him he needed to fix me up a makeshift "oven" in the firepit with a temperature of about 325°F. He said that would be "no problem". He lit about 3000 coals and covered the entire firepit with approximately 75 meters of tin foil. It looked like a space station (which is funny because my second loaf looks a little like an asteroid).

Well the disastrous results of this experiment are plainly obvious. At first I decided not to post this recipe (don't want to become a laughing stock). But my brother, Colin, said that if I didn't he would start his own blog to post all my cooking disasters, it would be called: "Are you still Hungry?"

Surprisingly, the bread tasted very good on the inside, after you cut off the burnt crust. My Mom (who is my biggest fan) ate it burnt crust and all and said it was "quite lovely". I will try this again next time we go camping, but I will reduce the amount of coals by about 2985.


....it gets worse....


Burnt White Camp Fire Bread
original recipe: "Overnight White Bread" from "Breads" by the California Culinary Academy

2 packages active dry yeast
1/2 cup warm water (105°F to 115°F)
2 tbsp honey
1 1/2 cup warm milk (105°F to 115°F)
1 1/2 tsp salt
2 tbsp butter
5 1/2 to 6 cups flour

1. Sprinkle yeast over warm water and 1 tsp honey, let stand five minutes.

2. Stir in milk, rest of honey, salt and butter.

3. Add three cups of flour. Beat until smooth and elastic. Stir in 2 cups more flour to make a soft dough.

4. Turn dough out onto floured board and knead for 10 to 15 minutes (adding just enough flour to prevent from sticking).

5. Divide into two balls, cover with plastic wrap and refridgerate for up too 24 hours.

6. When ready to bake, remove from refridgerator, and let come to room temperature. Shape into loaves and let rise until doubled in bulk.

7. Bake at 375°F for 35 to 40 minutes, until loaves are well browned.


Saturday, June 2, 2007

Olive Oil Fougasse with Olives


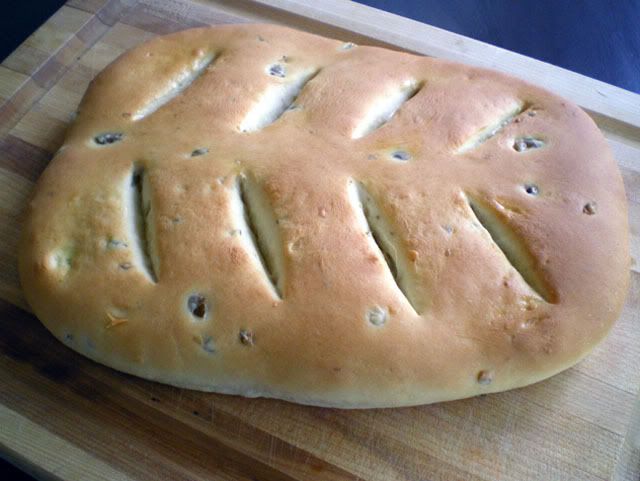
This was a wonderful loaf of bread that we had with dinner twice over the last few weeks. I was really aiming to make a Focaccia, and when I saw this recipe I assumed it would be much the same. It wasn't really, it was far less dense than Focaccia, but it was wonderful anyway. The olives were a nice touch, adding a bit of colour, but not overpowering the flavour.

I put the whole warmed loaf on the table on a cutting board, and people just tore sections off. No butter was necessary. Wha?? Who said that?? That was weird, it was like I got possessed for a second, and typed the words "no butter was necessary". Strange.

This recipe is from a cookbook that I've had for years, and used many times. It is called "Bread" and its from the California Culinary Academy.

Olive Oil Fougasse with Olives
makes 2 loaves

1 package active dry yeast
1/2 cup warm water (105° to 115°F)
2 tsp sugar
1/2 cup warm milk (105° to 115°F)
1/4 cup olive oil
1/2 tsp salt
2 3/4 to 3 cups flour
1/4 cup chopped green olives

1. Sprinkle yeast over 1/4 cup of the warm water. Add sugar, let stand until yeast has dissolved.

2. Stir in remaining water, milk, 3 tbsp of the oil and salt. Add 2 cups of the flour and beat with a mixer at medium speed for about 5 minutes.

3. Stir in olives then 1/2 cup more of the flour to make a soft dough.

4. Turn out onto floured surface and knead until smooth and satiny (10-12 minutes), adding just enough of the remaining flour to prevent sticking. Turn dough into a greased dish and let rise 1 hour or until doubled in bulk.

5. Punch down and let rest for 10 minutes. Divide dough in half and roll and stretch it out into two 8" by 10" rectangles. Place on greased baking sheets, cut diagonal slashes into two rows right through the dough. Open the slits by pulling them apart.

6. Brush loaves with remaining 1 tbsp of olive oil. Let stand 15 minutes, until dough looks puffy. Bake in a preheated 425°F oven for 15 to 20 minutes. Serve warm.

Tuesday, April 17, 2007

Cinnamon Bread


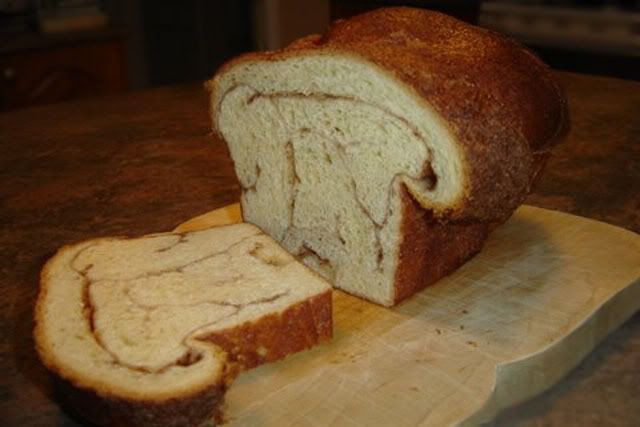
When we were in Belize in March, we found ourselves almost daily at an amazing little bakery in San Pedro called Casa Pandulce. One of my Dad's favorite treats (and mine too) was the Cinnamon Bread. Not quite like your typical Cinnamon Swirl Bread, this huge loaf was loaded with cinnamon, which ran through the bread like veins in a random pattern. The bread itself was light yet heavy enough to make it suberb for toasting. My plan was to duplicate the Cinnamon Bread, so I could give a loaf to my Dad for his birthday on April 15. I've already made one flopped attempt and those two loaves are sitting in my freezer waiting to be turned into a blog post about bread pudding or french toast.

This second attempt was more successful, although it still doesn't look as good as the original. My Dad sent me an e-mail yesterday to say the bread was great. He also sent the picture above that he took right before he toasted the bread for his breakfast. Happy Birthday Gramps!

Cinnamon Bread


6 cups white flour
1 package (2 1/4 tsp) dry yeast
1/4 cup warm water
1 cup hot milk
1 1/2 tsp salt
1/4 cup sugar
1/4 cup butter

Cinnamon filling:
1 cup sugar
1 tbsp cinnamon
1/3 cup butter

1. Mix the yeast and 1/4 cup water water in a small bowl and let stand 5 minutes to dissolve.

2. Mix 3 cups of the flour, salt and sugar.

3. Heat milk and butter in saucepan until butter melts and the liquid reaches a temperature of 115 to 125 degrees.

4. Add the dissolved yeast and the milk mixture to the flour and mix well. Add two more cups of flour and turn out onto floured board. Knead for a minute or two and let dough rest for 10 minutes.

5. Resume kneading, adding just enough of the remaining 1 cup of flour to prevent dough from sticking to board. Knead for 10 to 15 minutes.

6. Put dough in a large greased bowl, cover, and let rise until double in bulk (about 1 hour).

7. Punch down and divide dough in two. Grease two loaf pans.

8. Mix sugar and cinnamon for filling and melt the butter. Roll dough out on floured surface until it is about 15" square.

9. Paint dough with butter and spread with cinnamon sugar. Scrunch the dough up randomly into a loaf shape. Paint the outside with more butter and sprinkle with cinnamon sugar. Repeat with second loaf.

10. Cover loaves and let rise in a warm place until double in bulk (1 hour).

11. Bake in a 350F oven for 40-45 minutes.