Home Page
Showing posts with label Side Dishes. Show all posts

Tuesday, July 6, 2010

Southwestern Corn Pudding


This is a variation on a recipe that my Mom makes a lot that I really love. I especially like that this one is made in individual ramekins. Although it didn't turn out to be such a hot idea with kids, as they kept burning themselves. Or maybe that does make it a hot idea, just not a very good one! Anyway, a word to wise... let the ramekins cool a bit before you serve them to children or absent-minded adults.

Southwestern Corn Pudding
Adapted from the July/August edition of Vegetarian Times Magazine

1 cup soft breadcrumbs
4 cups fresh or frozen (thawed) corn kernels
4 large eggs, beaten
1 cup sour cream (fat free or low fat is OK)
1/4 cup chopped cilantro
1 small jalapeno pepper, minced
1 tsp salt

1. Grease 8 small (1.2 cup size) ramekins and dust with breadcrumbs.

2. In a food processor, blend up 3 cups of the corn kernels until pulpy. Dump them in a bowl and add the 1 cup of whole kernels.

3. Mix up the beaten eggs, sour cream, cilantro, jalapeno, and salt. Then mix together with corn.

4. Divide evently amongst the ramekins and bake for 30 to 40 minutes at 350F until set and golden.

Wednesday, November 21, 2007

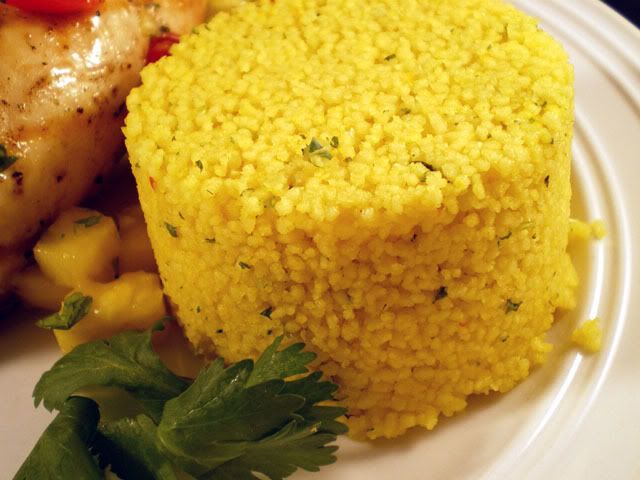
Saffron Couscous


My kids hate couscous, but I love it and I'm selfish, so it really doesn't stop me from preparing it whenever I want. Plus, I figure they are never going to learn to like it unless they are exposed to it a bit.

This time they were complaining, "why is it all yellow?" I explained that the saffron made it yellow and they turned their noses up at that. So I decided that next time I make couscous, I am going to put a few drops of food colouring in it. Maybe I'll make it blue or purple. But knowing my kids, and how illogical they are they'll gobble it up, if it's purple.

Saffron Couscous

1 1/2 cups chicken broth
1 cup couscous
1 clove garlic
1 green onion
2 tbps cilantro
1/8 tsp crush saffron threads

1. Finely chop the garlic, green onion and cilantro. Add to saucepan with chicken broth and saffron.

2. Bring to a boil. As soon as the broth is boiling, add the couscous and remove from heat.

3. Let sit 5 minutes and serve. I always use a 1/2 cup measure as a mold when I am serving it up (and a 1/4 cup measure for the kids).


Friday, October 19, 2007

Baked Zucchini Coins


If you love to order deep fried zucchini sticks in restaurants, then you will LOVE this healthier at home version. You won't even be able to tell they aren't deep fried!

This is the first time I made these at home, and I honestly thought for sure that the kids would love them. Silly me. Normally, I would have "fried" zucchini as an appetizer, but I decided to just serve it as a side dish with some steak and roasted potatoes wedges. We really enjoyed it.


Baked Zucchini Coins

1/2 cup cornmeal
1/4 cup whole wheat flour
1 tsp salt
1 tsp dried basil
freshly ground pepper
1 zucchini
1 egg
olive oil

1. Mix flour, cornmeal, salt, basil and pepper on a plate.

2. Beat egg in a small bowl.

3. Slice zucchini into 1/4" thick coins (you can do sticks, but its easier to brown them more evenly in the over if they are coins because you only have to flip them once).

4. Dip zucchini into egg and then into cornmeal mixture.

5. Coat a parchment lined cookie sheet with a couple of tablespoons of oiive oil. Arrange zucchini coins on cookie sheet and back at 425 for about 10 minutes per side, until golden brown.

6. Serve with bottled blue cheese or ranch dressing.


Tuesday, October 9, 2007

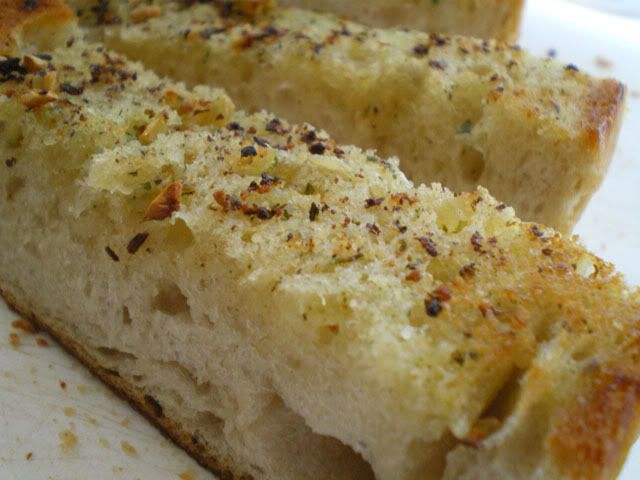
Garlic Bread


I'm not sure that anyone actually needs a "recipe" for garlic bread. Actually now that I think about it, if you DO need a recipe for garlic bread, this site probably won't help you much. Get an easy-bake oven!

I have to be really careful serving bread with meals. The main reason is my daughter, Claire, who is 8. Unfortunately (for her bum when she hits puberty) she is exactly like me! She loves things that aren't good for her, and since she is so young, she hasn't yet developped that well honed self-discipline that I have (yeah right!). So if I put bread on the table with dinner, she will fill herself up on that and forsake her meat and vegetables.

Because of this, I will often use dinner rolls instead of a loaf of bread. I'll put out five small dinner rolls, one each for everyone and two for Mario. On occassion, Claire has tried to fight Mario for that fifth roll. She argues the unfairness of Daddy getting the extra roll. I try to explain to her that a little girl weighing 60 pounds couldn't possibly need to eat as much as big man weighing [marriage-saving-self-censorship kicked in].

Yet sometimes you are eating one of those meals, like lasagna or pasta where it just wouldn't be the same without a nice warm crusty loaf of garlic bread, and this is how I usually make it.

Garlic Bread

1 loaf dense crusty French bread
2 cloves garlic, crushed
1/2 cup butter
1 tsp Mrs. Dash seasoning
zest of one lemon

1. Cut loaf in half lengthwise.

2. In a microwave dish melt butter, stir in crushed garlic and lemon zest.

3. With a pastry brush, spread garlic butter all over bread. Let it soak in a bit.

4. Sprinkle with seasoning. (At this point, you can freeze half of the loaf for later).

5. Place loaf on a cookie sheet and bake at 350F for about 15 minutes. Turn on broiler and continue baking another 2-3 minutes, until sliced top is nicely browned.


Friday, September 21, 2007

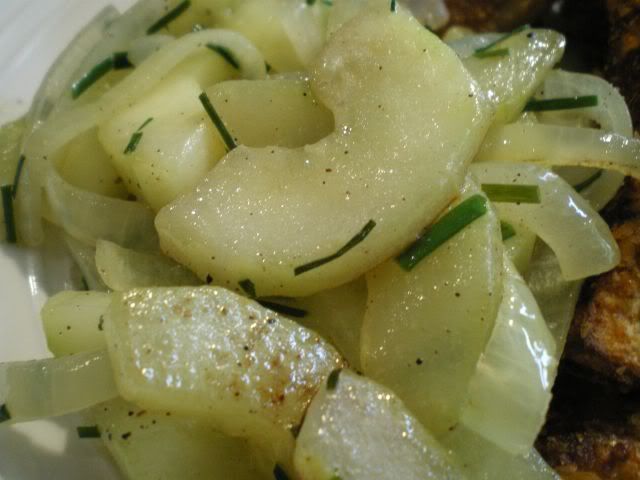
Braised Cucumbers


This is just a nice simple and refreshing side dish that I like to make sometimes. Claire and Marco actually both really like cucumbers so its a good way to get green stuff into them. I served this for dinner the other night with oven baked sweet potato fries and Shake n' Bake chicken thighs. Yes you read that right, Shake n' Bake from a package. Even I get lazy once in a while, you know.

Braised Cucumbers

1 large cucumber
1 tbsp butter
1 tbsp olive oil
1 small onion
salt and pepper
1/4 cup chopped chives

1. Peel cucumber and slice lengthwise. Scoop out seed and chop into slices.

2. Slice onion into thin rings.

3. Saute onion and cucumber in butter and oil over medium heat for about 10 minutes or until soft. Season with salt and pepper and add chives.


Tuesday, September 11, 2007

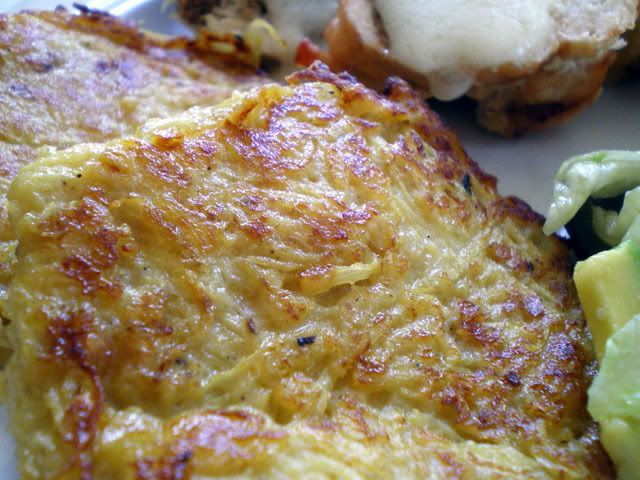
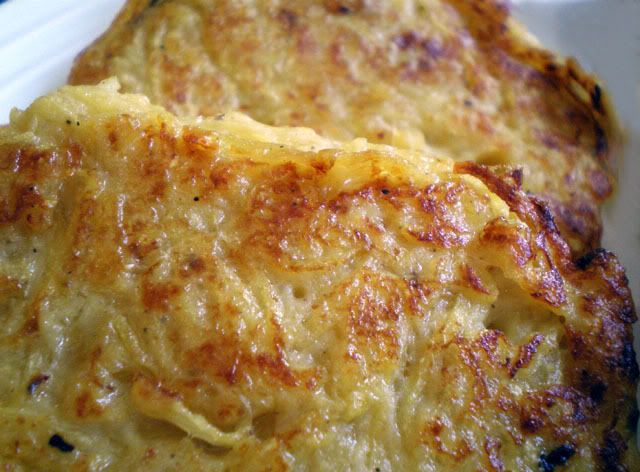
Spaghetti Squash Fritters


I made this recipe the other night when I was scrambling for a side dish to go alongside some stuffed pork tenderloin that I made. I was a little low on veggies in the house, but I happened to have half of a spaghetti squash on the verge of becoming blue and fuzzy . I had the idea of making spaghetti squash fritters. I used almost the exact same recipe that I nornally use to make Potato Pancakes. The differences were that I cooked the spaghetti squash first, and I added more flour and omitted the sour cream because the mixture already seemed wet enough.

These fritters were very nice tasting. The consistency was a little soft and they didn't get as crispy as I had hoped, but the kids ate them, and I think it was the first time I've been able to get them to eat any sort of squash (except for when I make cream of pumpkin soup in the fall).


Spaghetti Squash Fritters
makes about 8 fritters

1/2 spaghetti squash
1 egg
1/4 cup flour
salt and pepper
small amount of oil for frying (I used cooking spray)

1. Cook spaghetti squash by placing cut side down on a baking sheet at 375F for 45 minutes.

2. Remove the flesh from the spaghetti squash by raking across the sqash sideways with a fork.

3. Mix the squash with one beaten egg, flour and salt and pepper.

4. Drop by about 1/4 cup spoonfuls onto a hot frying pan. Flatten slightly with a spatula and fry on each side until golden brown.


Saturday, September 1, 2007

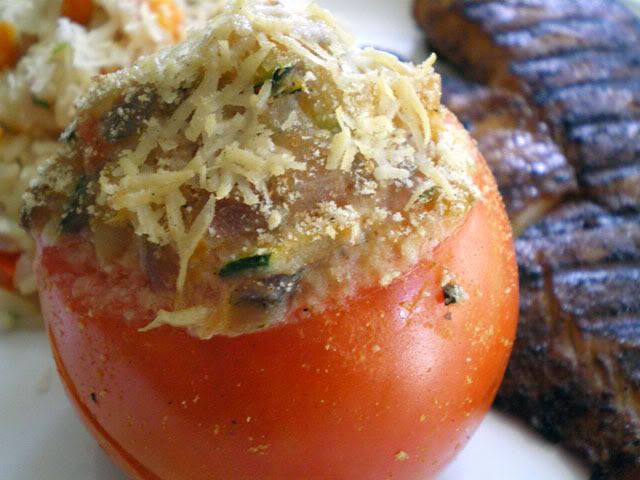
Stuffed Tomatoes


I wanted to make some stuffed tomatoes to go alongside my Snapper with Coffee Butter, and I had a basket of nice local tomatoes in the fridge... but not much else. So I had to improvise with what I had on hand. In the end I was very pleased with the result.

The kids didn't want to eat them so I gave them spoons and they just scooped out the insides. But I think the joke was on them, because the inside stuffing was loaded with vegetables and even more tomato...

Stuffed Tomatoes

4 medium tomatoes
1 tsp olive oil
1 onion, finely diced
1 small zucchini, grated
2 cloves garlic, minced
1 tsp dried basil
1/4 cup ricotta cheese
salt and pepper
1/4 cup Parmesan cheese
2 tbsp dried breadcrumbs

1. Slice one end off the tomato and scoop out the insides (I actually slice the bottom off, so they will stand without toppling). Chop the insides up and reserve.

2. Saute zucchini, onion and garlic in 1 tsp oil until tender.

3. Add reserved chopped tomato, basil and salt and pepper to taste. Stir in the ricotta.

4. Stuff the tomatoes and sprinkle with Parmesan and breadcrumbs.

5. Grill on barbecue for 10-15 minutes (note: I brought them inside and put them under the broiled for an addition minute to brown the tops).


Friday, August 24, 2007

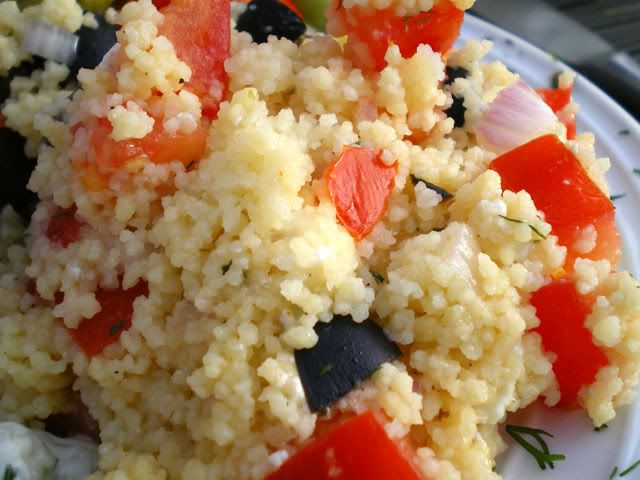
Couscous with Tomato and Olives


I can't tell you how much I love couscous. I only really discovered couscous about 2 or 3 years ago, but since then I can't get enough. I make it during the week, just about anytime I would have previously cooked rice, because couscous is simple and lightening quick. You just add boiling water and let it sit for 5 minutes. Voila. Done. You can add anything that tickles your fancy. Make it with stock instead of water, add garlic, veggies, lemon, white wine. Anything. Once I made it with apple juice and added cinnamon and raisins to go with a pork roast. Yum!

This is the couscous that I made to go along with the lamb chops that I posted yesterday. I wanted it to have a sort of Mediterranean feel so I added a lot of the things I would normally put in a Greek salad. It turned out perfect. The leftovers of this dish we ate cold the next day as a salad and it was equally good that way.

Couscous with Tomato and Olives

1 1/2 cup water
1 cup couscous
2 tomatoes, diced
1/3 cup feta cheese, crumbled
1/3 cup Kalamata olives, pitted and chopped
1/4 cup red onion, chopped
2 tsp fresh dill, chopped
1 tbsp fresh lemon juice
2 tbsp olive oil
salt and pepper to taste

1. Bring water to a boil. Add couscous, cover and remove from heat. Let stand for about 5 minutes.

2. Meanwhile, in a bottle mix together the dressing (olive oil, lemon juice, dill, salt and pepper). Shake the bottle well to thicken the dressing.

3. Add onions, tomatoes, feta and olives along with dressing to the couscous. Stir to combine. Serve immediately.


Friday, August 3, 2007

Marinated Grilled Vegetables


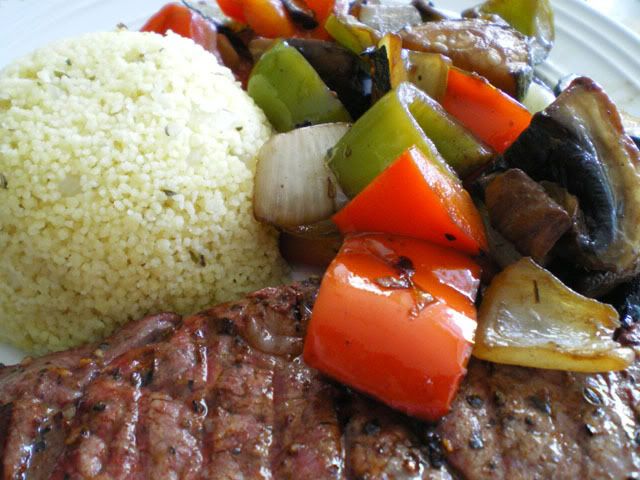
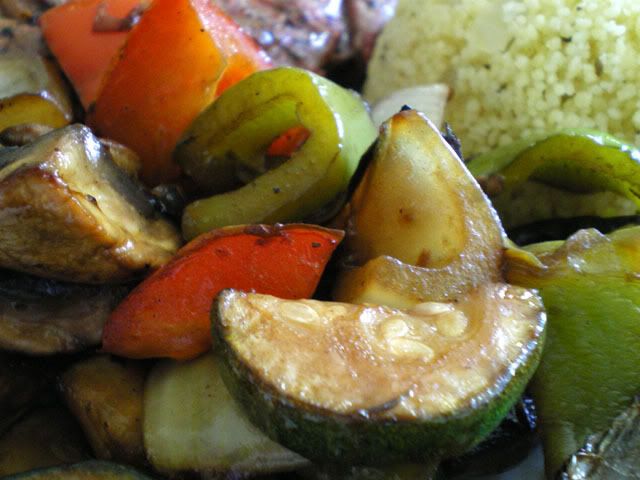
We went over to dinner at some friends of ours last weekend, and they served some marinated grilled vegetables. They were very good, and it reminded me that I haven't made them yet this summer. Shame on me! Barbecue season is half over!

So I hauled out my own recipe for grilled vegetables and had them Tuesday night with steak and couscous.

Marco, my 4 year old, said (and you really need to picture him when he's talking, his eyes are all wide and he gestures with his hands, and he is DEAD serious)... so he said, "Mommy... these vegables are ossable!.... O-SSA-BLE!"

.....uh, thanks??

So, is that good? I really don't know, he ate half of them, plus all his steak and all his couscous. This was enough to earn him one cookie for dessert. We have a "two cookie rule" at our house. Two cookies is a serving, for everybody - kids and grown-ups. If you eat all your dinner you get two. If you don't eat all your dinner, but you made a good effort and you at least TASTED everything, then you get one cookie. No effort, gets you nothing (just like life in general).


Marinated Grilled Vegetables
also known as "Ossable Vegables"

1 medium zucchini, sliced
1 red pepper, chopped large
1 green pepper, chopped large
1 medium onion, chopped large
6 med-large mushrooms (quartered)
1/4 cup olive oil
1/4 cup soy sauce
1/4 cup fresh lemon juice
1 clove garlic, crushed
Salt and Pepper

1. Mix marinade (last 5 ingredients) and pour over vegetables in a large bowl.

2. Let sit for at least 30 minutes.

3. Grill on BBQ in a grill basket (if you don't have one, you can stick the veggies on skewers) for about 15 minutes in grill basket.


Monday, July 30, 2007

Penne with Mascarpone and Walnuts


I had a really nice weekend. Mario and I were invited to a dinner party Saturday night, so I got to eat a fabulous meal (prepared by somebody else - YAY). On Sunday, I got to meet a fellow food blogger from Ottawa. I got together with Quellia from All Things Edible for a coffee and a nice chat. It was really nice to hang out with somebody who understands this weird food blogging obsession of mine!

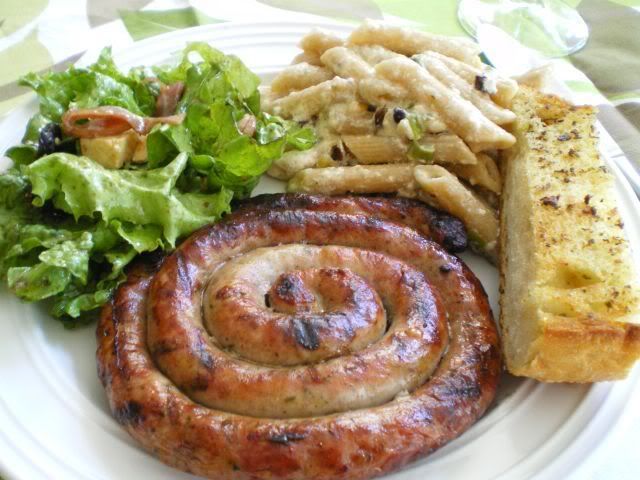
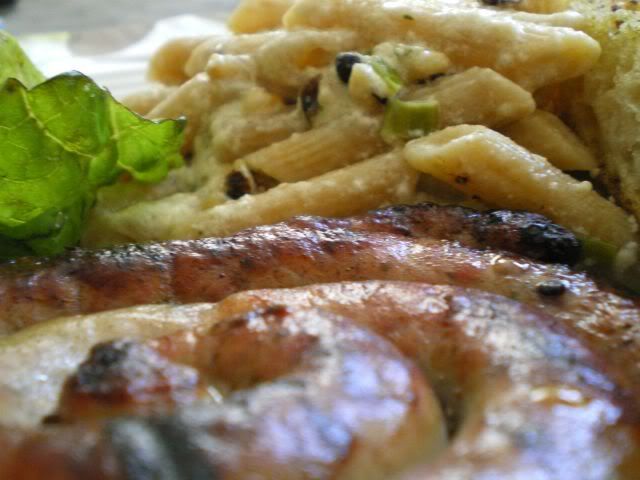
I actually didn't end up doing that much cooking this weekend, so I had to go back to last week to find something to post this morning. This was our dinner Thursday night, and you don't hear me say this too often.... the kids loved it. This was the first time we had these Barese sausages, we really enjoyed the flavour and the kids were drawn to the spiral shape. There is absolutely no recipe to go along with the sausages, we just grilled them on the barbecue.

The sidedish, however, was a nice creamy pasta that I made because I needed to use up the rest of the tub of Mascarpone that I bought to make the Mascarpone, Fig and Proscuitto Bruschetta. The pasta was delicious.


Penne with Mascarpone and Walnuts
adapted from Better Homes and Gardens Website

6 oz dry whole wheat penne
1/4 cup chopped green onion
1 tbsp butter
4 oz marsarpone cheese (you could also use cream cheese)
1/4 cup freshly grated Parmesan
1/4 cup chopped walnuts
freshly grated pepper

1. While the penne is boiling, heat the butter in a saucepan and cook green onions for about a minute.

2. Add cheese and stir until melted. Stir in Parmesan and walnuts.

3. Drain pasta and toss with sauce. Season with freshly ground pepper.


Wednesday, July 25, 2007

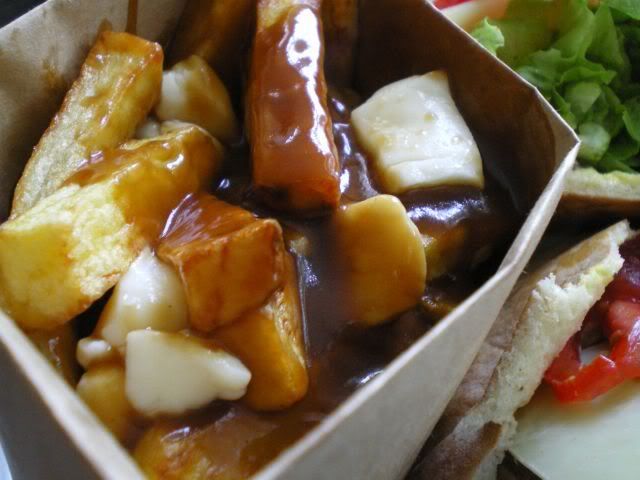
Poutine


Several weeks ago, I was tagged by Cherry at Diet-Meals-Recipes to write about my favorite food. It took me a while because frankly, you just can't go around whipping up an order of Poutine everyday. I also, don't know if I need to point out the irony of a blog dedicated to healthy eating and dieting encouraging me to prepare and consume one of the most unhealthy (blissfully unhealthy) foods on the planet. But I would like to thank Cherry for helping me to rationalize eating this meal!

Poutine is my all-time favorite food. No joke, if I had to pick my "last meal" this would be it. It is the perfect food to eat at a chip wagon at 3:00 in the morning, it is the perfect hangover cure, and it is the perfect food to satisfy pregnancy cravings (warning: eating Poutine 3 times a week while pregnant may cause excessive weight gain - and that little nugget was provided from a position of great authority on the topic).

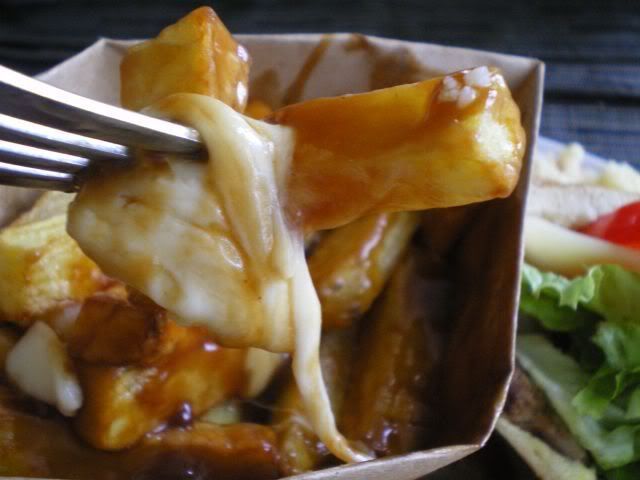
Poutine, for those who don't know, basically consists of french fries, fresh cheese curds and gravy. The best Poutine will be made with thick, fresh cut french fries, real cheese curds (not grated mozzarella) and a beef veloute sauce. If you have never had Poutine, my advice is DO NOT make this recipe. Once you get a taste of this, you will be hooked like me.


Poutine
makes 4 side servings or 2 main servings

4 large russet potatoes
oil for deep frying
salt
2 cups beef stock
1/4 cup butter
1/4 cup flour
1 1/2 cups cheese curds

1. Peel and slice the potatoes into thick fries (at least 1 cm thick).

2. Soak the potatoes in ice water for about 30 minutes. Remove and drain well.

3. Heat oil for frying to about 325F and deep fry potatoes for about 8 minutes.

4. Remove from oil and set on paper towel. Turn the oil up to 375F.

5. In a saucepan melt the butter and stir in the flour. Add the beef broth and stir over medium-high heat until thickened. Reduce heat and keep hot. (I use a tiny bit of gravy browning to get that nice dark colour).

6. Return the french fries to the oil and continue frying until golden and crispy. This should take about 5 more minutes. Remove fries to drain on paper towel and salt to taste.

7. Assemble the poutine quick while everything is still HOT. (Poutine is best made in a bowl or other container which will contain the heat and help melt the curds. Also, the curds should be at room temperature before assembling the Poutine). Start with a layer of fries. Put some cheese curds in the middle. Add more fries and top with more cheese curds.

8. Ladle gravy over the fries and cheese curds.

Tuesday, July 17, 2007

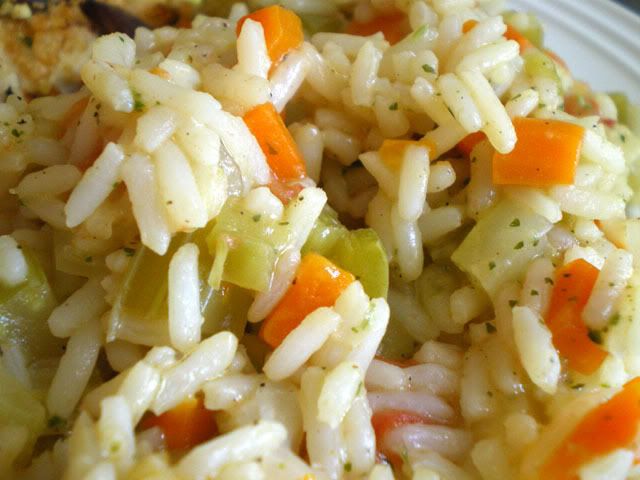
Rice Pilaf with Walnuts


Yesterday, Pam from Sidewalk Shoes left a comment asking for the recipe for the Rice Pilaf that I served as a side dish with my Crunchy Lime Tilapia. I wasn't planning on posting it (hence the strangely microscopic zoomed in picture of 7 grains of rice). But what the heck, I've always said that I take requests...

Rice pilaf is something that I make often, yet I rarely follow the same recipe twice. Even this recipe is already lost. In fact I literally tore my house apart looking for it after I got the request for the recipe. I printed it off the internet, but I can't remember where I got it from. I did make some changes to the original recipe, so at least it isn't a blatant rip off from somebody else's site (I'm really sorry if it is yours).

Here's my change.... I hate peas (gasp... don't tell my kids, PLEASE) so I left them out!

Rice Pilaf with Walnuts

1 small onion, diced
1 tablespoon olive oil
1 stalk celery, diced
2 carrots, diced
1/2 green pepper, diced
1/2 cup green peas (yuck! It was hard for me to even TYPE that)
1 tomato, seeded and diced
1 cup rice
2 cups chicken stock
salt and pepper
1/8 cup toasted walnuts
1/4 cup fresh parsley, chopped

1. Saute onion, celery, carrots, green pepper in olive oil for 2-3 minutes until onion is translucent.

2. Add rice, chicken stock, and tomato (and peas, if you must). Bring to a boil and let simmer, covered for about 20 minutes (or until rice is tender and liquid is all absorbed).

3. Fluff with a fork and stir in toasted walnuts and parsley. Season with salt and pepper (I used homemade chicken stock, but if you use powdered go easy on the salt).


Friday, July 13, 2007

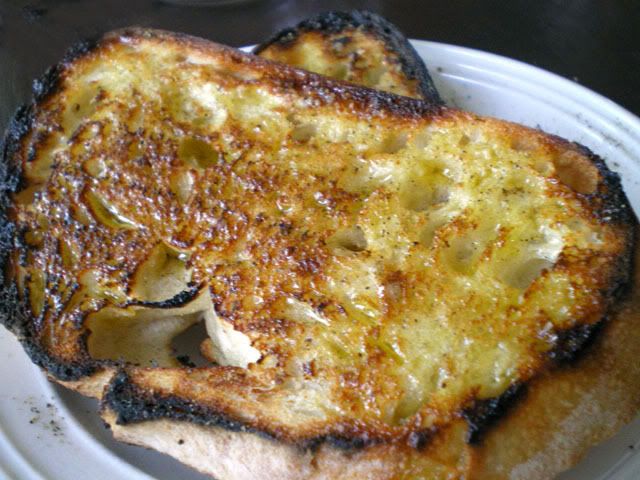
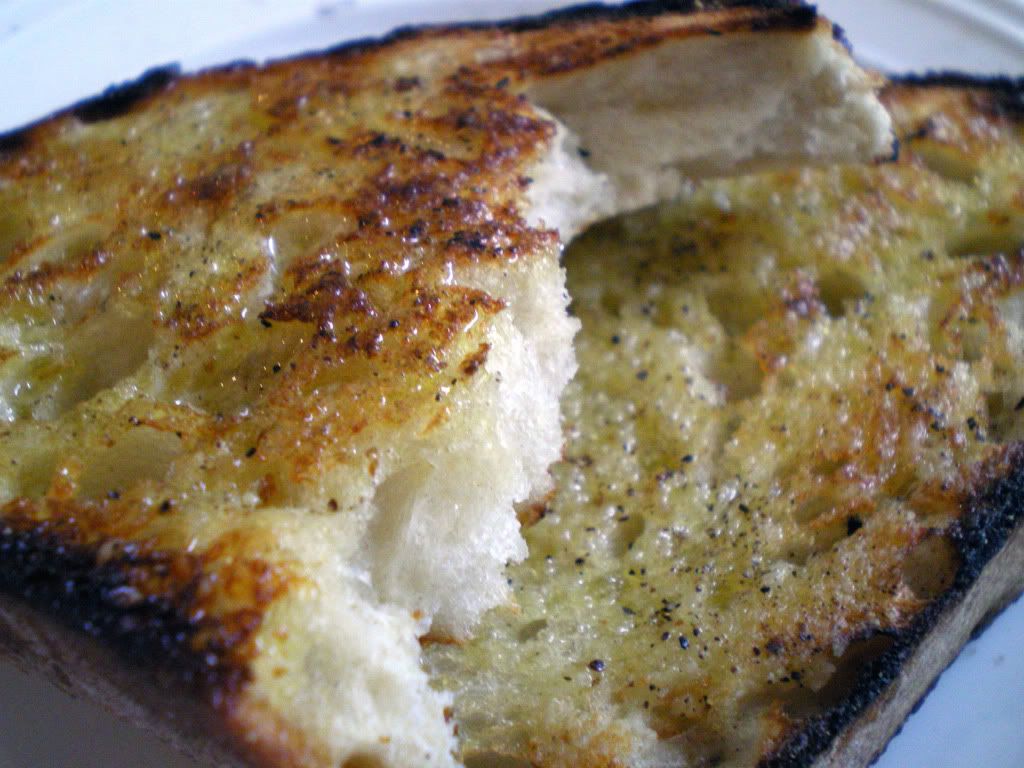
Garlic and Olive Oil Bruschetta


I feel like I am cheating today for posting this recipe. It is not even really a recipe, it is more like an idea and it wasn't even my idea. I guess it was some old Italian person's idea. But, boy was it ever a GOOD idea!! This is "authentic" bruschetta. Although my Bruschetta with Tomatoes is also really good, I actually prefer this more simple bruschetta as a bread to go alongside pasta. The tomato bruschetta is nicer as a starter dish.

This is something that I should do more often, we always have the ingredients around, but I tend to forget about it sometimes. Then every couple of years, I will remember that I haven't made it in a while, and we will we eat it every other night for a month! Then I'll forget about it again for a while. Well right now we are on another Garlic and Olive Oil Bruschetta kick.

We grill the bread on the BBQ and then let everyone fix it themselves so they can control the amount of garlic and oil that goes on it. It is so good, you really have to try it.


Garlic and Olive Oil Bruschetta

1 loaf crusty italian bread
peeled whole garlic cloves (allow about 1 per person)
olive oil (I put some in a bowl on the table with a brush)
freshly ground pepper

1. Slice bread into nice thick 3/4" to 1" slices.

2. Grill bread on the Barbecue (or alternatively broil it in the oven) until is it nicely browned on both sides.

3. Rub each slice with a clove of garlic (I rub until the garlic is about half worn down).

4. After the garlic, brush with olive oil and sprinkle with pepper.


Tuesday, July 3, 2007

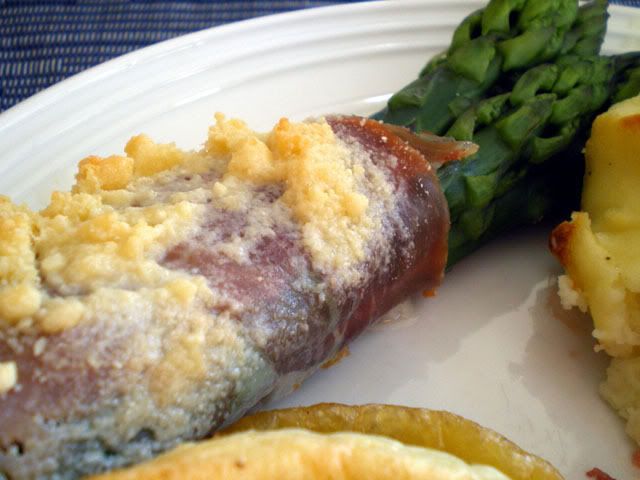
Asparagus wrapped with Proscuitto


Mario and I went to a cottage party this past weekend with about 15 friends (and no kids - YAY!). Each couple brought their own food... things like souvlaki, kebobs, pasta salad, green salads, chicken breasts... People were commenting, "remember back in the day when we used to bring only hotdogs and hamburgers? We must be getting old, everyone brought VEGETABLES". Pan over to Mario and I... we brought hotdogs, hamburgers, and canned beans. Well my excuse is that not only was I taking the weekend off from blogging and being a Mom, I was taking the weekend off from cooking too!

To redeem myself in the eyes of my peers, I have decided to post a vegetable recipe today.

I like this recipe for serving to guests because you can parboil the asparagus ahead of time and then get it all ready to pop into the oven for 5-10 minutes just before dinner is served. Actually, I have been making this recipe for so long that I do it from memory. I guess that was a bad thing, because when I dug out the original recipe to type out for this post, I noticed that I was supposed to dust the finished product with paprika. This is a step that must have gotten lost over the years, but the picture in the recipe book sure did look purty.

Asparagus Wrapped with Proscuitto
from Williams-Sonoma "Vegetables"

16 Asparagus Spears
4 thin slices Proscuitto
2 tbsp butter
freshly ground pepper
1/2 cup grated Parmesan
1/2 tsp paprika
1 lemon quartered.

1. Fill a frying pan with enough water to cover the asparagus and bring to a boil.

2. Trim the asparagus and add to the boiling water. Cook uncovered for about 3-4 minutes.

3. Divide asparagus into bundles and wrap 1 proscuitto slice around the middle of each bundle.

4. Place the bundles in a greased casserole dish. Dot with butter and sprinkle evenly with cheese and pepper.

5. When you are ready to serve, bake at 350°F for 5-10 minutes until cheese starts to brown. Remove from the oven and dust with paprika. Serve with lemon wedges.

Saturday, June 30, 2007

Fajitas and Spanish Rice


Yesterday, one of my new friends in the blogging world wrote an incredible review of my site, and I am just so excited about it that I wanted to share it with everyone. Please visit KeMari's site to check it out... Phattitudes.

OK - well that is probably enough horn-tooting for one day (I'm awesome - sorry that slipped). I was thinking that since I started this blog (I rock - oops) in March I haven't missed a daily post yet. But, I am going to be away until Monday at a Canada Day weekend cottage party, and so I am hoping that for the next two days I will be too tipsy to type out my blogger ID or password. But don't worry, I will leave you with a couple of recipes to keep you busy in your kitchens until I'm back.

This was a simple weeknight dinner that we had on Wednesday. This meal highlighted an interesting phenomenon... When I serve out a healthy plate of dinner for my kids, they whine and moan about eating the vegetables or "green stuff" and often leave a lot of the best parts behind. But when I put everything out in the middle of the table, for a serve yourself type meal, they pile everything up onto their plates... and then EAT it all!! Maybe it has something to do with giving them the power to decide themselves what to eat that encourages them to make wiser more mature choices... who knows, I won't question it too much.

This Spanish rice is a really nice dish, I tried several versions of a spanish/mexican style rice before I found this recipe and I've been making it ever since. I have also included the recipe for the guacamole. I did make the salsa too, but I had to make a few substitutions because I didn't have all my usual ingredients on hand, so I will wait until the next time I make salsa to post that recipe.

Beef and Chicken Fajitas

2 boneless skinless chicken breasts
1 lb steak (I used sirloin)
1 tbsp olive oil
Mexican Seasoning Mix
1 onion
1 green pepper
10 6" flour tortillas

1. Wrap tortillas in foil. Place a couple of sheets of dampened paper towel in with them to prevent them from drying out. Place foil packet in the oven at about 300°F to warm up while you get everything else ready.

2. Slice chicken and beef into strips. Sauté chicken in olive oil until almost cooked.

3. Add green pepper and onion. Sauté until soft.

4. Add beef and cook until desired doneness. Sprinkle with Mexican seasoning mix to taste. Keep warm.

5. Serve with warmed tortillas, sour cream, grated cheese, salsa and guacamole (recipe follows).


Guacamole

3 ripe avocados, peeled
1/4 cup sour cream
1/4 tsp salt
1/8 tsp pepper
1/4 tsp hot sauce
1/4 tbsp garlic
2 tbsp chopped onion
1 tbsp lemon juice (or more if you like it tangy)

1. Place avocados, sour cream, salt, pepper, hot sauce garlic and onion in a food processor. Process until smooth.

2. Add lemon juice to taste.


Spanish Rice

2 cups water
1 1/2 cups chopped green pepper
1 cup chopped onion
1 tsp salt
1 can (28oz) diced tomatoes
1 1/2 cups rice
2 tsp chili powder
1/4 tsp black pepper
dash hot sauce
fresh cilantro
1/4 cup grated Monterrey Jack

1. In a medium saucepan combine water, pepper, onion, and salt. Bring to a boil and simmer for 5 minutes.

2. Stir in undrained tomatoes, rice, chili powder, black pepper, and red pepper sauce.

3. Return to boil and simmer covered for 20-25 minutes until rice is tender and liquid is absorbed. Place rice in a serving dish and sprinkle with Monterrey Jack cheese.


Wednesday, June 20, 2007

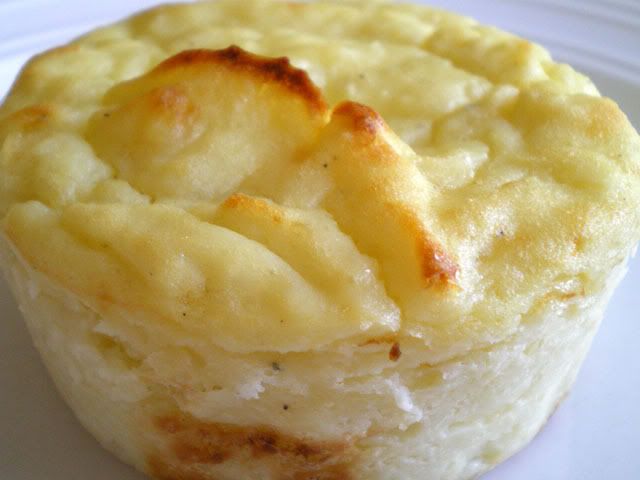
Mashed Potato Puffs


If you only ever try one recipe from my blog, let it be this one.

This is by far the best mashed potato recipe I've ever tasted. I got this recipe originally from my mother-in-law and then one day surfing around, I found the exact same recipe on the LCBO Food and Drink Website. I made this recipe many many times before I managed to get it right, but I'm glad I kept trying.

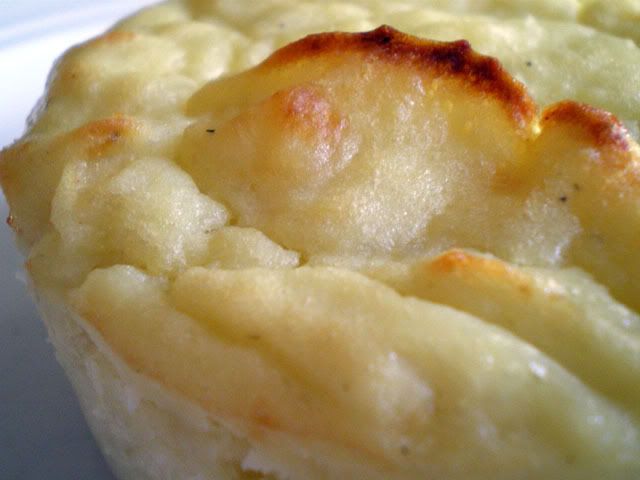
The eggs in this recipe make the potatoes puff up and become light and fluffy. You can make this in a casserole dish, or in individual muffin tins, or ramekins as I did. This is also something that you can make ahead quite easily.

My first tip is to weigh the potatoes. The recipe calls for three pounds, so don't guess.... "well there's 10 potatoes in this 5 lb bag, so divided by 5 equals 2 potatoes times 3 equals 6 potatoes".... don't do that! That is calculus, not cooking! The consistency of the potato mixture before you cook it should be a little runny and if you use too many potatoes it won't work right.

Another tip, is to cook this at high heat 450°F, the original recipe calls for a much lower temperature and I found the eggs didn't puff up enough, and the cottage cheese didn't quite melt (you could still detect curds of cottage cheese in the mashed potatoes). This recipe will serve about 8 people (the LBCO recipe says FOUR people, but I don't know who those people would be - giants maybe).


Mashed Potato Puffs
adapted from LCBO Food and Drink

3 lbs potatoes, peeled
1 cup cottage cheese
4 eggs
1/4 cup butter, softened
3 green onions, diced (white part only)
salt and pepper (use white pepper if you don't want flecks)

1. Boil the potatoes well. Boil the crap out of them. Drain and return to the burner. Continue to cook the potatoes over low heat for about 5 more minutes (stir so they don't stick) this will get all the extra water out of the potatoes.

2. Mash the potatoes very well. We want NO LUMPS. I put the potatoes through a potato ricer which takes care of that nicely.

3. In another bowl, with a hand mixer, beat the eggs, butter and cottage cheese until fluffy. Add in the potatoes and onions and beat with hand mixer until all mixed together.

4. Put the mixture into a greased casserole dish, or muffin tins. This is where you can let it cool and refridgerate, if you are making them ahead (let them come back to room temperature before baking though).

5. Bake in a 450°F oven for about 25 minutes (a little more if you are making them in a big casserole dish). The potatoes should puff up and get a little brown on top.

Sunday, June 17, 2007

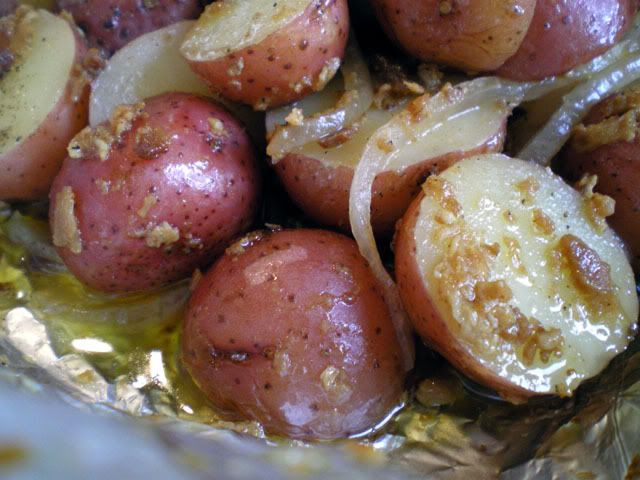
Barbecued Potato Packets


In yesterday's post for Lamb Shoulder Chops, I left everyone with a bit of teaser about what was contained in all of the other foil packets on the barbecue. The first two packages had the Lamb Shoulder Chops. The third packet had this potato recipe, and the last had dessert, which was a Cape Cod Apple Pudding (I will post that tomorrow).

These potato packets were good and tasty. The kids loved them, even though Marco isn't usually much of a potato fan. My Mom often used to make potato packets on the barbecue with sliced potatoes, sliced onions, salt, pepper and butter. I decided to jazz things up a bit with this recipe and so I added bacon and Parmesan.

I did make one mistake, I thought I'd be "professional-ish" and just pour the olive oil onto the potatoes straight from the bottle like the TV chefs do, you know, "and just add about a glug or two of olive oil". Issue was my olive oil bottle went glug....glug....glug glug glug..SPLAT. I have no idea how much I put on, but it was WAY too much. I think about 2 tablespoons would have done the trick.


Father's Day Poll Update: The winner of the Father's Day Poll in the side bar was Prime Rib with Yorkshire Pudding with 41.2% of the vote. And so I am off to the butcher to find a nice prime rib. I am also happy to report that this was Mario's preferred dinner, so he is pleased. Thanks for voting! I'll post the Father's Day Recipes sometime this week.

Barbecued Potato Packets

20 mini red potatoes
6 slices bacon, crumbled
1/4 cup Parmesan cheese, grated
1/2 red onion, sliced
2 tbsp olive oil
salt and pepper

1. Wash potatoes and cut in half. Place potatoes and remaining ingredients into foil packets.

2. Place on grill over indirect heat for 1 hour. Be careful when you are opening the packet!

Tuesday, May 29, 2007

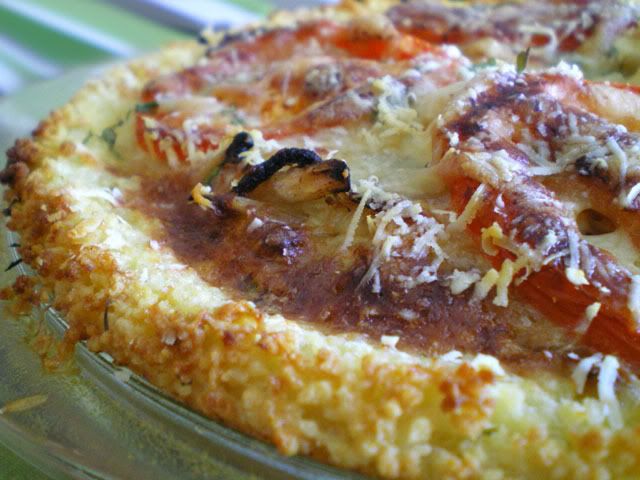
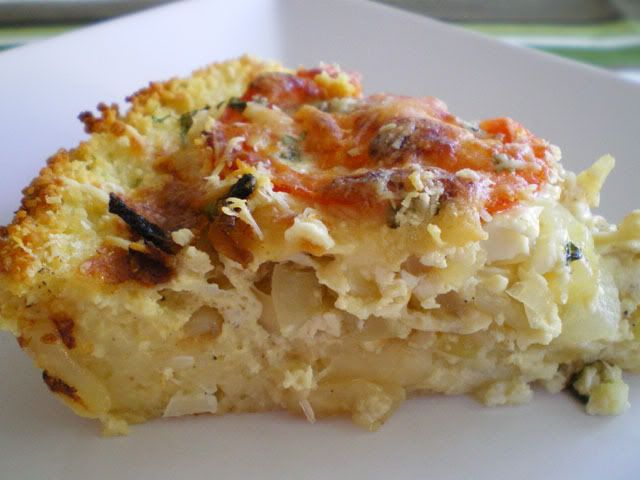
Onion and Wild Garlic Quiche with Parmesan in a Couscous Crust


Before I proceed with the description of this recipe, let me apologize for the uninspiring recipe name. Whenever I come up with my own creations, I seem to hit a road block when it comes to naming them. I usually end up with something that looks more like an ingredient list. In fact, I am lucky I didn't settle on "Quiche in a Couscous Crust with 2 cups Onion, 25 bulbs Wild Garlic, 3/4 cups milk, 3 eggs, 1/2 cup Parmesan..."

I came up with the idea for this recipe because I was racking my brain trying to come up with a way to use up the 2 cups of leftover couscous that I had in the fridge. Efficient use of leftovers is NOT one of my strong points. That is why the food event "Leftover Tuesdays" hosted by Pam at Project Foodie, is going to be a good thing for me. If you ever see a tupperware container in my fridge, immediately SHUT the door and slowly BACK AWAY... then run for your life!

I am sure that people are wondering what happens to all of the food that this blog generates, especially since every post seems to end with "my kids wouldn't eat this". Unfortunately I just don't like eating leftovers re-heated in the microwave. Once I've tried a new meal, I want to move on to a new and exciting recipe. But if you can take your leftovers and turn them into an entirely new dish? Now you're talking!

Only, I had half this Quiche leftover... my kids wouldn't eat it. sigh.


Onion and Wild Garlic Quiche with Parmesan in a Couscous Crust

2 cups leftover Couscous
1 tbsp butter
2 cups thinly sliced onion
25 bulbs wild garlic
1 tbsp olive oil
1 tsp Dijon mustard
3 eggs
3/4 cup milk
1/4 cup Mozzarella
1/2 cup Parmesan
4 slices tomato
salt and pepper

1. Mix 1 tbsp butter with leftover Couscous (note: the couscous I used was originally cooked in vegetable broth with white wine and lemon juice with chives).

2. Dump the couscous into an 8" pie plate. Press it down and up the sides of the dish.

3. Saute the onion and garlic in a little olive oil (note: if you are substituting regular garlic, DO NOT use 25 cloves. Wild Garlic is much milder. I would suggest maybe 2 cloves, and I would mince them).

4. Spoon onions and garlic into the couscous crust.

5. Mix together the milk, eggs, Dijon, 1/4 of the Parsmesan, and salt and pepper. Pour over the pie.

6. Top with tomato slices, then remaining Parmesan, Mozzarella and cilantro. Bake at 350F for about 45 minutes, or until set and the edges have started to brown. Serve small wedges as a side dish, or with a salad for lunch.

Wednesday, May 16, 2007

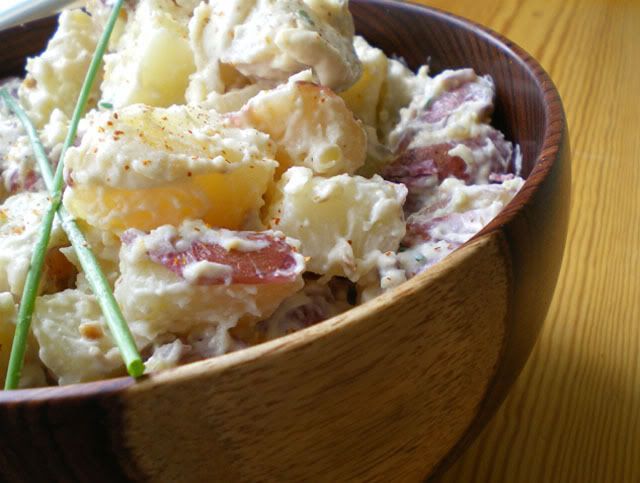
Caesar Potato Salad


I wanted to make a nice potato salad on the weekend to go alongside the BBQed steak I served when my Mom and Dad came to dinner. I do have a regular potato salad recipe that uses a can of cream of celery soup, but I was also trying to think up a recipe that I could submit to my next blog event. Hay Hay its Donna Day 12 is being hosted by Katie B over at Other People's Food and the theme this month is "Caesar Salad". So I decided to combine my love of potato salad with my love of Caesar salad.

This actually turned out quite nicely (which still sometimes surprises me, when I don't follow a recipe and try to create a dish all on my own). It really did taste like Caesar Salad, but with potatoes. I thought it might also be nice to add some cooked sliced chicken breast and serve this on a bed of Romaine lettuce, as a meal in itself.

I started off by mixing the sauce, and I ended up making about twice as much as I needed for the amount of potatoes that I made. I will post the full amounts, so I don't screw anything up in the conversion, but unless you are having a BIG potato salad party, you might consider cutting this in half. Then again, leftover potato salad is not a bad thing. One more note: I used light miracle whip in the dressing, but if I was actually making this for guests (Mom and Dad don't count as guests), then I might have used "real" mayo, and I think it would have been even better! I usually make a comment about whether or not my kids liked the recipe, but I honestly can't remember, I guess I was too busy stuffing my pie-hole with potato salad and steak to pay attention to them.

Caesar Potato Salad

1 cup mayonnaise
1 cup sour cream
2 tbsp red wine vinegar
2 tbsp chives, chopped
1 tsp dijon mustard
2 cloves garlic, minced
1/3 cup Parmesan cheese, grated
6 slices Bacon, crumbled (about 1/3 cup)
pinch cayenne pepper
salt and pepper
10 medium red potatoes, washed and not peeled

1. Boil potatoes in a pot of salted water about 20 minutes, or until a metal skewer can be inserted easily into the largest potato. Drain and let cool.

2. Mix mayonnaise, sour cream, vinegar, chives, mustard, garlic, Parmesan and bacon. Season with pepper.

3. Chop potatoes into large rough chunks and mix with sauce until all are coated. Sprinkle top lightly with Cayenne pepper.

Saturday, May 12, 2007

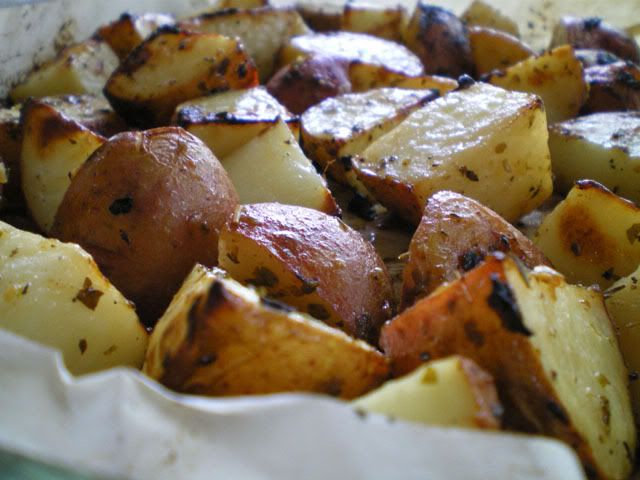
Roasted Greek Potatoes


As promised in yesterday's post, here is the recipe for my Roasted Greek Potatoes. It is one of those recipes that I have been making for so many years (long before I had ever conceived of writing a food blog) that I have no idea who to give credit to. I have always kept the ingredients the same, but have played a lot with the cooking times, and amount of time covered/uncovered to achieve just that right combination of crispy and juicy. I love potatoes in just about any form, but this is one of my favorites because I think they come out just like those yummy potatoes you get when you order Greek takeout.

I have a convection oven, so if you don't you might have to increase the cooking time by about 20 minutes. Lining your baking dish with parchment is a must, or they will stick and you will be scrubbing for a week. Don't skimp on the lemon juice or the oregano. Trust me.

Roasted Greek Potatoes

5 large red potatoes, washed and not peeled
1/3 cup fresh lemon juice
2 cloves garlic, minced
1 tbsp dried oregano
1/2 tsp sugar
2 tbsp olive oil
1 tsp salt
1/2 tsp freshly ground pepper

1. Preheat oven to 375F. Roughly chop potatoes and place in a parchment lined baking dish.

2. Mix garlic, lemon, oil, oregano, sugar, salt and pepper. Pour over potatoes and mix around with a rubber spatula until all are coated.

3. Cover baking dish with foil and bake for 30 minutes.

4. Remove the foil, increase oven temperature to 400F and stir the potatoes around with a rubber spatula.

5. Continue cooking for 30 more minutes, stirring once to make sure all sides of the potatoes get brown. About 5 minutes before they're done, put the foil back on the dish. This softens them up nicely (if you prefer real crispy potatoes, skip this last step).