Home Page

Friday, October 19, 2007

Baked Zucchini Coins


If you love to order deep fried zucchini sticks in restaurants, then you will LOVE this healthier at home version. You won't even be able to tell they aren't deep fried!

This is the first time I made these at home, and I honestly thought for sure that the kids would love them. Silly me. Normally, I would have "fried" zucchini as an appetizer, but I decided to just serve it as a side dish with some steak and roasted potatoes wedges. We really enjoyed it.


Baked Zucchini Coins

1/2 cup cornmeal
1/4 cup whole wheat flour
1 tsp salt
1 tsp dried basil
freshly ground pepper
1 zucchini
1 egg
olive oil

1. Mix flour, cornmeal, salt, basil and pepper on a plate.

2. Beat egg in a small bowl.

3. Slice zucchini into 1/4" thick coins (you can do sticks, but its easier to brown them more evenly in the over if they are coins because you only have to flip them once).

4. Dip zucchini into egg and then into cornmeal mixture.

5. Coat a parchment lined cookie sheet with a couple of tablespoons of oiive oil. Arrange zucchini coins on cookie sheet and back at 425 for about 10 minutes per side, until golden brown.

6. Serve with bottled blue cheese or ranch dressing.


Thursday, October 18, 2007

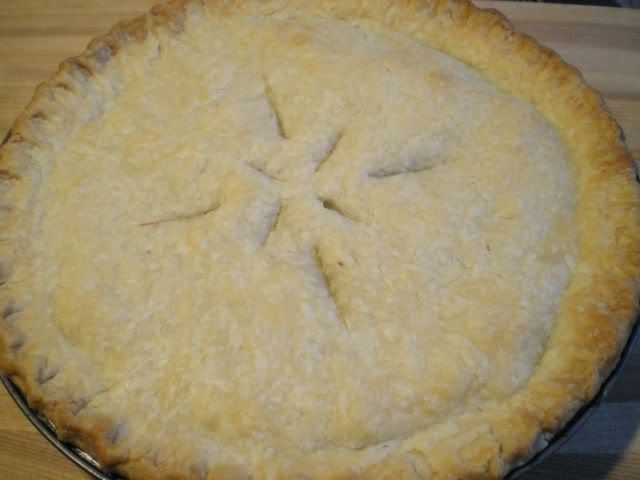
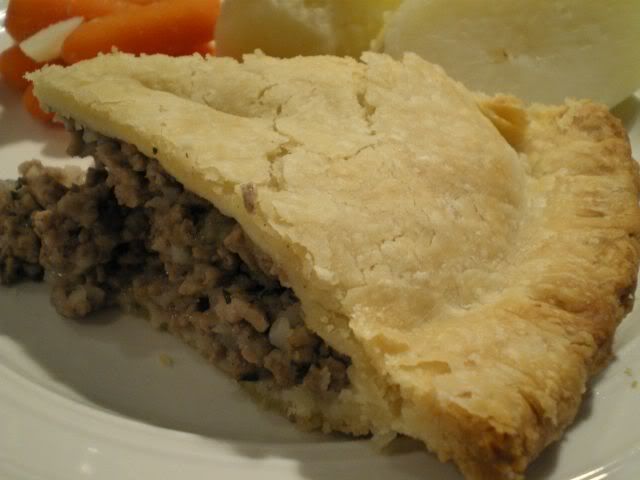
Tortiere


Tortiere is a very traditional dish around this area, and particularily in Quebec. There are several different variations of tortiere. The most common, I believe, is a mixture of ground pork, with onion, celery and seasonings, but some tortieres use a mixture of beef and pork or chunks of meat rather than ground meat.

This is my favorite version of the recipe. Mario's family is French Canadian, and his Mom makes tortiere often. I like mine better and finally, after years of nagging and threatening, I actually got Mario to admit that he likes mine better too, but shhhh.... don't tell his Mom!

This is a major favorite with the kids too. But really what's not to like about ground pork and pastry? I always serve my tortiere with some steamed vegetables and pickled beets.

Tortiere

Double 9" Pie Crust:

2 cups flour
1 tsp salt
3/4 cup vegetable shortening
5-6 tbsp cold water

Meat Filling:

1 1/2 lbs ground pork
1 onion, chopped fine
1/4 cup celery, chopped fine
2 cloves garlic, minced
1 tsp salt
1 tsp ground summer savory
1/3 tsp pepper
1/4 tsp allspice
1 bay leaf
1/2 cup water
1 small potato, boiled and mashed
1 egg yolk
1 tbsp milk

1. Prepare pastry: Cut cold shortening into cubes (TIP: In my pastry I always use a mixture of butter - for flavour, and shortening - for flakiness). Place butter/shortening in food processor with flour and salt. Pulse a few times.

2. Dump flour mixture out into a bowl and start adding water a tbsp at a time until mixture forms a dough that will hold together. Wrap with plastic wrap and refridgerate for about 30 minutes.

3. Make filling: In a non-stick skillet with a cover, cook pork, breaking up the larger chunks.

4. Add onion, celery, garlic and cook until the onions are tender.

5. Add salt, savory, pepper, allspice, bay leaf and water. Cover and simmer for 15 minutes. Remove lid and simmer 5 more minutes until most of the water is gone (it should still be quite moist).

6. Add mashed potato and remove bay leaf.

7. Roll out pastry (TIP: I roll my pastry out between two sheets of plastic wrap, when it is the right size, peel one sheet away and use the other to pick up the pastry and flip it over into the pie plate). Fill with meat mixture, cover with second half of pastry and seal edges. Cut a few vents in the top.

8. Brush top with a mixture of egg yolk and milk.

9. Bake at 425F for 30-40 minutes until golden brown.


Tuesday, October 16, 2007

Calamari with Red Wine and Tomato Sauce


I had a pound of frozen squid rings in the freezer, they've been on my mind for the last week or so as I really couldn't decide how to prepare them. What I WANTED to do with them was bread them and deep fry them, but in the end, I was a good girl and I made this tomato based recipe instead.

It was pretty good, and the kids ate it well. Even the squid. When they asked what it was, I just said "calamari" which sounds a lot more palatable to an 8 year old than "squid". They both ate it up. About halfway through dinner, Claire asked, "Is calamari a fish?" Actually, it is a mollusk (related to the Octopus) but I didn't think that would go over too well, so I just said, "yup, it's fish". Claire thought about it then said, "how did you get the fish into little circles?"

....well, I am just a REALLY good cook!!

Calamari with Red Wine and Tomato Sauce

1 onion, chopped
2 cloves garlic, minced
1 tbsp olive oil
1 28oz can diced tomatoes
1 small can tomato paste
1/2 cup dry red wine
1/4 tsp cinnamon
1 bay leaf
salt and pepper to taste
1 lb squid rings
1/4 cup flour
2 tbsp olive oil
lemon wedges
Rice or Pasta

1. For the sauce, saute onion and garlic in 1 tbsp olive oil until soft. Add diced tomatoes, tomato paste, red wine, cinnamon, bay leaf and salt and pepper. Simmer for about an hour.

2. Meanwhile, prepare the rice or pasta.

3. When everything is ready, heat 2 tbsp olive oil over medium-high heat in a non-stick skillet. Dredge squid rings in 1/4 cup flour, and saute in oil for about 3-5 minutes until cooked through.

4. Serve rice/pasta with sauce and topped with squid. Garnish with lemon.


Monday, October 15, 2007

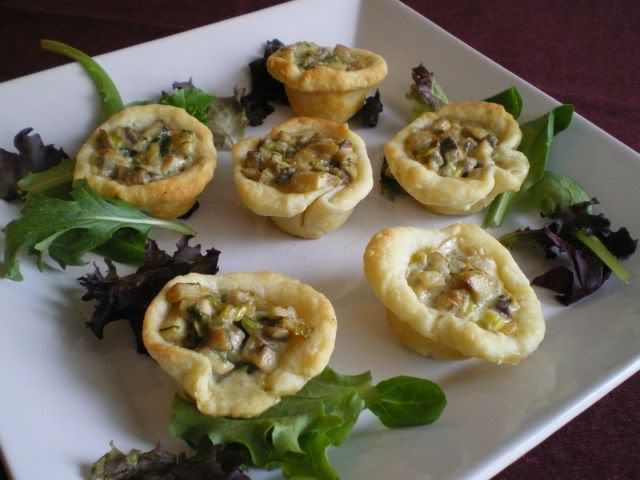
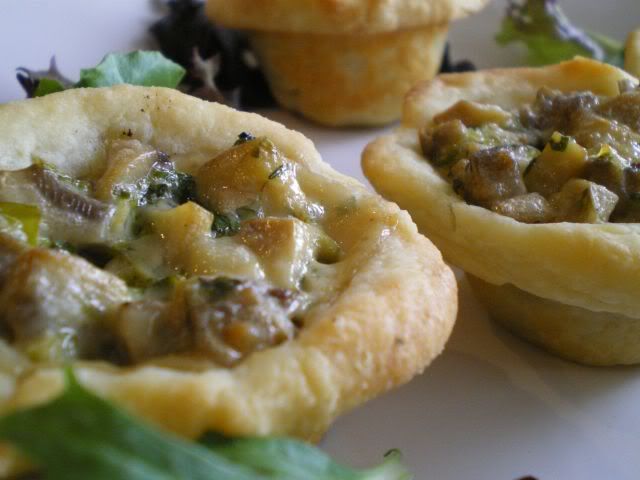
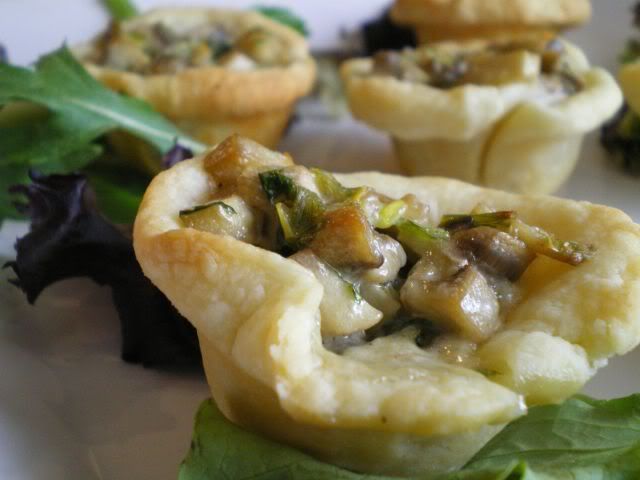
Mushroom Tarts


Last night I decided to make some fancy appetizers before dinner. There was no big special occasion, it was just sort of a, "oh my GOD, I have nothing to post tomorrow" sort of occasion. Although, I sold it to Mario as more of a, "I made you a special treat because your the best-est Husband in the whole world (I bought some new shoes)" sort of occasion.

I have always had an special bond with mushroom tarts. In fact way back when Mario and I were first dating, his Mom happened to make some, and I exclaimed, "Oh mushroom tarts, my FAVORITE"... well, they aren't truly my favorite, not in the Poutine sort of sense, but I do really like them a lot. Anyway, since then, Mario's Mom continues to make mushroom tarts for me all the time. So much so, that there is really no need for me to make them at home, and thus it's been years and years since I have pulled out this recipe and made it. The first thing I noticed was... they aren't as good as Mario's Mom's. I think that I like my pastry better, but her filling is the BOMB. So now I'm going to have to do some reconnaisance to figure out what she does differently.

In the meantime while I am busy with my spy work, if you are hankerin' for some mushroom tarts, these ones are a fine substitute!

Oh, and because I always like to write a sentence or two about the official reaction of "the offspring"... Claire and Marco were out in the yard raking (e.g. jumping in) leaves when I served these. I brought a couple out to the back door for them to eat outside. A few minutes later, Mario goes to look out the window... "looks like your tarts are really popular with the seagulls"...


Mushroom Tarts
makes 12 mini tarts

Pastry:
1 cup flour
1/2 tsp salt
1/2 cup butter, diced
1/2 cup cream cheese, diced

Filling:
1 tbsp butter
8 oz fresh mushrooms, diced
1 clove garlic, minced
1/2 cup heavy cream
1/2 tbsp lemon juice
1/4 cup chopped green onion
2 tbsp chopped fresh parsley
salt and pepper to taste

1. In a food processor, mix together all the ingredients for the pastry. Form into a ball, wrap and chill for 30 minutes.

2. Meanwhile, in a non-stick skillet, saute mushrooms and garlic in butter until soft and most of the liquid is evaporated. Add cream, lemon juice, green onion and parsley. Bring to a boil and remove from heat. Season to taste.

3. Remove pastry from fridge. It will be a little to soft for rolling, so break off 1" balls, flatten them with the palm of your hand, and press them into the tart tins.

4. Fill each pastry shell with mushroom mixture and bake at 400F for 20 minutes until golden brown.


Friday, October 12, 2007

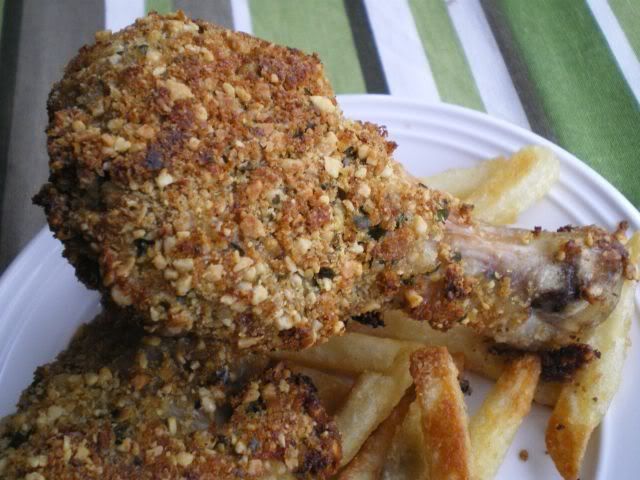
Crunchy Chicken Drumsticks


My kids just adore shake'n bake chicken (who doesn't?). So, I often make it for them when a quick and easy dinner is in order. One night last week, I just had no idea what else to make, and so I decided shake'n bake for the whole family this time. Of course, when I got home and checked the cupboard, I was all out.

No problem, I'm a resourceful Mom.... I just whipped up some homemade shake'n bake. Now I wasn't trying to replicate the flavour exactly. I mostly just wanted to get a nice crunchy coating on the chicken.

Of course, I went to all this trouble and Claire and Marco didn't like the crust. They made me peel all the skin off and they just ate the chicken. People must read my blog, and think to themselves, "that POOR POOR woman, why does she even bother?" I know it sounds like my kids never like ANYTHING, but overall I'd say they are less picky than I was at the same age. And in their defense, they have a crazy food obsessed Mom, who is always trying weird new recipes. They barely ever get to eat plain old spaghetti or meatloaf...

Crunchy Chicken Drumsticks

1 1/2 cups fresh breadcrumbs
1 cup peanuts, finely chopped
Freshly ground black pepper
2 tbsp chopped fresh cilantro
8 chicken drumsticks
1 egg, beaten

1. Mix together the breadcrumbs, nuts, pepper and cilantro (I did this in a food processor to get a fine chop).

2. Dip the chicken drumsticks in the egg, then in the breadcrumb mixture.

3. Spray a cookie sheet lightly with cooking spray and bake in a preheated oven at 375°F for about 30 minutes.


Wednesday, October 10, 2007

Tuscany Stuffed Chicken Breasts


Everytime I decide to try stuffing chicken breasts I end up cursing myself, "WHY WHY WHY did I feel the need to torture myself with this recipe??" Stuffed chicken breasts are finicky and annoying. But sometimes, the end result turns out to be well worth the effort.

In the recipe book I found this in, the picture was amazing. The cheese was oozing out from the center of the nicely browned and perfectly rolled chicken breast. The recipe didn't even call for string or skewers or duct tape to hold it together while cooking, just "roll and pinch the edges to seal" (YEAH RIGHT!!). I had to tie each of my chicken breasts up with about 18 feet of string, they looked like little chicken breast mummies, and STILL most of my cheese leeked out into the wine I was trying to poach them in (made the sauce taste real good though).

I think part of my problem may be in the hammering/pounding of the chicken breasts, maybe I go a little overboard with the meat mallet. All I know is when I'm done I do not end up with a nice thin INTACT piece of chicken breast to neatly roll around a filling of my choice, but rather a pulverized, holey mess of chicken that I have to patchwork together around my filling and plug holes and try to tie up with my greasy chickeny gross slippery hands.... grrrr. At one point, when Mario heard me huffing and puffing he came over to ask if I needed some help and he came REALLY close to getting a pulverized chicken breast right between the eyes!

Then, I purposely left the sage out of one of the chicken breasts from hell for the kids, but got them mixed them up and gave the sageless one to Mario by mistake. To top it all off, my kids declared them "yucky" and, I officially lost my mind.... "yeah? yeah? well if you don't eat that, I'm not gonna be your friend anymore!!"

Did I mention this recipe tasted really good?

Tuscany Stuffed Chicken Breasts
from the New Dieters Cookbook from Better Homes and Gardens

4 skinless boneless chicken breasts
2 oz fontina cheese (in four slices)
1/2 cup roasted red peppers cut into strips
12 fresh sage leaves
1/4 cup flour
1 tbsp olive oil
2 cups dry white wine

1. Place each chicken breast between two pieces of plastic wrap and pound to 1/4" thickness.

2. Remove plastic wrap add a slice of cheese, red pepper, sage. Fold in sides (if can find sides) and roll up (good luck with that). Don't feel bad if you have to resort to string to keep this sorry mess intact.

3. Repeat with remaining breasts (tee hee, I said "breasts").

4. Roll in flour, and cook in olive oil over medium heat until brown on all sides (about 5 minutes). Remove from pan.

5. Add wine and bring to a boil, let reduce slightly. Add chicken back to pan, cover and poach until chicken is cooked through (about 8-10 more minutes).

6. Remove chicken again, and turn heat up. Reduce sauce until about 1/2 cup remains.

7. Serve chicken with a little sauce drizled over top (don't forget to remove the string!)


Tuesday, October 9, 2007

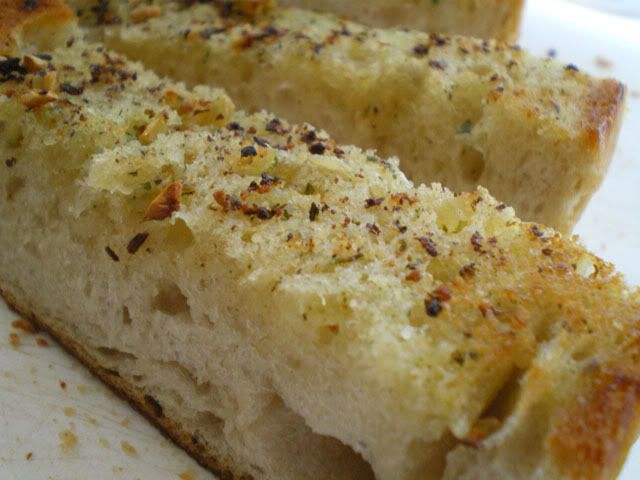
Garlic Bread


I'm not sure that anyone actually needs a "recipe" for garlic bread. Actually now that I think about it, if you DO need a recipe for garlic bread, this site probably won't help you much. Get an easy-bake oven!

I have to be really careful serving bread with meals. The main reason is my daughter, Claire, who is 8. Unfortunately (for her bum when she hits puberty) she is exactly like me! She loves things that aren't good for her, and since she is so young, she hasn't yet developped that well honed self-discipline that I have (yeah right!). So if I put bread on the table with dinner, she will fill herself up on that and forsake her meat and vegetables.

Because of this, I will often use dinner rolls instead of a loaf of bread. I'll put out five small dinner rolls, one each for everyone and two for Mario. On occassion, Claire has tried to fight Mario for that fifth roll. She argues the unfairness of Daddy getting the extra roll. I try to explain to her that a little girl weighing 60 pounds couldn't possibly need to eat as much as big man weighing [marriage-saving-self-censorship kicked in].

Yet sometimes you are eating one of those meals, like lasagna or pasta where it just wouldn't be the same without a nice warm crusty loaf of garlic bread, and this is how I usually make it.

Garlic Bread

1 loaf dense crusty French bread
2 cloves garlic, crushed
1/2 cup butter
1 tsp Mrs. Dash seasoning
zest of one lemon

1. Cut loaf in half lengthwise.

2. In a microwave dish melt butter, stir in crushed garlic and lemon zest.

3. With a pastry brush, spread garlic butter all over bread. Let it soak in a bit.

4. Sprinkle with seasoning. (At this point, you can freeze half of the loaf for later).

5. Place loaf on a cookie sheet and bake at 350F for about 15 minutes. Turn on broiler and continue baking another 2-3 minutes, until sliced top is nicely browned.