Home Page
Showing posts with label Breakfasts. Show all posts

Monday, April 26, 2010

Sourdough Crumpets


For the past few months I've been quite successful in keeping my sourdough starter alive and thriving. I use it often so I don't refrigerate it - I leave it on the counter and feed it everyday. I don't like throwing so much starter in the garbage, so I've started making these crumpets with the excess. It is very easy.

Each night when I feed my starter, the portion I would normally discard goes into a little containter in the fridge. Once I have a cup, I make this recipe. You can freeze them and pop them in the toaster for breakfast. They are delicious with butter and jam.

Sourdough Crumpets
makes about 8 crumpets

1 cup sourdough starter
1 tsp sugar
1/2 tsp baking soda
pinch of salt

1. Preheat your griddle to medium heat.

2. In a bowl with room for expansion, mix the starter with the sugar and salt.

3. Stir in the baking soda. (The batter will get foamy and just about double in size).

4. Lightly spray your skillet and 4 egg rings with cooking spray. Drop 1/4 cup of batter into each egg ring. Cook slowly until the top of the crumpet is set (no longer wet). If you want you can flip them and give them a few seconds on the other side to make sure they are cooked through, but this isnt' traditional.

Tuesday, March 9, 2010

Sourdough Pancakes


A few weeks ago I posted the recipe for my Sourdough Pizza Crust. This was more of an experiment than anything else. An experiment that went very well for a change. I've been working on a little project to develop a sourdough starter for about a month now, and I've baked with it a few times. Enough to know that I have a good starter going. In addition to the sourdough pizza crust, I've made sourdough cornbread, sourdough pancakes, sourdough crumpets, sourdough blueberry muffins, and a sourdough paperweight. All those recipes will be posted in good time - well except the paperweight recipe. Although, if anyone would like the recipe for a really heavy paperweight which can double as a brick to throw at your husband if he makes fun of your flopped bread, please just e-mail me for the recipe at:

madwomanattackshusbandwithunleavenedbread@crankypants.com

Anyway - I digress (as usual) - I thought I would share my sourdough pancake recipe today.

I've experimented with many different pancake recipes over the years. Sour Cream Pancakes, Pancakes with Beaten Egg Whites, Buckwheat Pancakes, Oatmeal Pancakes, Pancakes with all sorts of things added in, Pancakes from boxes, Pancakes from a can...

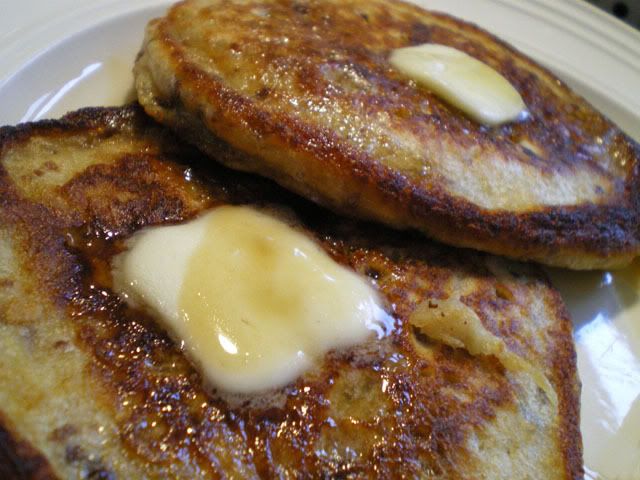
Until this past Saturday. My days of pancake experimentation are over. I will never ever be able to make pancakes again without making THIS recipe (unless I kill my starter, but that's another story). Before Saturday, my favorite pancake recipe has been one that I found in my Fanny Farmer Cookbook, where you separate the eggs, beat the egg whites and then fold them into the batter to make the pancakes extra fluffy.

But this recipe seriously blows that one away. On two fronts... it is way easier to make and it tastes better.

Here are the reviews of my family on these pancakes when asked which of my pancake recipes they like best:

Marco (6 years old): I don't know, do these ones have money in them? (In reference to the fact that I bake money into the pancakes every year on Shrove Tuesday).

Claire (10 years old): Yes, Mommy I love these ones best, can you buy me a new DS game?

Mario: I don't know, I think I need to try them all side by side to compare properly.(Seriously? OK, now where did I put that sourdough brick?)

Sourdough Pancakes

Before you go to bed:
1/2 cup sourdough starter
1/2 cup milk
1/2 cup warm water
1 1/4 cup flour

In the morning:
1 egg, beaten
1 tbsp sugar
3 tbsp melted butter
1/2 tsp baking soda
1/4 tsp salt

1. Before you go to bed, mix together the starter, milk, water and flour. Give it a good stir and let it sit on the counter overnight.

2. In the morning, add in the remaining ingredients. Stir.

3. Cook your pancakes as per usual.


That's it! This recipe made 12 fairly generous size pancakes (using a 1/4 cup ice cream scoop to drop the batter on the frying pan), plus one runt size pancake for the cook to eat on the sly.

Thursday, September 3, 2009

Huevos Rancheros


This isn't really much of a recipe and it's probably not all that authentic, but I wanted to post it anyway, due to it's deliciousness...

I made this for dinner the other night because I had to throw something together quickly for myself before Mario and the kids ate... I didn't have high expectations, having had scrumptious huevos rancheros at a local restaurant called George's Kitchen in Belize...

BUT... it was pretty darned good and very healthy. You can use homemade salsa with fresh tomatoes (if you want to feel more like you actually made a recipe) but mine was good with bottled salsa...

Huevos Rancheros
Serves 1

1 flour tortilla
2 eggs
1/4 cup grated Monterrey Jack Cheese (about 15g)
1/2 cup salsa
chopped fresh cilantro
cooking spray
salt and pepper to taste

1. Heat your oven to 300F, put the tortilla on a dinner plate and throw it in to warm up both the plate and the wrap...

2. Heat up the salsa (in the microwave if you want... gasp!)

3. Fry the eggs in a non-stick pan coated with cooking spray. I did mine sunnyside up (season with salt and pepper).

4. Remove the plate and tortilla from the oven (put on oven mitts first - OUCH) and slide the eggs onto the tortilla. Spoon the hot salsa around the eggs, and sprinkle with cheese and cilantro.


Friday, November 28, 2008

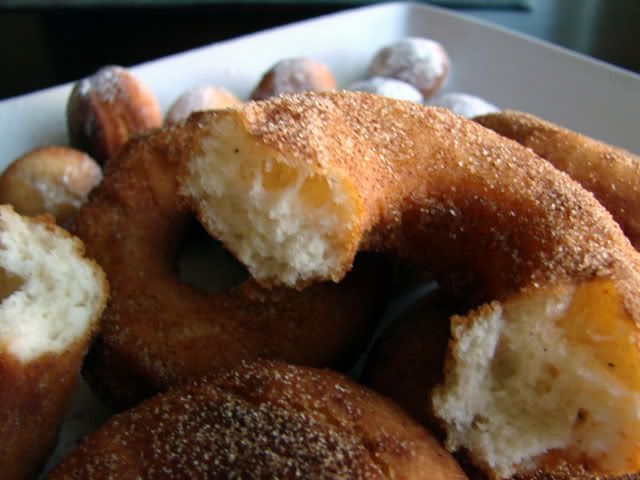
Old Fashioned Cake Doughnuts


Nothing beats homemade doughnuts. Well, that is nothing except for Muskoka Cookies, Peach Squares, Peanut Butter Chocolate Cake, Butter Tart Squares, Fresno Pudding, and Chocolate Banana Cake. Not my Haupia though, joking aside, please don't ever make my Haupia, make somebody else's Haupia.

(Note: I hope everyone CLICKED on all those links! That's why I put them there people! And I can check, you know - well I think I can, anyway, well maybe not... I mean I'm sure I could if I was at all technology savvy, but I should probably just stick to cooking.... and rambling, I'm good at that - the rambling that is.)

OK, so where was I? Doughnuts. Right.


So the doughnuts are yummy.

You can either douse them in cinnamon sugar or icing sugar. I always keep a spice bottle in my cupboard filled with cinnamon sugar that I make with 3 parts sugar to 1 part cinnamon (for anybody who might be fractionally challenged that means I would add 1 tablespoon of cinnamon to 3 tablespoons of sugar). This is great to have on hand to sprinkle on toast. I used the whole bottle on these doughnuts.

These are best served still warm.

Old-Fashioned Cake Doughnuts

1 cup sugar
4 tsp baking powder
1 1/2 tsp salt
1/2 tsp nutmeg
2 eggs
1/4 cup butter, melted
1 cup milk
4 cups flour (plus a little more if dough is sticky)
oil for frying (lots)
Cinnamon Sugar (tons)

1. In a large bowl mix the sugar, baking powder, salt and nutmeg.

2. Add eggs, milk and melted butter. Beat well.

3. Add 3 cups of the flour, beating until blended. Add one more cup of flour and beat well. The dough should be soft and sticky but firm enough to handle. If you feel its necessary, add up to 1/2 cup more flour.

4. Cover with plastic wrap and chill for one hour (I once got a question from a reader as to whether when I said "chill" I meant in the refrigerator... um yes that's what I meant, but I can see how this could be confusing, I could have meant "Like OK, cover with plastic wrap, and then um like chill, ya know on the couch, for like an hour... like OK?")

5. After you're done chilling on the couch, remove your dough from the fridge and begin heating about 1" of oil to 360F in a large metal skillet. I actually don't have one of those fancy schmancy candy thermometres (hello Santa are you reading?)... somebody remember to ask me after Christmas how many candy thermometres I get...

6. Working half the dough at a time, roll it out on a floured surface to about 1/2" thickness. Cut out circles using a doughnut cutter. If you don't have a doughnut cutter (Santa?) then use a regular cookie cutter and cut out the hole with the screw cap off a 40oz bottle of Newfoundland Screech.

7. Decide that you are too cool for school and take a big swig of the Screech for no good reason. Once the burning subsides and you stop crying and sputtering, push the scraps of dough back together, re-roll and repeat steps 6 through 7 over and over until (a) all the dough is used up or (b) you pass out.*

8. Gently drop the doughnuts in batches into the hot oil. Flip them over as they puff and turn them a couple more times as they cook. They will take 3-4 minutes in total and they will be lovely and golden brown all over.

9. Remove from the oil and set them on paper towels (that removes all the fat, you know). Sprinkle generously with cinnamon sugar. Enjoy them hot, and eat at least four, you need some carbs in your belly to soak up all that Screech.


*Janet is Hungry will not be responsible for any mishap (foreseeable or unforeseeable) that may arise as a result of drinking alcohol in close proximity to a pan of hot oil.

Thursday, October 4, 2007

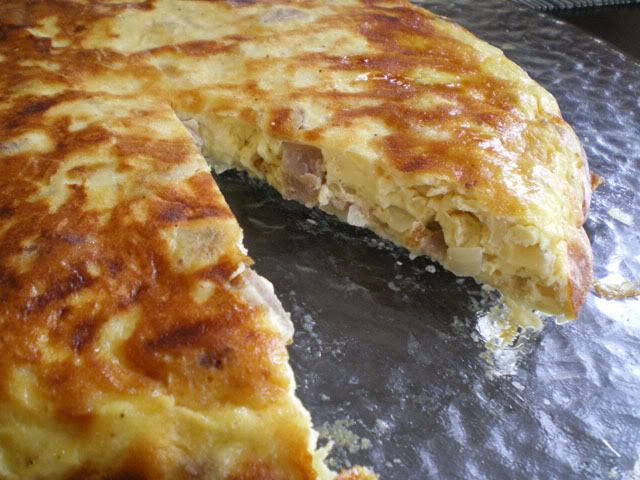
Bacon Sausage and Goat Cheese Frittata


Have I ever written about how much I love to have breakfast for dinner? Probably, but let me go on about it again for a bit...

Breakfast foods are among my favorite things on the planet... Eggs Benedict, Stuffed Crepes, Sausage and Egg Biscuits... I would eat those types of meals every morning for breakfast, if I could. But sadly, my metabolism runs at the same speed as cold molasses, and so I really do have to stick with bran flakes most mornings. One way I get around this, and manage to get my fix of breakfasty goodness, is to have my breakfast foods at dinner time, right before I go to the gym.

Frittatas are a perfect dinner food, served with some potatoes and a nice side salad. My kids love eggs, so it is also something that they will eat well (as long as I don't go all crazy and start putting vegetables in the frittata).


Bacon Sausage and Goat Cheese Frittata
adapted from Rachel Ray

4 strips bacon, cooked and chopped
4 breakfast sausages, cooked and chopped
2 tbsp olive oil
1 medium onion, finely chopped
8 large eggs
1/2 cup grated Fontina cheese
2/3 cup crumbled goat cheese
1/4 teaspoon salt
1/8 teaspoon pepper

1. Saute the onion in 1 tbsp olive oil over medium low heat until softened. Let cool.

2. In a large bowl, beat the eggs. Stir in the onion, the bacon and sausage, the cheeses and the salt and pepper.

3. Coat a 10" inch ovenproof skillet with the remaining oil. Add the egg mixture and cook over medium-low heat until the sides start to set, about 3 minutes.

4. Bake at 325F until the frittata is firm, 20 to 25 minutes.

5. Gently run a rubber spatula around the sides of the skillet to loosen and carefully flip the frittata out onto a serving plate. Cut into wedges to serve.


Sunday, September 30, 2007

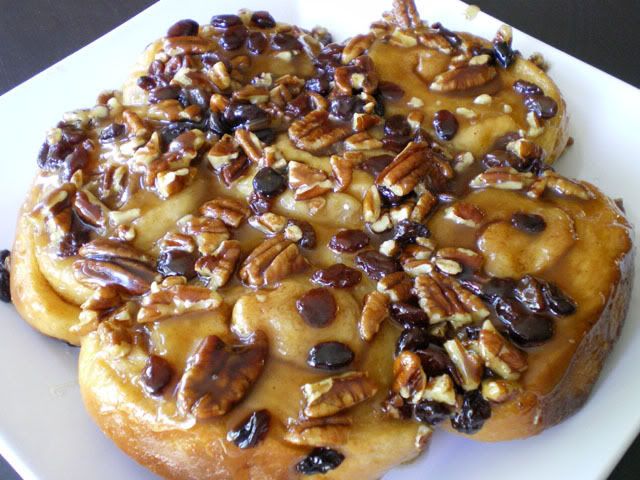
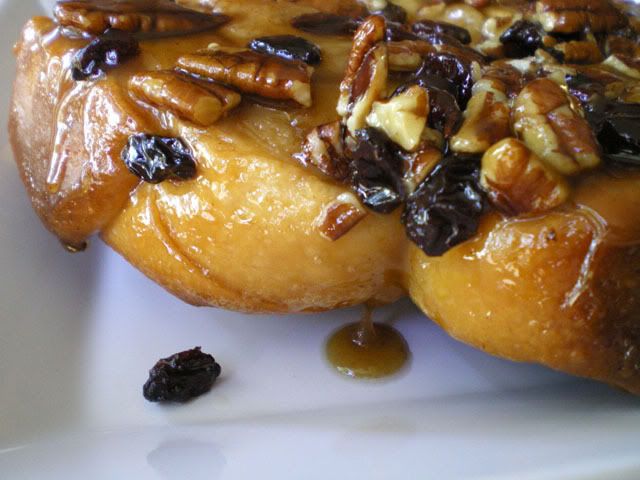
Sticky Buns


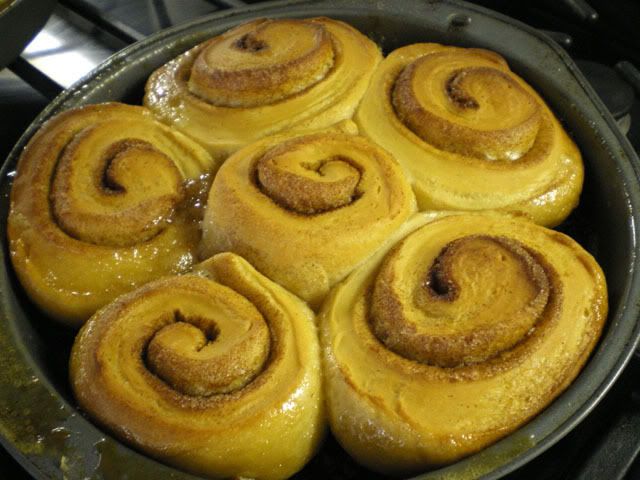
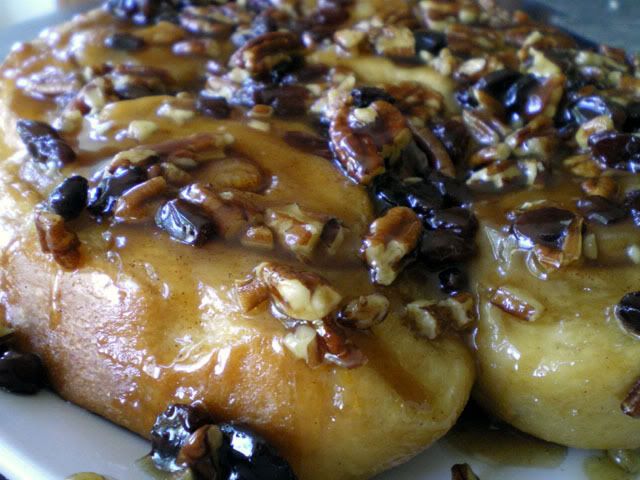
I was incredibly excited to see that this month's Daring Baker Challenge was going to be Cinnamon Rolls or Sticky Buns. Sticky Buns are a huge favorite of mine, and something that I have never actually made at home before.

The recipe turned out great, and everything went smoothly, with no hitches. There was a base recipe for the rolls and then everyone had a choice to make cinnamon rolls, sticky buns or a combination of both. I went with the sticky buns, and they were so good, I will probably go back at some point and try out the cinnamon buns too.

Check out all the other Daring Baker posts (I guarantee LOTS of mouthwatering pictures), at the Daring Baker Blogroll.


Sticky Buns
Makes 8 to 12 large sticky buns

6 1/2 tbsp sugar
1 tsp salt
5 1/2 tbsp shortening or unsalted butter or margarine
1 large egg, slightly beaten
1 tsp lemon extract OR 1 teaspoon grated zest of 1 lemon
3 1/2 cups unbleached bread or all-purpose flour
2 tsp instant yeast (also called rapid rise or quick rise)
1 1/8 to 1 1/4 cups whole milk or buttermilk, at room temperature
1/2 cup cinnamon sugar (6 1/2 tablespoons granulated sugar plus 1 1/2 teaspoons ground cinnamon)

1. Cream together the sugar, salt, and shortening or butter on medium-high speed in an electric mixer with a paddle attachment (or use a large metal spoon and mixing bowl and do it by hand). Whip in the egg and lemon extract/zest until smooth. Then add the flour, yeast, and milk. Mix on low speed (or stir by hand) until the dough forms a ball. Switch to the dough hook and increase the speed to medium, mixing for approximately 10 minutes (or knead by hand for 12 to 15 minutes), or until the dough is silky and supple, tacky but not sticky. You may have to add a little flour or water while mixing to achieve this texture. Lightly oil a large bowl and transfer the dough to the bowl, rolling it around to coat it with oil. Cover the bowl with plastic wrap.

2. Ferment at room temperature for approximately 2 hours, or until the dough doubles in size.

3. Mist the counter with spray oil and transfer the dough to the counter. Roll out the dough with a rolling pin, lightly dusting the top with flour to keep it from sticking to the pin. Roll it into a rectangle about 2/3 inch thick and 14 inches wide. Don´t roll out the dough too thin, or the finished buns will be tough and chewy rather than soft and plump.

4. Sprinkle the cinnamon sugar over the surface of the dough and roll the dough up into a cigar-shaped log, creating a cinnamon-sugar spiral as you roll. With the seam side down, cut the dough into 8 to 12 pieces each about 1 3/4 inches thick.

5. Make Caramel Glaze.

Caramel Glaze
1/2 cup granulated sugar
1/2 cup firmly packed brown sugar
1/2 teaspoon salt
1/2 pound unsalted butter, at room temperature
1/2 cup corn syrup
1 tsp lemon extract
Walnuts, pecans, or other nuts (for sticky buns.)
Raisins or other dried fruit

5. In the bowl of an electric mixer, combine sugar, brown sugar, salt and butter.

6. Cream together for 2 minutes on high speed with the paddle attachment. Add corn syrup and 1 teaspoon lemon extract. Continue to cream for about 5 minutes, or until light and fluffy.

7. Coat the bottom of 1 or more baking dishes or baking pans with sides at least 1 1/2 inches high with a 1/4 inch layer of the caramel glaze. Sprinkle on the nuts and raisins Lay the pieces of dough on top of the caramel glaze, spacing them about 1/2 inch apart. Mist the dough with spray oil and cover loosely with plastic wrap or a food-grade plastic bag.

8. Proof at room temperature for 75 to 90 minutes, or until the pieces have grown into one another and have nearly doubled in size.

9. Preheat the oven to 350°F (175°C) with the oven rack in the middle shelf for cinnamon buns but on the lowest shelf for sticky buns.

10. Bake the sticky buns 30 to 40 minutes, or until golden brown
.


Friday, August 10, 2007

Decadent Scrambled Eggs


I am really a walking contradiction, and definitely a "do as I say, not as I do" sort of person. In other words what I say is, "you should eat a nice healthy well-balanced breakfast that is low in fat and high in fibre and protein."

What I do? Well...I make these scrambled eggs. But a word of warning - they will make your bottom look just as lumpy as the eggs in the picture (that is purely a suppostion...OF COURSE!)

The funniest part is, most of the time I will have scrambled egg beaters which have almost no fat. But then I'll be sitting there in the kitchen with my carton of egg beaters on the counter, ready to spray the no-fat cooking spray into the griddle to scramble them up. Then something takes a hold of me... it's something evil, and nasty. It speaks to me from within, in a deep echoey Vincent Price sort of voice.... "Jaaaaanet.... you neeeed to add creeeeam, and loooots of buttter...."

Then I realize that my problems run much deeper than a lumpy bottom, so I make the eggs anyway.

This recipe is from Bill Granger, and no you didn't misread it, there is 1/3 cup of heavy cream per heavy bottom serving.


Scrambled Eggs
per person

2 eggs
1/3 cup heavy cream
pinch salt
1/2 tbsp butter

1. Whisk together the eggs, cream and salt.

2. Heat butter in a non-stick frying pan, over high heat.

3. Pour in egg mixture, and once it starts to set, begin to gently fold the eggs towrds the middle of the pan.

4. Remove the eggs when they are just set.


Wednesday, August 1, 2007

Oatmeal Surprise Pancakes


Mario and I were lying in bed this past Saturday morning at about 5am, sound asleep and dreaming about sleeping in, when all of the sudden, Claire and Marco were SCREAMING in our ears:

"MOOOOMMMMMYYY, DAADDDDDYYYY!!"
"Huh? Wha? What's wrong?"
"What do you want for breakfast?"
"Oh - pancakes", I grumble.
"OK!!!" and they run off.

Groggily I think, oh gosh, should I be concerned? Nah.. and I went back to sleep. A few minutes later (I think), more screaming....

"MOOOOOMMMMYYY, WAKE UP!!! What do you want for breakfast?"
"I already said, pancakes."
"Are you sure you don't want cereal??"
"Nope, pancakes."
"OKAAAAY, but we don't know how to use the stove."
"How about coffee, can you make coffee?"

They run off again, and I fall back asleep. The next time I am woken up, it is by the sound of banging and clanging coming from the kitchen, "Oh god, what are they doing?"

I get up and head downstairs. Claire was standing on a chair by the counter, mixing something up (she was using the bulb end of the turkey baster as a mixing tool - which I thought was an interesting choice of utensil). I peer into her bowl, "What is it?".... (Oh God, am I going to have to EAT that to qualify as a good Mother??)

"It's breakfast!!" (said with a great deal of PRIDE)
"Uh....it looks great! What did you put in it, Sweetie?"

"Shreddies, chocolate chips, and raisins". Claire had crushed up the shreddies with the turkey baster and then put it in the microwave to melt the chocolate.

"Gee, that looks delicious, but how were you planning to serve it? I was going to make pancakes..."

Silence..... then, "I know!! We can put this IN the pancakes!!".

And so Oatmeal Surprise Pancakes were born. They were pretty good, the Shreddies stayed a little crunchy and there was a hint of chocolate. I will give the recipe without Claire's surprise, but if anyone wants to make it her way, you just put about 1 cup Shreddies, 1/4 cup of chocolate chips, and 4 raisins into a bowl, mash it up with the end of a turkey baster, and then nuke it for about 30 seconds. Add to the pancake batter right at the end.

Oatmeal Pancakes
From Fanny Farmer Cookbook (Note: the recipe said makes 16 griddlecakes, I doubled it and got 9... go figure.)

1/2 cup milk
1/2 cup quick-cooking oatmeal
2 tablespoons melted better
1 egg
2 tbsp flour
2 tsp baking powder
2 tbsp sugar
1/2 tsp salt

1. Heat the 1/2 cup milk, stir in 1/2 cup quick-cooking oatmeal and let stand for 10 minutes.

2. Separate the egg, and beat the egg white until soft peaks form.

3. Add egg yolk, and melted butter to oatmeal.

4. Mix flour, baking powder, sugar and salt and add them all at once to the oatmeal mixture. Fold in egg white.

5. Lightly butter or grease a frying pan over moderate heat. Fry pancaked on the griddle until they are full of bubbles on the top and the undersides are lightly browned. Turn with a spatula and brown the other sides.

6. Place finished pancakes in a warm oven until finshed frying.


Saturday, July 21, 2007

Belgian Waffles


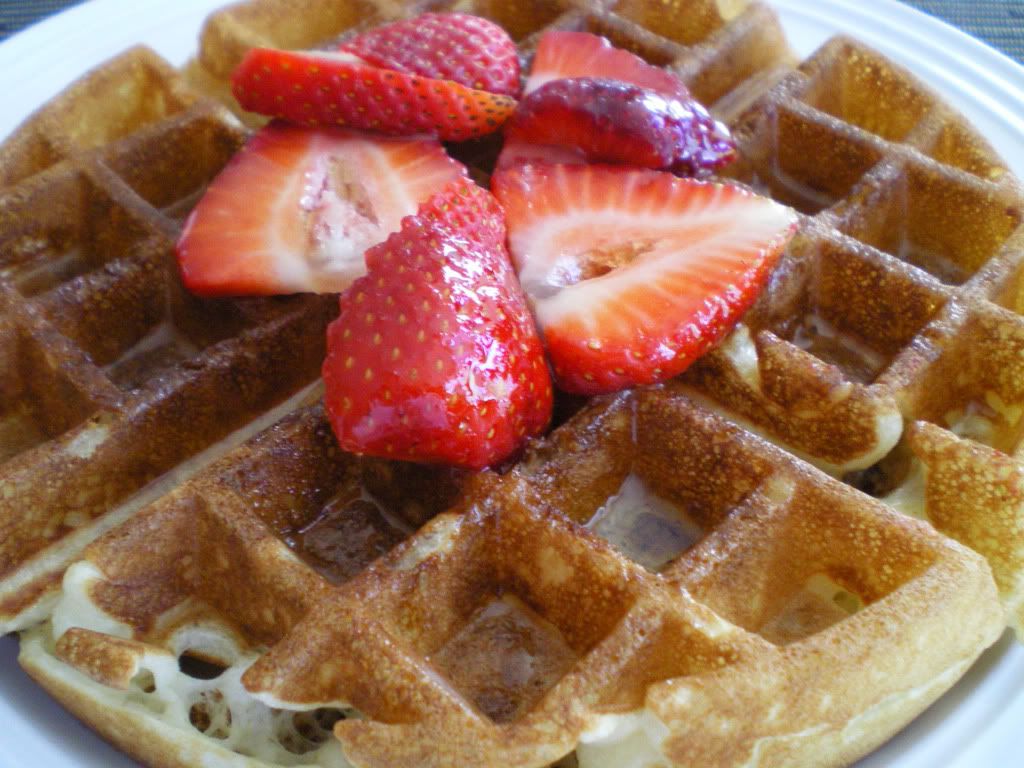
I never realized that true Belgian Waffles were made with yeast until I got my own Waffle Maker for Mother's Day and I read the book that came with it. It seemed like a lot of extra work (and compared to adding water to a pancake mixture, it was), but MAN were these good waffles.

Belgian Waffles
from the book that came with my waffle maker

1 package active dry yeast
1/4 cup warm milk (about 110F)
3 eggs
2 3/4 cups warm milk (about 110F)
3/4 cup butter, melted and cooled to lukewarm
1/2 cup sugar
1 1/2 tsp salt
2 tsp vanilla extract
4 cups flour

1. Dissolve yeast with 1/4 cup warm milk. Let sit about 10 minutes.

2. Separate the eggs. In a large bowl, whisk the egg yolks, 1/4 cup of the warm milk and the melted butter.

3. Add the yeast mixture, sugar, salt and vanilla. Stir in the remaining milk, alternating with the flour.

4. Beat the egg whites until they form soft peaks; fold into the batter.

5. Let sit for one hour, stirring every once in a while.

6. Preheat the waffle iron. Brush with oil and spoon in the amount suggested by your waffle maker. Serve immediately.


Thursday, July 19, 2007

Stuffed French Toast


This was breakfast from a couple of weeks ago. I did really good that weekend, I didn't have any fatty breakfast food. Sometimes though when I am minding my calorie intake and not eating anything that is very fattening (or really any good) I feel a little guilty for depriving my family of their nice treats. So on this particular Sunday, I made french toast stuffed with banana, chocolate and peanut butter for Claire and Marco. Mario got egg and cheese on a bagel with homefries and I had cornflakes with 1/2 a sliced banana.... talk about a short order cook!

Needless to say it was agonizing to sit across the table and watch them eat this, I very nearly leapt across the table and ripped the fork out of Marco's chubby little hands (I figured I could take the 4 year old easier than the 7 year old).

Stuffed French Toast

4 slices of bread
1 ripe banana
2 tbsp chocolate chips
2 tbsp peanut butter
2 eggs
2 tbsp milk
oil for frying

1. Assemble french toast sandwiches. Spread 2 slices of bread with peanut butter. Sprinkle chocolate chips on peanut butter. Layer with sliced banana, and top with remaining slices of bread.

2. Beat eggs with milk. Dip sandwiches into egg mixture and let sit for about 10 minutes.

3. Fry in a small amount of oil on both sides until golden brown. Serve drizzled with maple syrup.


Friday, July 6, 2007

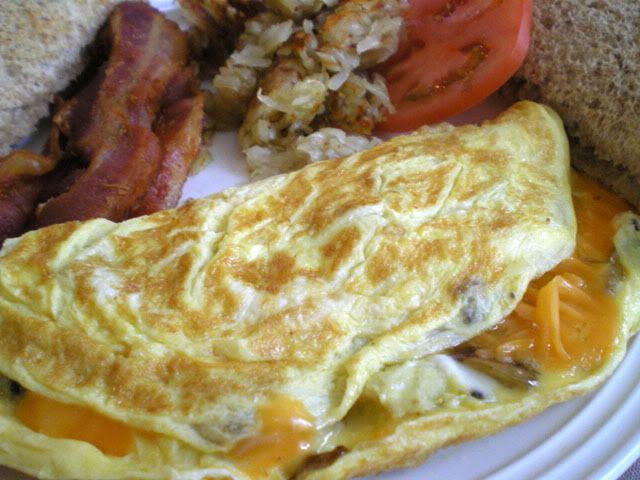
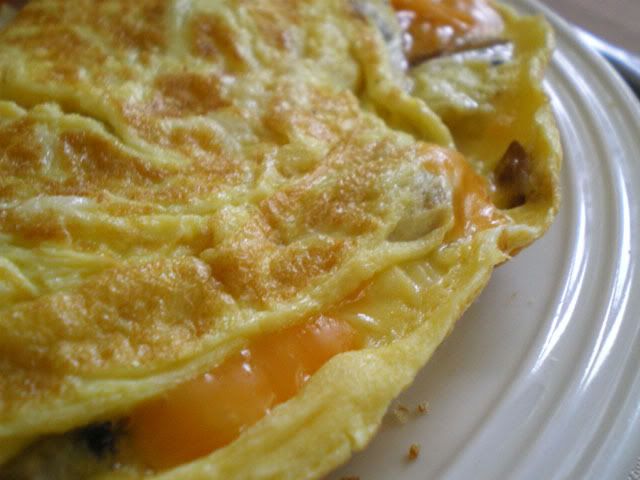
Mushroom and Proscuitto Omelet


We are going camping this weekend... Goodness, maybe I shouldn't have said that - if you are a robber reading about omelets, please don't break into my house while we're gone (I have a REALLY MEAN dog, its like a doberman/pitbull/angry bear mix).

Anyway, when we go camping we always make a heart attack special breakfast. It's the best, it is the only time I will ever eat my eggs fried in bacon fat... which is just so good, but you only bring one frying pan camping right?

Since I have spent the last few days daydreaming about breakfast, I decided to post one that I made a couple of weekends ago but never posted. Sometimes I get embarrassed, I can't post THAT, people are going to think I never eat anything healthy. Well, I do eat lots of healthy stuff, it just makes less mouthwatering blog material.

So here is a favorite breakfast of ours for the weekend. FYI, after I took this picture, I split the omelette with one of the kids, because it was enough for two (Okay Okay I might not have cut it even, it was more like a 70/30 split, but they never noticed).


The omelet is served with bacon (overkill, I know), hashbrowns and sliced tomato. To make really good hashbrowns out of grated potato, the trick is to get all the moisture out of them (I squeeze the raw grated potato in my potato ricer), then stir in a tablespoon of cornstarch to soak up the rest of the moisture before frying.

Mushroom and Proscuitto Omelet
Serves 1 really hungry person - multiply as required

3 eggs, beaten
3 white mushrooms, sliced
2 thin slices proscuitto
1/4 cup chopped onion
1/4 cup grated cheddar cheese
salt and pepper
paprika

1. Roll up proscuitto slices and chop up. Saute the onion, mushrooms and proscuitto then set aside.

2. Preheat non-stick frying pan, add a small amount of oil. Beat egg well and dump into frying pan. You can stir the egg around a bit until it starts to set, then leave it alone. Lift the edges gently to let some of the raw egg run underneath and cook quicker (and prevent the omelet from getting too dark on the outside).

3. When the egg is almost cooked, but still runny. Add mushroom, proscuitto, and onion along with the cheese. Cover with a lid and wait (peek every few seconds until cheese is all melted).

4. Sprinkle with paprika, pepper and salt. Fold and slide out of pan onto a plate.


Monday, June 11, 2007

Berry and Yoghurt Parfait


Prince Harry is in love with me.

That's right! This past week I was in Calgary for work. Some friends and I visited a local bar called Cowboys, we had a blast and danced the night away. The next night, Thursday, we decided to go back again. We walked in and the crowd just felt completely different. There didn't seem to be a person in there over about 18, and we could barely move, let alone get on the dance floor. Compared to the other girls in the bar, I felt completely over-dressed (and by that I meant, I was wearing clothes).

We ended up having one drink and then moving on to another bar. The next morning we woke up to the news that Prince Harry had been at Cowboys the night before! Crap, I can't believe I didn't see him! I decided it was close enough, so for the rest of the week, I've been telling people that I met Prince Harry and he wanted to whisk me away in his private jet. But I had to say no, because I was only in Calgary for a few days, and I had yet to fulfill my lifelong dream of riding a mechanical bull.

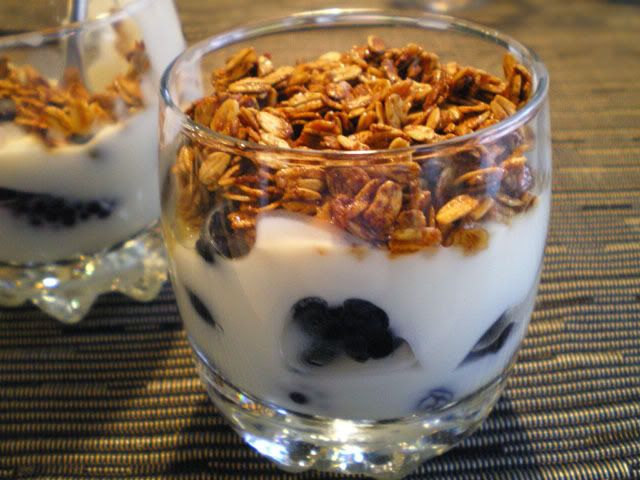
Since I was away, I have very nearly worked through my entire backlog of draft posts, and believe it or not I have very little to post this morning. This Berry and Yoghurt Parfait was something that I must have made and took pictures of more than a month ago, but never posted, because I wasn't sure it was 'blog worthy'. So I hope everyone will give me a one day break, while I reaquaint myself with my kitchen.

I'm not sure you can really even call this a recipe.... its more like "assembly instructions". I did make my own granola topping, but often I just use store bought granola. This also makes a great breakfast.

Berry and Yoghurt Parfait

1 pint fresh berries (I used blueberries and blackberries)
500ml container of vanilla yoghurt (fat free, if you like)

Granola topping:
1 cup old fashioned oats
2 tbsp brown sugar
1 tbsp honey
1 tbsp oil

1. Mix ingredients for granola topping and spread on cookie sheet. Bake at 300°F for 30-40 minutes until golden brown (stir every 10 minutes).

2. Layer berries and yoghurt in a parfait glass.

3. Top with granola.

Friday, June 1, 2007

Breakfast Biscuit with Sausage and Egg


Each morning from Monday to Friday I chow down on some plain wheat toast or Bran Flakes Cereal so that I can justify whipping up a fabulous weekend breakfast on Saturday or Sunday (or both). What usually happens is that I am feeling so deprived by the time Saturday rolls around that I create a breakfast so incredibly bad for me, that it completely wipes out all the calories I saved eating saw dust with skim milk all week long.

I think I could say that breakfast is my favorite meal, and I could easily eat breakfast food three times a day. Problem is I prefer sausage to lean ham, fried eggs to poached, homefries to no homefries... you get the idea. I put tomato on my breakfast biscuit, but after the first two bites, I removed it and ate it separately, I didn't want any vegetables getting in the way of tasting the ooey gooey fattiness of my treat.

So without further ado, my lastest breakfast creation from the past weekend, which was inspired by a post I saw over at Breakfast Blogger.

Breakfast Biscuit with Sausage and Egg
serves 4

Baking Powder Biscuits:
(from Fanny Farmer)
2 cups flour
1/2 tsp salt
4 tsp baking powder
1 tbsp sugar
1/2 cup butter
2/3 cup milk

Biscuit Filling:
butter
4 eggs
4 sausage patties
4 slices tomato
4 slices cheddar cheese

1. Make biscuits: Put the flour, salt, baking powder, and sugar in a bowl. Cut the butter into the flour with a pastry blender. Add the milk and stir until a dough forms.

2. Turn dough out onto a floured surface and knead lightly about 14 times. Roll out oto a 1/2" thickness and cut into rounds with a cookie cutter (note: I made 4 biscuits slightly larger - about 4" in diametre to accomodate my fillings, and the rest I made smaller 2" in diametre for putting in the kids lunches)

3. Bake at 425F for 15-20 minutes.

4. While the biscuits are baking prepare the filling. Fry the sausage rounds, and drain on paper towels. Fry the eggs - I have egg rings that I use for this to keep the eggs just the right shape for the buns.

5. Split open piping hot biscuit. Butter them and add egg, sausage, cheese and tomato (if you like).

Thursday, May 24, 2007

Crepes Stuffed with Scrambled Eggs and Bacon


I think you can pretty much divide most people into two camps. Crepe people and pancake people. I grew up on pancakes and never had crepes until I was dating Mario, whose Mom always makes them. But to be honest, I still prefer a nice fluffy pancake that soaks up the maple syrup like a sponge.

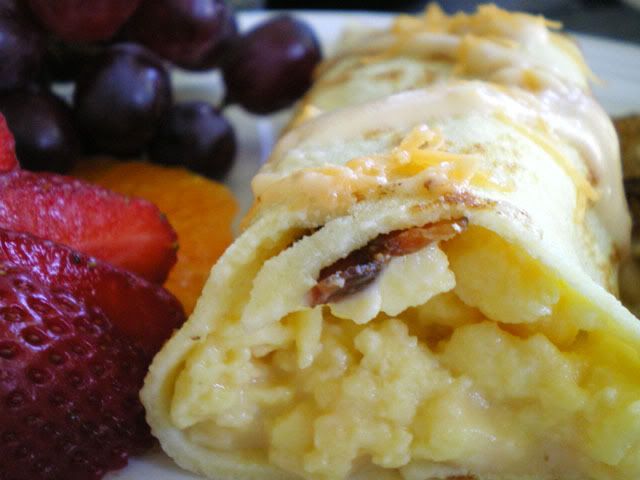
One thing I really do adore though, is stuffed crepes. I stuffed these ones with scrambled eggs, bacon, and a little bit of cheese sauce. My trick is to whip half of the egg whites to create a lot more volume in the eggs, so the crepes aren't too skinny.

I will include my regular crepe recipe here, but it makes about 12-14 crepes (depending on how big you make them). You will only need one crepe per person for these scrambled egg crepes, but there are so many uses for leftovers. You can reheat the crepes for breakfast the following morning. You can stuff them with something for dinner. You can make my Crepe Appetizer. Or you can make soup, like the one that Nicky at delicious:days made (and which is high on my growing list of things to try).

Crepes Stuffed with Scrambled Eggs and Bacon
Serves 4

Crepes:
1 cup flour
1 1/2 cup milk
3 eggs
3 tbsp butter, melted and cooled
1 tsp salt

Filling:
8 eggs
salt and pepper
4 slices bacon

Cheese Sauce:
1/2 cup milk
1/4 cup grated cheddar
1 tbsp butter
1 tbsp flour

1. Make Crepes: mix flour and salt. Add milk, eggs and butter. Beat with a hand mixer for 2 minutes until very smooth. Let batter rest 30 minutes before making crepes.

2. Heat non-stick skillet and brush with a small amount of oil. Remove pan from heat, pour batter in middle all at once and twirl the pan with your wrist. Once spread, return pan to heat. Cook on the first side until the edges start to get golden. Flip and cook another minute on the second side. Make all the crepes, stacking on a warm plate (cover with foil to keep warm).


3. While you are making the crepes, cook the bacon. Use your usual method or place strips on a foil lined baking sheet and bake for about 20 minutes at 350F (longer for crispy bacon).

4. Make Cheese Sauce: In a small saucepan melt 1 tbsp of butter and stir in 1 tbsp flour. Stir in milk and whisk over med-high heat until thickened. Stir in grated cheese until melted. Keep warm.

5. Make Scrambled Eggs: To increase the volume of the scrambled eggs separate 4 of the eggs and whip the 4 egg whites until stiff peaks form.

6. Beat the 4 egg yolks together with the remaining 4 whole eggs and then fold in the egg whites. Scramble over medium-low heat, do not over stir just gently move the eggs around the pan as they begin to set. Cook until set, but still moist.

7. Assemble the crepes: On each plate, lay out a warm crepe, place a strip of bacon down the center. Spoon 1/4 of scrambled eggs over bacon, and top with a small spoonful of cheese sauce. Roll crepe. Drizzle a small amount of cheese sauce on the top of the crepe.

Sunday, May 6, 2007

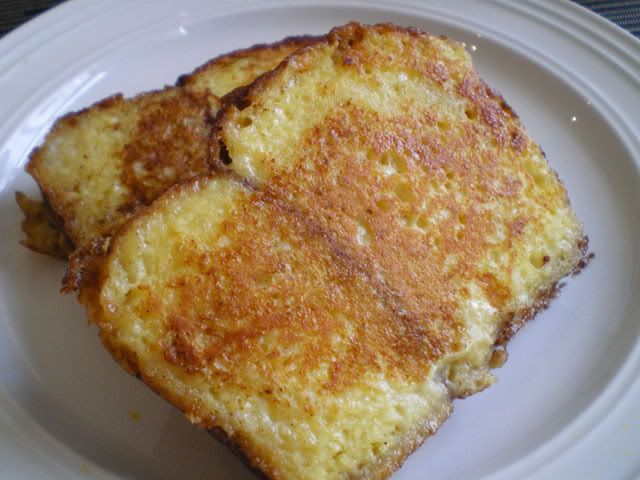
Cinnamon French Toast


I made French toast for breakfast mainly because I needed to use up a flopped batch of cinnamon bread that I made a few weeks ago and then threw in the freezer. See here for the batch that actually turned out.

I think that the trick to making excellent French toast, is to let the bread sit for a while after you've dipped it in the egg. You can't just dip it, and then throw it straight onto the frying pan (as most restaurants do) because the inside will still be dry. You need a good heavy/firm loaf of bread to do this, so it doesn't become soggy. Generally speaking, I use 1 egg per two slices of bread, and I don't usually measure the milk. Serve with warmed maple syrup.

Cinnamon Bread French Toast

8 thick slices Cinnamon Bread
4 eggs
1/4 cup milk
salt
oil or cooking spray for frying

1. Mix eggs, milk and a dash of salt in a shallow dish (a pie plate works well).

2. Dip each slice of bread for a few seconds on each side into the mixture. Set the bread in a single layer on a cookie sheet. If you have any egg mixture left over after you've dipped all the slices, pour it over the bread on the cookie sheet.

3. Let the bread sit for at least 10 minutes, and up to half an hour.

4. Heat a frying pan with cooking spray (or oil if you prefer) and fry the slices over medium heat until browned on each side.

5. Serve with maple syrup.

Sunday, April 8, 2007

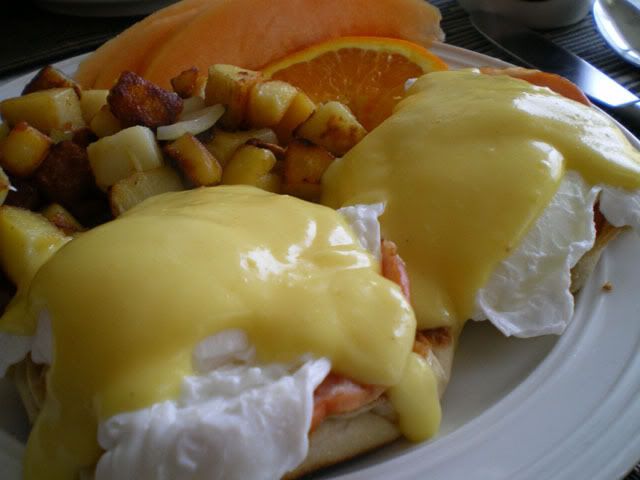
Eggs Benedict and Homefries


We always have a special Easter breakfast after the kids finish opening their Easter presents and searching for their Easter Eggs. Of course, Claire and Marco are much too jacked up on chocolate already by breakfast to even care about what I make.... I love Eggs Benedict, it's one of those indulgences that is all that much more special because you know you can only eat it a couple of times a year (unless you WANT to look like the side of barn, and then you can eat it every day). Eggs Benedict is also one of those dishes, that while simple, requires a little bit of co-ordination to get everything ready and have it all HOT at the same time. This can be further complicated by my caffeine drugged children screaming at the top of their lungs, "MOMMY - Claire ate some of my chocolate!".... "Mommy! Marco put an Easter Egg up his nose".... This recipe served 3 (two muffin halves each for the adults and one each for the kids). I served it with fresh fruit and homefries (recipe follows).

Eggs Benedict

3 English Muffins, halved, toasted and buttered
6 eggs
6 slices Canadian Back bacon

Hollandaise Sauce:
4 egg yolks
1 tbsp lemon juice
3/4 cup butter melted
2 tbsp hot water
dash of cayenne pepper
salt to taste

1. Make sauce. Use a double boiler over hot water. Beat egg yolks until smooth. Add lemon juice, butter, and 2 tbsp hot water. Season with cayenne and salt.

2. Continue to mix for a couple of minutes until sauce thickens. Keep warm over hot water while preparing the rest of breakfast. IF, your sauce separates, don't panic! At the last minute just whisk in another tbsp of boiling water and the sauce will smooth out again. (Note: go ahead and use a packaged hollandaise if you like, they're still pretty good)

3. Once hollandaise sauce is made, get water boiling for the poached eggs. Use a large skillet so you can do all the eggs at once. Put a couple of teaspoons of vinegar in the water (this help keeps the eggs together). Break eggs one at a time into a small dish and "slip" quickly into the simmering water. Poach 4-5 minutes for an egg that is runny inside. (to test, just pick the egg up out of the water with a slotted spoon and poke it with your finger - you'll know when its done to your liking.) When eggs are done, remove them and let them drain a couple of seconds on a couple of sheets of paper towel, so they don't make your English muffins soggy.

4. While the eggs are cooking, toast the English muffins under the broiler (this is easier than messing with toasting them two at a time in the toaster). Butter the muffins.

5. For the back bacon, I usually just throw it in the microwave for a minute or so (because at this point, I figure that I've dirtied enough dishes!)

6. Assemble on warmed plates. English muffin, back bacon, egg and a spoonful of sauce on each. Serve with homefries and fruit.

Homefries

4 yukon gold potatoes, washed and not peeled
1 small onion
1 tbsp olive oil
1 tbsp butter
2 tbsp maple syrup
salt and pepper

1. Before you go to bed the night before, bake the potatoes in the microwave (pierce them with a fork and bake for about 10 minutes). Place them in the fridge.

2. Cube the potatoes and fry in olive oil and butter until they are starting to brown.

3. Add maple sugar and onion and continue to fry until the onions are soft. The sugar in the syrup will help brown the potatoes really nice.