Home Page
Showing posts with label Appetizers. Show all posts

Monday, May 10, 2010

Shrimp and Avocado Toasts


Sometimes on Sunday's just for the heck of it, I create a little canape for the family to snack on before dinner. I don't usually make a lot, just enough for one or two bites per person, but it's a fun way to try experiment with some appetizer recipes. I usually try to work with stuff I already have at home.

This weekend, I wanted to use up some flour tortillas that I had in the freezer. They had become all bashed and battered around the edges from being buried under the frozen turkey and all those frozen muffins and muffins and muffins and muffins. They were no where near suitable for making wraps anymore, I don't know why I bother freezing them, I usually end up with a bag full of broken flour tortillas pieces. But it lead me to create this recipe, so I guess it's all good.

Shrimp and Avocado Toasts

3 large flour tortillas
16-20 medium size cooked shrimp
1-2 tbsp olive oil
1 ripe avodaco
2 tbsp mayonnaise
1 tbsp fresh squeezed lime juice
salt and pepper
lime zest

1. Using a 2" inch cookie cutter, cut as many circles as you can out of your flour tortillas.

2. Brush the tortilla circles lightly with olive oil and fry them in a medium hot skillet on both sides until browned and crispy. Remove them to cool.

3. In a small bowl, mash the avocado with a spoon, be a rebel and leave a few lumps (it's better that way). Stir in the lime juice and mayonnaise. Season to taste with salt and pepper.

4. Place about a tbsp of the avocado mixture on each tortilla toast, and top with a cooked shrimp. Arrange on a platter and sprinkle with lime zest.


Thursday, March 25, 2010

Pistachio, Blue Cheese and Apricot Canapes


A delicious and super easy little canape recipe that I tried out for the first time on my family last weekend. This was the perfect thing for my kids because my daughter loves blue cheese and pistachios and my son loves apricots, so they pulled them all apart and split things up.

The contrast between the sweet honey and the apricots and the salty pistachios and the blue cheese was just divine. I'll be making these again the next time I have to bring an appetizer somewhere. They were super easy and I imagine they will travel well also.


Pistachio, Blue Cheese and Apricot Canapes

16-20 dried apricots
1/4 cup crumbled blue cheese
2 oz salted pistachios, shelled and chopped
1 tsp honey + more for drizzling.

1. In a bowl mix the blue cheese, chopped pistachios and 1 tsp of honey, until it forms a bit of a paste that can be shaped.

2. Use a tsp to form out little round mounds and place on on top of each apricot.

3. Arrange on a serving platter and drizzle with honey.


Thursday, June 25, 2009

Shrimp Summer Rolls with Two Sauces


I have been wanting to try making homemade summer rolls for some time, and I finally found a good excuse. I made these for a party at my Mom and Dad's place last weekend. I made a trial run ahead of time at home for the family and we had them for dinner. The picture above is from the trial run.

I was a little worried that my kids wouldn't eat them, so I told them we were having Egg Rolls for dinner (they LOVE Egg Rolls... Egg Rolls and Chicken Balls ARE Chinese Food to them). So, we were about halfway through dinner, and Claire had eaten a couple of the summer rolls when she says, "Mommy, I think you might have done something wrong, these don't taste like Egg Rolls". So then I had to fess up and explain the difference between Egg Rolls, Spring Rolls and Summer Rolls.

I tried out two different dipping sauces in the hopes that one would emerge as a clear winner to take to the party. But, Claire and I favoured the Peanut Sauce, and Marco and Mario liked the Sweet Chili Sauce. Given the stalemate, I decided to go ahead and make both for the party. I had a lot of leftover Peanut Sauce the night that I made them at home, so I used it on a stir fry and it was fabulous. (Only the peanut sauce is pictured above, sorry!)

These aren't as finicky as one might think. The important part is to get a little system going with all your ingredients laid out in order. The night I made them at home, I had some trouble with the summer rolls sticking to each other. So for the party, I tried misting them lightly with non-stick cooking spray before I set them on the platter. Then I covered them with damp paper towels before I covered the tray in plastic wrap. This worked nicely. I made them about 2-3 hours ahead of time, and they didn't dry out, and the cooking spray kept them from sticking.

Summer Rolls

1 generous cup lettuce (I used mescalun mix)
1 cup bean sprouts
1 cup rice vermicelli noodles (about 2 oz uncooked)
1/2 cup shredded carrot
4 green onions, cut into 3" pieces
1/4 cup thinly sliced basil
1/4 cup chopped mint
6 oz cooked shrimp, roughly chopped
8 8” round sheets rice paper

1. Prepare all your ingredients and set into piles close to your work surface.

2. Set about 1" of hot tap water in a shallow dish that is a little bigger than the rice paper wrappers (I used a round cake pan).

3. Prepare your work surface with a couple of layers of paper towel in order to absorb the excess water from the wrappers.

4. One at a time dip the wrapper in the water. Hold each one in the water until softened (over soaking might make them easier to rip). After one or two, you'll get a feel for how soaked they should be.

5. Set the wrapper down on your paper towel and at one end stack the ingredients: noodles (about 20g per wrapper), shrimp (about 20g per wrapper), then the rest of the veggies (eyeball about 1/8 of each pile).

6. Roll burrito style. Fold the bottom up, sides in, and then roll the rest of the way. Spray with cooking spray if you are making ahead (very lightly - you don't want them to feel greasy).

7. If serving as a finger food, slice in half diagonally and set on a serving tray.

Sweet Chili Sauce

2 tbsp sugar
1/4 cup rice wine vinegar
1/4 cup fresh lime juice
2 tsp chili paste with garlic
2 tsp soy sauce

1. Mix all ingredients together. Chill until ready to serve.

Peanut Sauce
I got the Peanut Sauce recipe from the blog, The Chef and The Photographer, and it was fabulous.

2 tbsp finely chopped shallots
2 tbsp finely chopped lemongrass
2 tbsp minced garlic
2 tbsp finely chopped ginger
1 tsp sesame oil
1/2 cup chicken broth
1/4 cup peanut butter
2 tbsp brown sugar
2 tbsp rice wine vinegar
2 tbsp soy sauce
1 tbsp lime juice
salt and pepper to taste

1. In a small non-stick pan, saute the shallots, lemongrass, garlic and ginger in the sesame oil until soft.

2. Add broth, peanut butter, brown sugar, vinegar and soy sauce. Bring to a boil and simmer on low heat, covered, for about 5 minutes.

3. Strain through a fine sieve, pressing all the juice you can out of the garlic, shallots etc.

4. Add lime juice and salt and pepper to taste. Chill until ready to serve.


Sunday, March 22, 2009

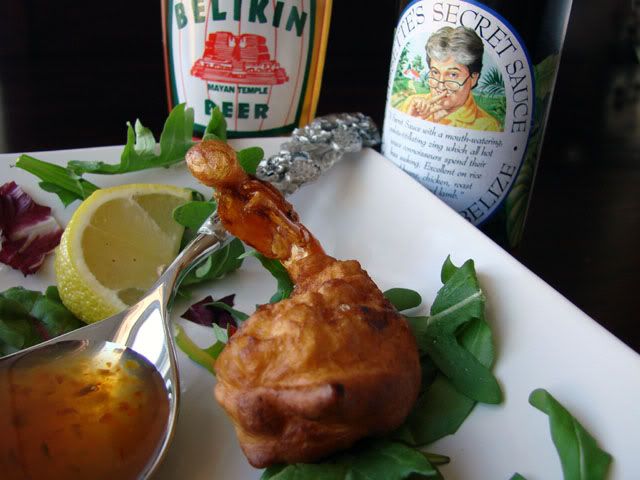
Belikin Beer Battered Shrimp with Lisette's Secret Sauce


We just returned home, yesterday, from our annual family vacation to San Pedro, Belize. While there, I made a very important discovery... Janet is Hungry has a lot of fans in Belize. More than I could possibly count! (using one hand)

I am not kidding when I say that all this adulation has seriously gone to my head.

The President of the Belizean Chapter of the Janet is Hungry fan club, Jesse (of the San Pedro Daily), has made a personal request for more local Belize recipes on Janet is Hungry.

Not wanting to disappoint my only groupie, I scrambled to put together a recipe using some ingredients that I associate with my vacations in Belize: Belikin Beer (of course), shrimp (I would have used conch if it I could get it here) and Lisette's Secret Sauce (a staple in most Belizean kitchen's - well I think so anyway, having only ever been in one Belizean kitchen - my Mom's).

I have, on returning from previous vacations in Belize, experimented with some other local recipes, such as fish tacos, orange crusted snapper, and shrimp ceviche.

I also promised Jesse to take a stab at Belizean Stewed Chicken with Rice and Beans, but this will have to wait until another time when I am less travel weary. For those not familiar with Lisette's Secret Sauce, it is a sweet tangy sauce made with peppers, lime juice, carrots and sugar, etc.


Belikin Beer Battered Shrimp with Lisette's Secret Sauce

1 lb large shrimp (peeled and deveined with tail intact)
1 cup flour
1 egg
1/2 cup Belikin Beer (or other pale ale)
Lisette's Secret Sauce (or other dipping sauce)


1. Heat skillet with 1/2" of oil over medium-high heat.

2. Mix batter ingredients (flour, egg, and beer) until smooth. Should be the texture of thick pancake batter.

3. Wash and pat shrimp dry, season with pepper.

4. Dip shrimp in batter and fry in batches until golden brown on both sides (they cook very quick, about a minute per side).

5. Drain on paper towel, and serve with dipping sauce.


Tuesday, November 18, 2008

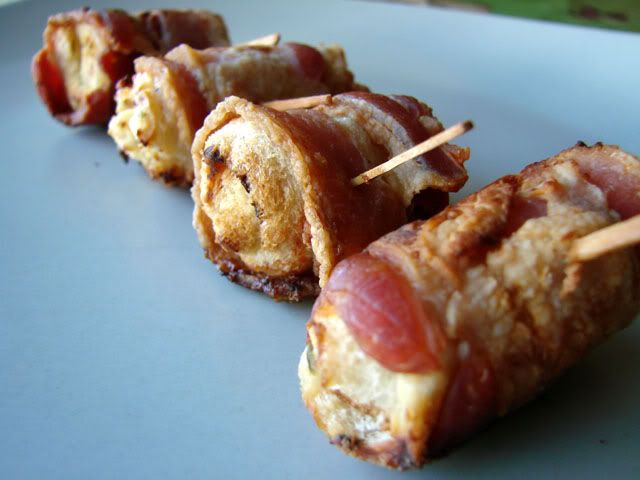
Bacon and Cream Cheese Roll-Ups


This recipe is a long time favorite of ours (and our friends). I made these most recently for a party that we hosted on Halloween. One of my friends specifically requested that I make "the bacon things" for the party... and they go pretty fast!

We actually had a little discussion about how you could pretty much wrap ANYTHING in bacon and improve on it! Then, much to the dismay of my guests, I happened to mention that, as many times as I have made these appetizers, I have never actually sampled one. They just seem a little "dangerous" to me.... I think they would be "more-ish".

People who know me well, know that I don't do things well in moderation, I have an ALL or NOTHING kind of mentality. I compare this to the day that I first tasted Poutine... I probably should have never had that first bite, because then I wouldn't know what I was missing everytime I walk past the chip wagon that parks itself right outside my office building (solely to taunt me, I know). Ask me if I have EVER ordered a "small" poutine.... yeah, I rest my case.


Bacon and Cream Cheese Roll-Ups

1/2 loaf white sandwich bread (square slices are best)
1 8oz package of cream cheese, softened
1 clove garlic minced
1 tsp italian seasoning blend
1 tsp dried parsley flakes
1/8 tsp pepper
1 lb bacon

1. Mix together the cream cheese, garlic, seasoning, parsley and pepper until well blended.

2. Cut the bacon slices in half.

3. Cut the crusts off the bread, and spread each slice evenly with cream cheese (I use about a heaping tablespoon per slice, then cut each slice of bread into 3 strips.

4. Roll up each strip of bread and wrap with 1/2 slice of bacon. Secure with a toothpick. I usually just keep going until I run out of bacon. This usually takes about 1/2 a loaf the bread and most of the cream cheese mixture. If you have leftover cream cheese, it is great spread on crackers or toasted bagels.

5. At this point, you can go ahead and bake them, or you can stash them in the fridge or the freezer to bake later (if baking from frozen, add about 5-10 minutes to your cooking time).

6. Bake at 375F for 15-20 minutes until the bacon is crisp. Drain on paper towels for about 5 minutes to cool a bit, and serve.
7. Get out of the way quickly, so you don't get trampled.


Wednesday, October 15, 2008

Rice Fritters


Have some leftover rice? That's never a problem in my house. Leftover rice always gets used. There are so many things you can use it for. I love taking cold rice salads for lunch (leftover white rice, tomato, cucumber, green onion, garlic and a splash of red wine vinegar and olive oil - yum). My kids simply adore fried rice, which I often make for them with leftovers. You can also throw leftover rice into soup or stew or a sandwich (OK. OK. You got me. I've never put in a sandwich, but I bet you could!!)

Anyway, here's my favorite way to deal with leftover rice. Usually I would make this with leftover risotto, but any leftover rice that is a little on the sticky side will do (you just need to be able to shape it into a ball that will stay formed). This time, I had some leftover Persian Rice. Sadly, I had my Mom and Dad for dinner the night I made it, and in all the excitement I forgot to take pictures of the original rice recipe.

The next day, I made these Rice Fritters.


These are really tremendous! I am surprised that you don't see this on appetizer menu's in restaurants more often, alongside the fried zucchini, potato skins and the nachos... (and they are WAY better than your run of the mill deep fried mozzarella sticks).

I am going to leave the amounts out of the recipe, because it really all depends on how much leftover rice you have. Just start with one egg and about 1/2 cup of crumbs, because you can always add more if you run out, but if you crack 8 eggs and dump out your whole box of panko... well... that wasn't very smart. Why'd you do that?

Rice Fritters

Leftover rice
Panko crumbs
Eggs
Mozzarella Cheese
Dipping Sauce (Marinara Style)

1. Shape the rice into balls that are, in diameter, precisely halfway in between a walnut and a golf ball... just kidding! Just make your balls "yay big".

2. Cut some mozzarella into little cubes (about 1 cm square).

3. Make a depression with your finger in each rice ball and press in a mozzarella cube. Close the rice back up to completely enclose the ooey-gooey mozzarella goodness.

4. Roll the rice balls around in beaten egg, and then in panko crumbs until well coated.

5. Chill in the fridge for 30 minutes or so, to set coating.

6. Preheat oven to 400F (use convection if you have it). Place the rice balls on a baking sheet that you've sprayed with cooking spray. Spray more cooking spray on top of the rice balls. Bake for about 15 to 20 minutes until golden brown. Turn them around and give them another squirt of cooking spray halfway through. (FYI - the original recipe called for these to be deep fried, but I don't like to deep fry at home).

7. Serve with your favorite marinara-type dipping sauce (I used canned pizza sauce).


Wednesday, September 17, 2008

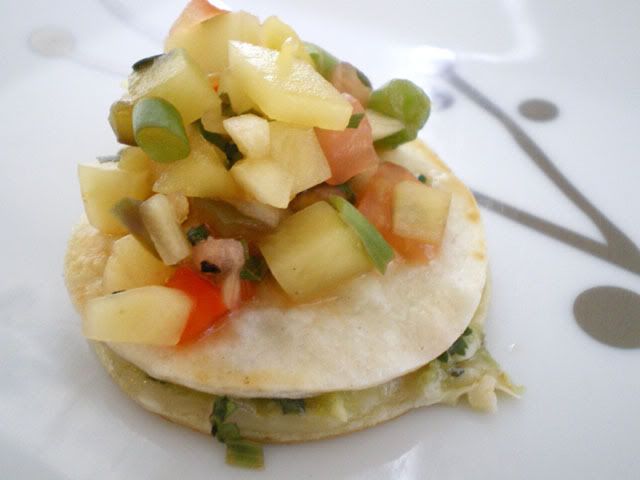
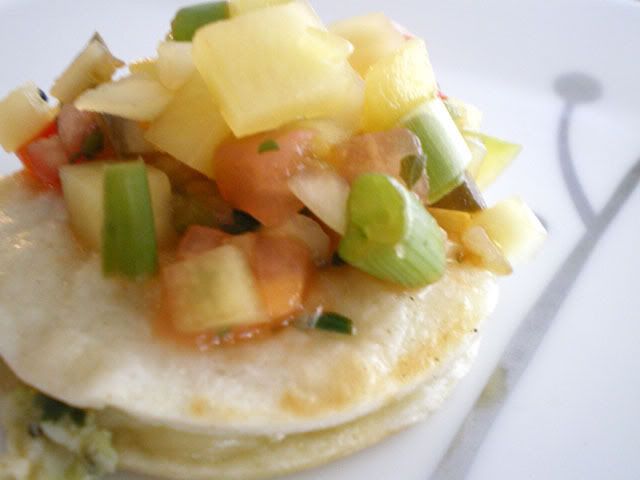
Crab and Avocado Mini Quesadillas


Every once in a while, I absolutely love to just cook appetizers for dinner. I will make 4 or 5 different hot appetizers and put them all in the middle of the table along side some veggie sticks, dip, bread and assorted cheeses. It's a great dinner that everyone loves (especially the kids, since they can pick and choose what they want - which is usually just a lot of bread and cheese). It is also a great way to experiment and test out some new recipes before springing them on unsuspecting friends at a potluck!

This recipe has become a real favorite of ours. If you think it seems fussy, you can always make the quesadillas full-size and cut them into wedges for serving. The original inspiration for this recipe came from a 2007 Holiday Appetizer edition of Fine Cooking Magazine.

Crab and Avocado Mini Quesadillas
makes about 60 appetizers

Mango Salsa
1 ripe mango (peeled, pitted and diced)
1/2 red bell pepper, diced
1 large ripe tomato, seeded and diced
2 tbsp finely chopped chives
2 tbsp finely chopped cilantro
2 tbsp fresh lime juice
1 fresh jalapeno, seeded and finely chopped
salt and pepper

Crab and Avocado Quesadillas
12 8-inch flour tortillas
1 1/2 cups cooked crabmeat
1 1/2 cups shredded Monterrey Jack cheese
2 ripe avocados, diced
1/3 cup green onion, finely chopped
1/3 cup cilantro, finely chopped
2 tbsp fresh lime juice
salt and pepper
olive oil for frying

1. To make the salsa, combine all of the salsa ingredients and let stand for at least one hour before serving.

2. Cut 120 circles out of the tortillas using a 2 inch cookie cutter.

3. Mix together the crab meat, cheese, avocado, green onion, cilantro, and lime juice. Season with salt and pepper.

4. Spread about 1 tablespoon of crab mixture on each of 60 tortilla circles and top with the remaining circles (you can get this far and the chill the circles until it is time to cook them).

5. Heat a small amount of oil in a non stick pan over medium heat and fry in batches until golden brown. An alternative I have used a couple of times is to spray a baking sheet with cooking spray, load it up with quesadillas, spray the top of the quesadillas lightly with cooking spray, and bake in the oven at 400F until golden. About 10-15 minutes or so.

6. Serve warm with a small spoonful of salsa on top.


Thursday, July 3, 2008

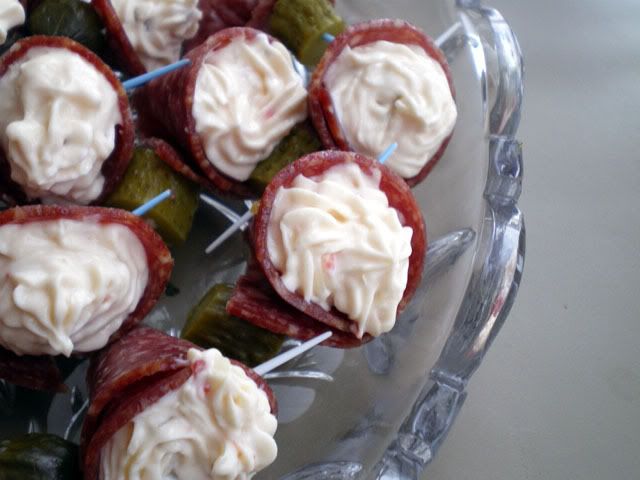
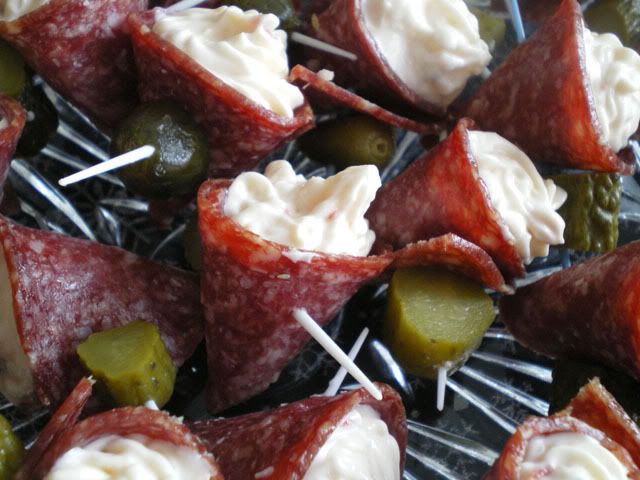
Salami Cones


Well, it's been an unforgivably long time since I've written a post, but rather than going into a whole list of excuses (most of them would be made up anyway), I'm just going to give you all a nice new recipe.

I've gotten a lot of e-mails over the past few months, hundreds probably, and to answer the most common question I've been asked.... YES, I am STILL hungry!!

This is a nice little appetizer recipe that I've made tons of times. It's a little finicky to put together, but well worth the effort for all the compliments you will receive.

Salami Cones

1 4oz package of cream cheese
1 cup finely shredded Monterrey Jack cheese
1-3 tbsp milk
3 tbsp very finely chopped red pepper
1 package (at least 12 slices) hard salami, thinly sliced
baby dill pickles

1. Mix softened cream cheese with Monterrey Jack and red pepper.

2. Mix in milk. Add one tablespoon at a time until mixture reaches the consistency of cake icing.

3. Spoon into pastry bag fitted with large nozzle (this is why you have to chop the red pepper very fine, or they will clog the opening).

4. Cut each salami slice into 2. Roll each half into a cone and fill with cream cheese mixture. Secure with toothpick and a chunk of baby dill.


Friday, November 2, 2007

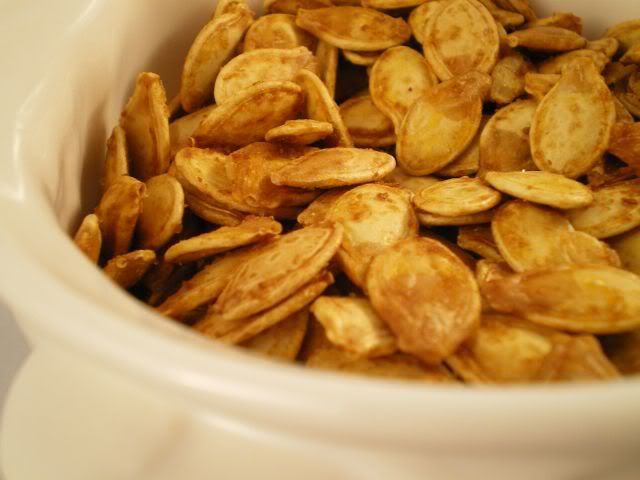
Roasted Pumpkin Seeds


Around this time of year, you start seeing a lot of recipes around the internet for roasted pumpkin seeds. So you might be asking, what does Janet know about roasting pumpkin seeds, that we don't already know? WELL.... I have a secret! This is something that I rarely see anyone else suggest, and you are all missing out! BIG TIME.

You have to trust me on this one... have I ever steered you wrong before? (OK, don't answer that). Here is my big pumpkin seed secret.....

DO NOT wash the seeds! Most other recipes always say to wash the seeds, but if you do, you are just washing away all the good pumpkiny goodness. See the lovely brown crispy bits on my seeds? That is pumpkin pulp and it is delicious. It makes the seeds so good and flavourful. All I do is pick out the largest chunks of pulp by hand and leave the rest on the seeds.

I buy extra pumpkins right after halloween every year, when you can get them dirt cheap. Mostly for the seeds, but I also save a lot of the pumpkin flesh for pumpkin pie, pumpkin soup and pumpkin muffins. I'll be posting some of those recipes over the next week or so.

Roasted Pumpkin Seeds

2 cups pumpkin seeds
2 tbsp margarine
1 1/2 tsp salt

1. Remove largest chunks of pulp from the pumpkin seeds but do not wash.

2. Toss the seeds with margarine and salt.

3. Spread on a baking sheet and roast at 250F for 1 hour and 10 minutes. Stir two or three times through out the roasting. Store at room temperature in a sealed container.


Friday, October 19, 2007

Baked Zucchini Coins


If you love to order deep fried zucchini sticks in restaurants, then you will LOVE this healthier at home version. You won't even be able to tell they aren't deep fried!

This is the first time I made these at home, and I honestly thought for sure that the kids would love them. Silly me. Normally, I would have "fried" zucchini as an appetizer, but I decided to just serve it as a side dish with some steak and roasted potatoes wedges. We really enjoyed it.


Baked Zucchini Coins

1/2 cup cornmeal
1/4 cup whole wheat flour
1 tsp salt
1 tsp dried basil
freshly ground pepper
1 zucchini
1 egg
olive oil

1. Mix flour, cornmeal, salt, basil and pepper on a plate.

2. Beat egg in a small bowl.

3. Slice zucchini into 1/4" thick coins (you can do sticks, but its easier to brown them more evenly in the over if they are coins because you only have to flip them once).

4. Dip zucchini into egg and then into cornmeal mixture.

5. Coat a parchment lined cookie sheet with a couple of tablespoons of oiive oil. Arrange zucchini coins on cookie sheet and back at 425 for about 10 minutes per side, until golden brown.

6. Serve with bottled blue cheese or ranch dressing.


Monday, October 15, 2007

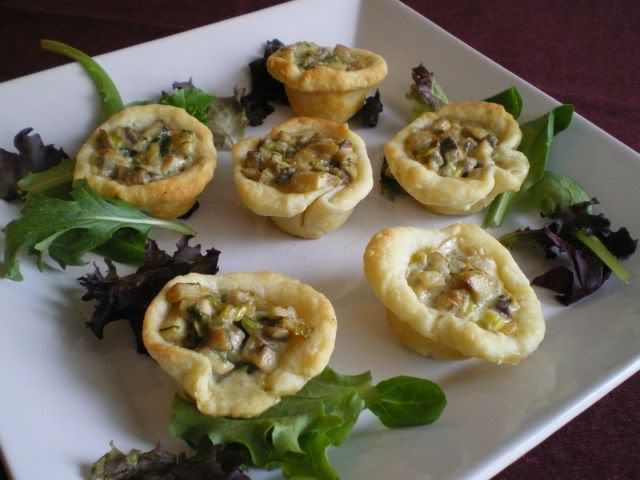
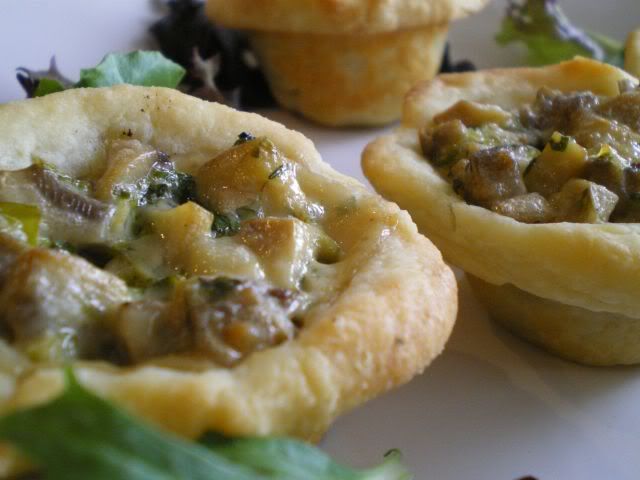
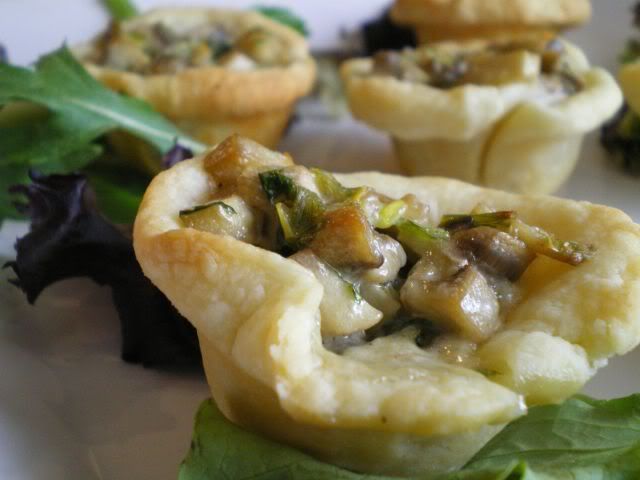
Mushroom Tarts


Last night I decided to make some fancy appetizers before dinner. There was no big special occasion, it was just sort of a, "oh my GOD, I have nothing to post tomorrow" sort of occasion. Although, I sold it to Mario as more of a, "I made you a special treat because your the best-est Husband in the whole world (I bought some new shoes)" sort of occasion.

I have always had an special bond with mushroom tarts. In fact way back when Mario and I were first dating, his Mom happened to make some, and I exclaimed, "Oh mushroom tarts, my FAVORITE"... well, they aren't truly my favorite, not in the Poutine sort of sense, but I do really like them a lot. Anyway, since then, Mario's Mom continues to make mushroom tarts for me all the time. So much so, that there is really no need for me to make them at home, and thus it's been years and years since I have pulled out this recipe and made it. The first thing I noticed was... they aren't as good as Mario's Mom's. I think that I like my pastry better, but her filling is the BOMB. So now I'm going to have to do some reconnaisance to figure out what she does differently.

In the meantime while I am busy with my spy work, if you are hankerin' for some mushroom tarts, these ones are a fine substitute!

Oh, and because I always like to write a sentence or two about the official reaction of "the offspring"... Claire and Marco were out in the yard raking (e.g. jumping in) leaves when I served these. I brought a couple out to the back door for them to eat outside. A few minutes later, Mario goes to look out the window... "looks like your tarts are really popular with the seagulls"...


Mushroom Tarts
makes 12 mini tarts

Pastry:
1 cup flour
1/2 tsp salt
1/2 cup butter, diced
1/2 cup cream cheese, diced

Filling:
1 tbsp butter
8 oz fresh mushrooms, diced
1 clove garlic, minced
1/2 cup heavy cream
1/2 tbsp lemon juice
1/4 cup chopped green onion
2 tbsp chopped fresh parsley
salt and pepper to taste

1. In a food processor, mix together all the ingredients for the pastry. Form into a ball, wrap and chill for 30 minutes.

2. Meanwhile, in a non-stick skillet, saute mushrooms and garlic in butter until soft and most of the liquid is evaporated. Add cream, lemon juice, green onion and parsley. Bring to a boil and remove from heat. Season to taste.

3. Remove pastry from fridge. It will be a little to soft for rolling, so break off 1" balls, flatten them with the palm of your hand, and press them into the tart tins.

4. Fill each pastry shell with mushroom mixture and bake at 400F for 20 minutes until golden brown.


Tuesday, August 21, 2007

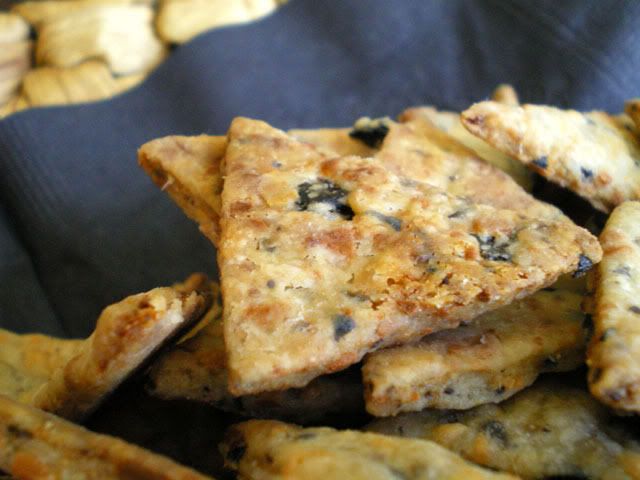
Olive and Anchovy Bites


Thanks to everyone who wished me a happy birthday yesterday. I got tons of e-mails and comments. It was great!

I ended up making some chocolate mocha cupcakes for my birthday cake, but I'm not posting them today (sorry) because it was too dark last night when we were eating them to take nice pictures. I will post them tomorrow.... but here's a teaser.... my Mom said, "These are the best cupcakes I've ever had in my life!"... of course she's my Mom which obligates her to say stuff like that, but still you might want to come back and check out the recipe tomorrow, just in case...

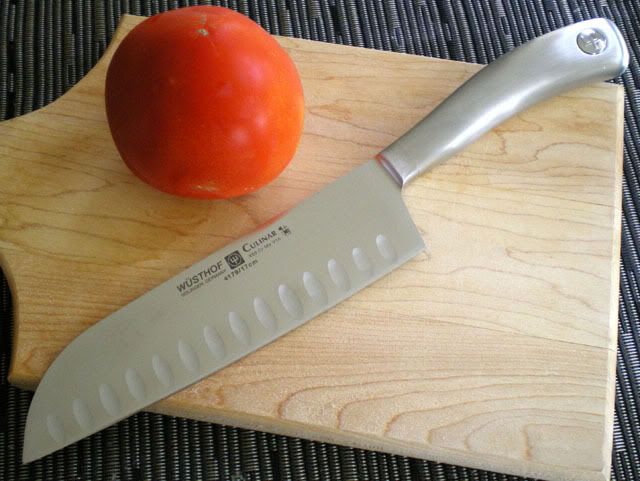
As for my gifts, I did really well. I thought I would be getting a tacky pair of earrings or something from the kids, but I guess they are good little shoppers. Claire and Marco got me a Cuisinart Hand Blender (Mario swears he didn't try to influence their choice). Mario got me a very nice Chef's knife. When little Marco handed me the wrapped up package he said, "Mommy, this one is VERY SHARP..." OK Bud, thanks! My parent's gave me a Kitchen Aid food processor, which I can't wait to take for a whirl (ba da bum).

My parents and Mario and the kids took me out to dinner at a Japanese Teppanyaki restaurant called Edoko. The Teppan chef put on quite a show and the kids loved it. Although at first when the chef lit a huge fire on the grill, I don't think Marco knew it was SUPPOSED to happen, and he looked petrified. When he notice no one else was panicking and running for the exits, he started to laugh too. He pointed and said, "that guy is FUNNY!" and Claire said, "Pay attention Mommy, OK? This guy is gonna teach you how to cook, OK?" Uh thanks sweetie...

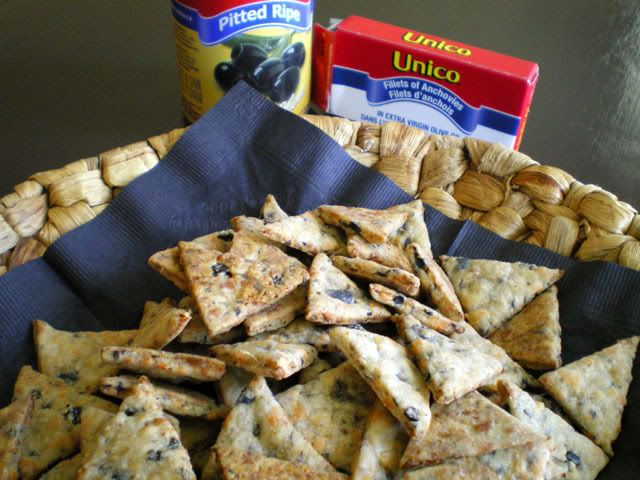
Today I am posting a nice little appetizer that I served for my parent's when they came to dinner a few weeks ago. These were really tasty, although the kids didn't like them too much. They were salty and yummy and they went very well with a cold beer before dinner. The recipe calls for some sea salt to be sprinkled on them just before baking, but I left this off, because I figured with the olives and the anchovies, they would be salty enough.


Olive and Anchovy Bites
from "Mediterranean Food of the Sun" by Jacqueline Clark and Joanna Farrow

1 cup flour
1/2 cup chilled butter
1 cup finely grated Gruyere
2oz can of anchovy filets in oil, drained and roughly chopped
1/2 cup pitted black olives, roughly chopped
1/2 tsp cayenne pepper
sea salt

1. Place flour, butter, cheese, anchovies, olives and cayenne in a food processer. Pulse until the mixture forms a dough. (It was while I was trying to make this recipe that my old food processor 'gave up the ghost' the shaft was completely stripped (overuse I guess). Hence the birthday present.)

2. Wrap the dough and chill for 20 minutes.

3. Roll out dough thinly on a lightly floured surface. Cut the dough into 2" wide strips and then cut across each strip diagonally to make little triangles. Don't worry if they aren't equilateral. Most of mine were isosceles and scalene triangles. (a little geometry lesson there).

4. Place on parchment lined baking sheets and bake at 400F for about 8 to 10 minutes. Cool on a wire rack. Sprinkle with sea salt and serve.

Tuesday, July 31, 2007

Mango Chutney and Curry Cheese Dip


I got this recipe a few months back from my Mom, who in turn got it from a friend of hers. It is a really nice refreshing change to your typical Mexican Layered dip. Chances are, if you bring this to a party, there won't be anyone else there who brought the same thing.

The dip in the picture was actually made by my Mom who served it with some thin crackers. The recipe calls for some coconut to be sprinkled over the top, but my Mom left it off because Mario doesn't like coconut (I'm not usually so nice to him). Claire and Marco didn't even try a bite (not a huge shock) but that was OK, because usually even a few bites of some sort of appetizer before dinner will spoil their appetites.


Mango Chutney and Curry Cheese Dip

1 8 oz package cream cheese, softened
1 cup cheddar
1 tsp curry powder
1/2 jar of peach jam
1/2 jar of mango chutney
green onions
slivered almonds
shredded unsweetened coconut

1. Mix cream cheese with curry. Stir in the cheddar.

2. Spread on the bottom of a large plate or serving dish.

3. Mix together the peach jam and mango chutney. Spread over cheese.

4. Sprinkle with almonds, green onion and coconut.

5. Chill. Remove from fridge about 30 minutes before you want to serve, or else it will be a little hard and you will keep breaking your crackers.


Friday, July 27, 2007

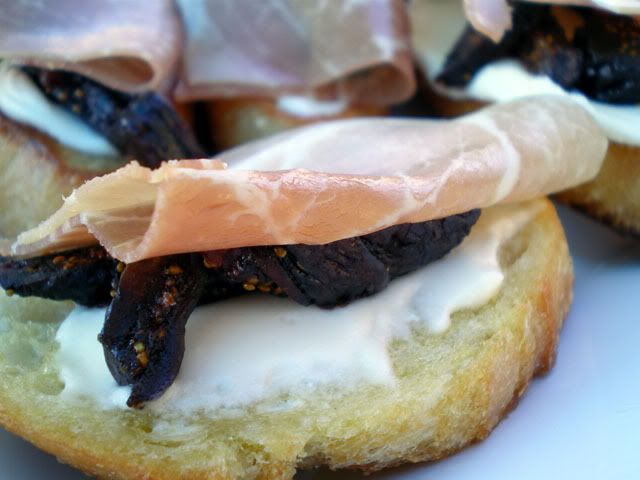
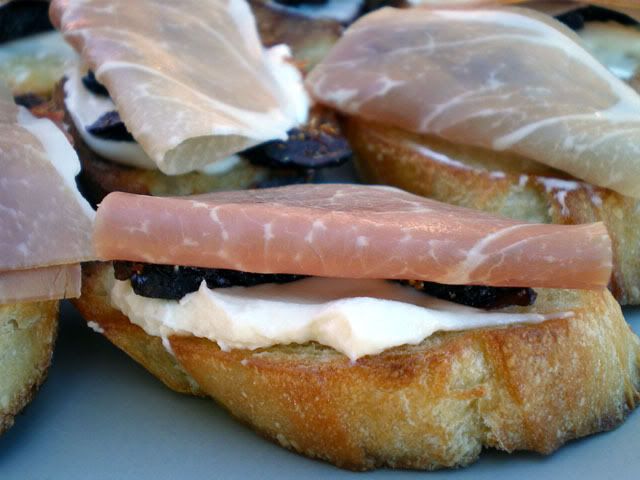
Mascarpone, Fig and Proscuitto Bruschetta


I had a six friends and their kids over for dinner this past Sunday. We had quite a good time. It was a beautiful hot day and we ate outside. I live in a newly built house and our backyard is big, but we haven't had a chance to do much with it yet. So... no fence, no deck, no patio, no patio furniture. No problem, I just moved my dining room table out to the backyard! It worked out fine. And because there was NO shade, Mario put up a big blue tarp over the "picnic" table. And THAT is why there is a slightly blue tinge to my pictures. If you make these at home, and they turn out blue... you did something wrong!!

These mascarpone, fig and proscuitto bruschetta's were inspired by a recipe that I saw over on Kirsten's Home Cooking.... I tend to make a lot of her recipes....to the point where I wonder if I should just stop writing a blog, and just post a link to Kirsten's site everyday. I can't say I followed her recipe exactly because true to form, I took one look at her pictures and assumed I knew how to make it (my relationship with recipes could be equated to a man's relationship instruction manuals.... to be referred to only in dire circumstances). So it wasn't until after I made this recipe that I realized I was supposed to put garlic somewhere.


At any rate, I thought these were fabulous, and I got many compliments on the recipe from my guests.

Whenever I entertain, I always try my best to choose recipes that I can do mostly in advance. Here was my menu plan for Sunday, some of these recipes haven't been posted yet, but they will be... someday:

Appetizers
Hot Artichoke Dip
Shrimp Ceviche
Mascarpone, Fig and Proscuitto Bruschetta.

Main Course (Buffet Style)
Barbecued Boneless Rib Roast
Crusty Rolls
Tray of "fixings" (lettuce, tomato, cheese, fried onions)
Condiments
Krista's Couscous Salad
Bean Salad
Potato Salad

Dessert
Peanut Butter and Chocolate Brownies
Banana Split Bars
Fruit Skewers (except I completely forgot to make those)

Mascarpone, Fig and Proscuitto Bruschetta

1 baguette, sliced into diagonal 1/2" slices
olive oil
1 clove garlic, peeled and sliced in half
mascarpone cheese
dried mission figs, sliced
prosciutto

1. Rub bread with garlic (I missed this step, but they were still really good). Brush with olive oil, and toast in the oven until slightly browned.

2. Spread toasts with Mascarpone cheese and top with some sliced figs.

3. Slide the toasts down the counter to your helper (I commandeered a dinner guest, thanks Bill!) who will place a third of a slice of proscuitto on each toast.

Friday, July 13, 2007

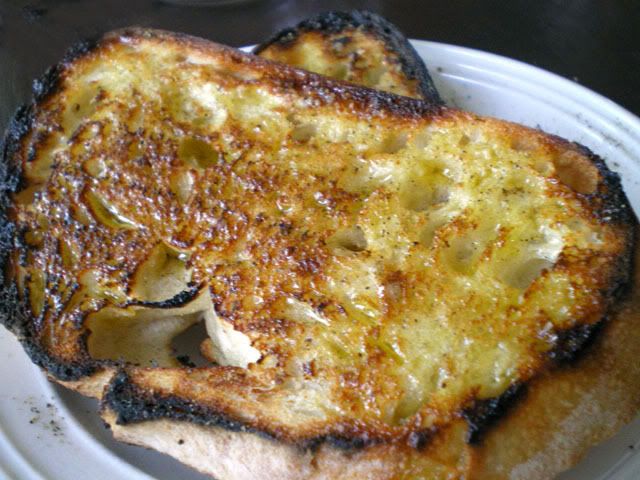
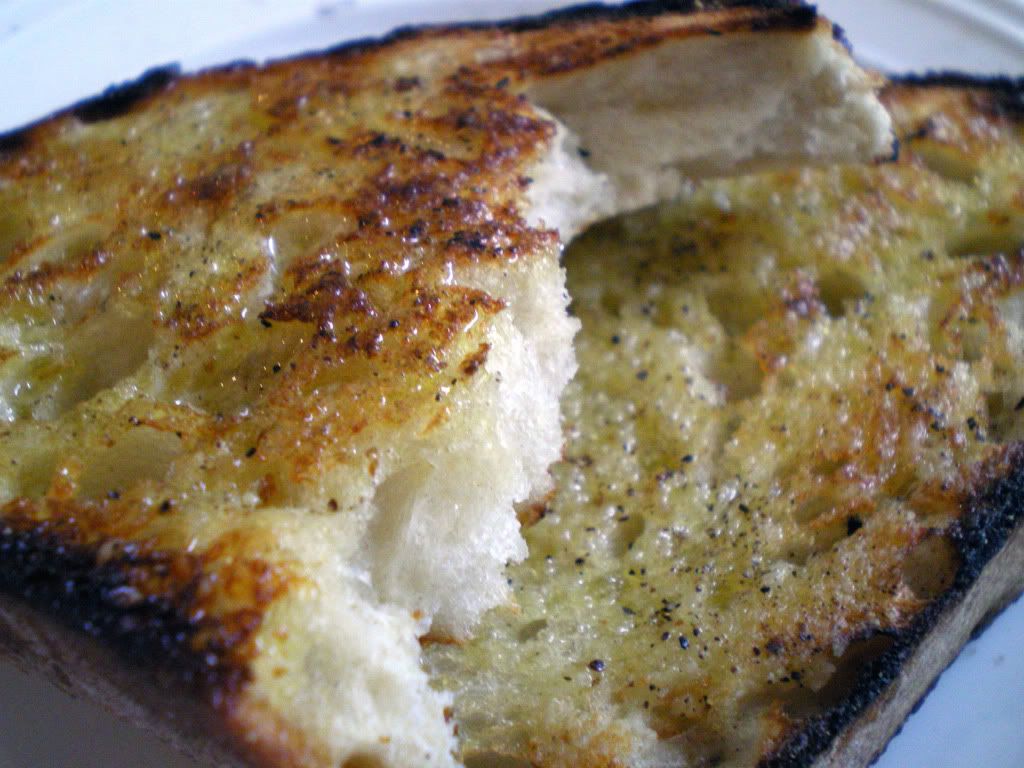
Garlic and Olive Oil Bruschetta


I feel like I am cheating today for posting this recipe. It is not even really a recipe, it is more like an idea and it wasn't even my idea. I guess it was some old Italian person's idea. But, boy was it ever a GOOD idea!! This is "authentic" bruschetta. Although my Bruschetta with Tomatoes is also really good, I actually prefer this more simple bruschetta as a bread to go alongside pasta. The tomato bruschetta is nicer as a starter dish.

This is something that I should do more often, we always have the ingredients around, but I tend to forget about it sometimes. Then every couple of years, I will remember that I haven't made it in a while, and we will we eat it every other night for a month! Then I'll forget about it again for a while. Well right now we are on another Garlic and Olive Oil Bruschetta kick.

We grill the bread on the BBQ and then let everyone fix it themselves so they can control the amount of garlic and oil that goes on it. It is so good, you really have to try it.


Garlic and Olive Oil Bruschetta

1 loaf crusty italian bread
peeled whole garlic cloves (allow about 1 per person)
olive oil (I put some in a bowl on the table with a brush)
freshly ground pepper

1. Slice bread into nice thick 3/4" to 1" slices.

2. Grill bread on the Barbecue (or alternatively broil it in the oven) until is it nicely browned on both sides.

3. Rub each slice with a clove of garlic (I rub until the garlic is about half worn down).

4. After the garlic, brush with olive oil and sprinkle with pepper.


Friday, June 29, 2007

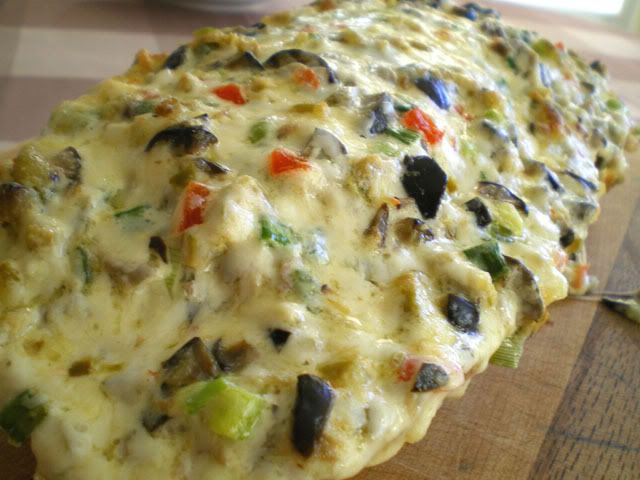
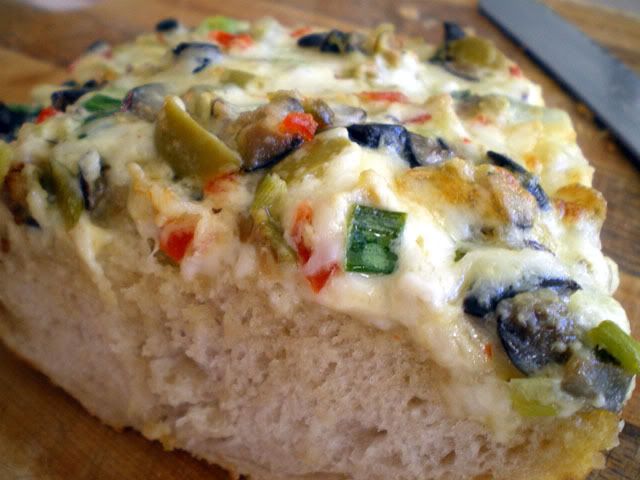
Olive Cheese Bread


It seems like my biggest challenge lately with posting my recipes has been competing with my 7 year old, Claire, for computer time. Anyone ever heard of Webkinz? Well Webkinz World is sort of like Facebook for kids. Claire is standing over my shoulder right now, rushing me, so she can get back on the computer.

The recipe that I am posting today, was something we had on the side with our dinner last weekend (you can see it in the background of my Chicken Orzo picture). It was so good.

I got this recipe from a blog called The Pioneer Woman Cooks. It is a fantastic site, but don't go there if you are on a diet! Seriously, you should check it out, it is funny and there are step by step photo instructions for this recipe.

I adjusted the amounts slightly so I could reflect them in "cups" instead of "cans" (I always have trouble with recipes from the US that call for a 6oz can of something, since in Canada that would be ??ml)

Claire just asked me to type out "it was yucky", but I would urge you to try it for yourself first!


Olive Cheese Bread

1 loaf french or italian bread
1 cup chopped pimento stuffed olives
1 cup chopped black olives
2 green onions
2 cups grated Monterrey Jack Cheese
1/2 cup mayonnaise
1/2 cup butter, softened

1. Roughly chop the olives and green onions. Mix with grated cheese, mayonnaise and butter.

2. Slice the bread in half lengthwise and half pile the mixture on top of each half of the loaf.

3. Bake at 325°F for about 25 minutes, until melted and started to brown on top. Cut into slices and serve.
4. This is really filling, so you may only need half the loaf, the other half can be wrapped and frozen (before you bake it) for later.


P.S. Thanks to everyone that voted in my "Should Janet be allowed to drive the new car" poll. There were 193 votes cast and I won with 64%!!

Thursday, June 28, 2007

Hot Artichoke Dip


Well, I had an interesting day yesterday. Somehow through the wonders of the internet, my little food blog became the center of a debate over at the GM Insider Forum where somebody started a thread called "should his WIFE drive his G35?". Wow. Mario, still has cramps from laughing so hard. I shot myself in the foot. Not the first time, won't be the last.

I am going to close this now infamous poll down at the end of the day today, so it's your last chance to have your say (i.e. vote for me).

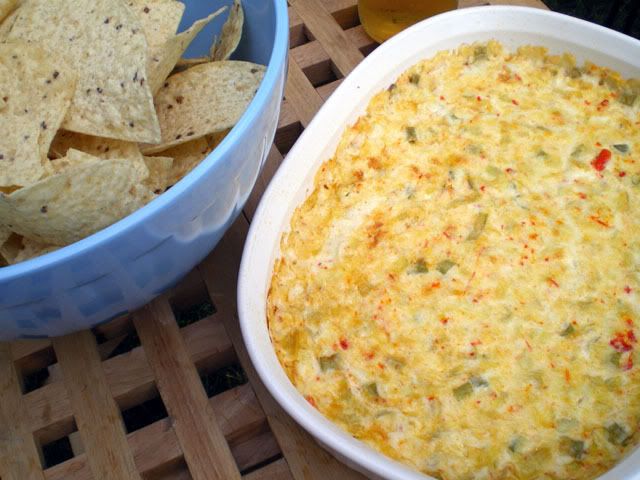
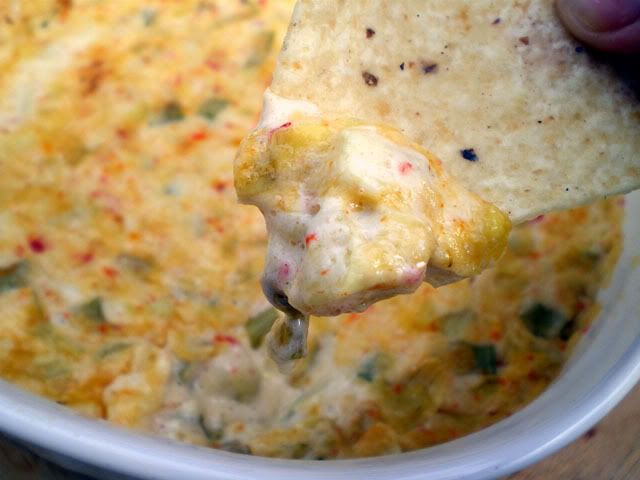
And just to demonstrate what a tremendous wife I really am, and how deserving I am of winning, I am going to post a recipe for some "Man Food". This is a nice yummy hot dip that I served to Mario with a cold beer while he was watching the football game, and I wasn't wearing any... oh wait, it's not football season?? details details ...

He loved it.


Hot Artichoke Dip

2/3 cup Parmesan Cheese
2/3 cup mayonnaise
1/3 cup heavy cream
1 can (14 oz) artichoke hearts, drained and chopped
1/4 cup chopped green onion
1 tbsp chopped pimento peppers

1. Blend all ingredients together.

2. Bake 25 minutes at 325°F until lightly browned.