Home Page

Friday, May 29, 2009

Black Bean Soup


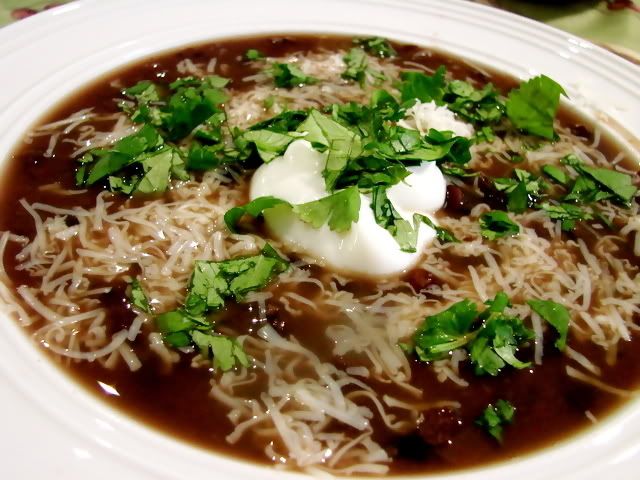
I have discovered a great recipe for black bean soup. Although I don't really consider myself a "soup" person, the rest of my family loves their soup. There are a few soups which I do enjoy - they are mostly the hearty, meal in a bowl type of soups. A favorite of mine is pea soup - I'll have to get that posted someday soon.

This is a soup that simmers all day long in the crock pot. I love coming home from work to the smell of dinner already prepared. This recipe would be great for those rainy summer "non-BBQ" type of days, and makes a fine meal with a hunk of crusty bread and a side salad. It wasn't as spicy as I would have liked, so next time I might opt not to remove the seeds from the jalapeno pepper. I also throw a bit of grated Monterrey Jack cheese on the top for the sake of my kids, because for some reason it helps them see past the little bits of "green stuff".

Black Bean Soup
from Cooking Light Magazine, March 2009

1 lb dried black beans
4 cups low sodium chicken broth
2 cups chopped onion
1 cup water
1 tbsp ground cumin
3 bay leaves
1 jalapeno pepper (seeded and finely chopped)
2 tbsp lime juice
1 tsp salt

Garnish
Chopped cilantro
Sour cream
Grated Cheese

1. Sort and rinse the beans, cover with water and let stand overnight to soak.

2. The following morning, drain the beans, and add them to your crock pot along with the chicken broth, onion, water, cumin, bay leaves and jalapeno.

3. Cook on low all day (about 10 hours or so).

4. Just before serving, stir in lime juice and add salt to taste. Spoon into bowls and top with sour cream, cheese, and cilantro.


Thursday, May 21, 2009

Hot Cross Bun Pudding


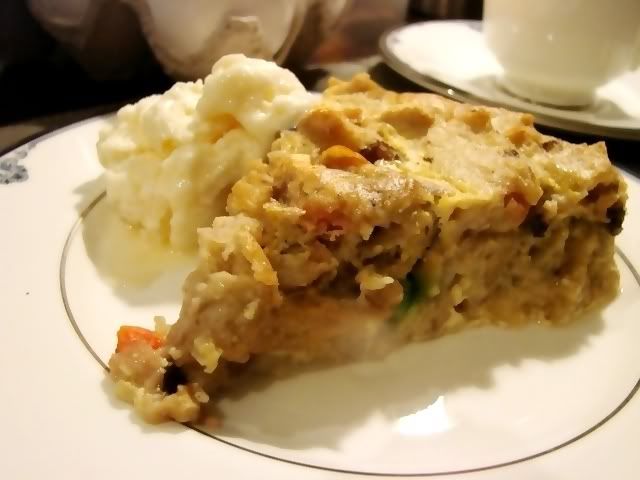
This is the dessert that I made for dinner at Easter. I know this is almost cruel, since it calls for Hot Cross Buns and you probably won't be able to find those in the grocery store to make this recipe until next spring. Yet, it is worth the wait, and I decided that I should post this now, before it gets buried in my alarmingly sizeable photo archive of unposted recipes.

I usually buy Hot Cross Buns for the kids as soon as I see them in the store each spring. They love to eat them split and toasted with a little butter for breakfast. Well at least LAST year, they loved them. Children, however, can be fickle (especially mine) and a favorite treat last year, can turn into one step up from fried liver this year.

So, I took my regular everyday Bread Pudding recipe with a few tweaks and made this delicious bread pudding with the surplus buns. We loved it so much (even the kids), that I ran back out to the grocery store and bought three more packages of Hot Cross Buns, so I will be able to make this six more times before next Easter!

Hot Cross Bun Pudding

4 Hot Cross Buns
2 eggs slightly beaten
⅓ cup sugar
¼ tsp salt
3 cups unsweetened almond milk

1. Cut buns into 1" cubes. Spray an 8" round cake pan with cooking spray and dump the cubes in.


2. Mix together the eggs, sugar, salt and almond milk (you can certainly use regular milk instead, I've discovered that I like almond milk in bread puddings because it adds nice flavour and it is thick like using whole milk without as many calories).

3. Pour the milk/egg mixture over the cubed buns and let it sit for about 30 minutes. Preheat your oven to 325F.

4. Bake for 1 hour. Serve warm with vanilla ice cream.

Sunday, April 12, 2009

Fish and Brewis


I made fish and brewis (pronounced "bruise") for dinner on Good Friday. This is a meal that has a lot of nostalgic appeal to me. I associate fish and brewis with my childhood, and it is something that my Mom made fairy often whenever she could find the ingredients. The recipe originated a long time ago in Newfoundland, where it was prepared by sailors who were often at sea for long periods of time without access to fresh ingredients. Fish and brewis is very simple to make, as it only has three ingredients. Some of the ingredients are only readily available in Eastern Canada, but nowadays thanks to the internet, I can order them on-line.


Here are the ingredients: Purity Hard Bread, Dried Salt Cod, and Salt Pork Fat. The hard bread is a hard block of dried biscuit that will literally crack your teeth if you try to bite into it (sounds yummy eh?)... wait, it gets better. The Pork Fat gets fried up into little bits of heaven that Newfie's like to call, "scrunchions". So, you have to soak both the hard bread and the salt fish overnight to make them edible and then the next day it all gets fried up in the fat that has been rendered from the scrunchions. In Newfoundland, this meal is often served for breakfast to patients undergoing cardiac and pulmonary rehabilitation. OK, I made that last bit up (about the cardiac patients, not the breakfast!)

I can honestly say that this was one of my all time favorite meals as a child (yes, I was a peculiar child). Apparently, my own children are NOT as peculiar because they hate fish and brewis. It is actually a little stressful for them, you see they hate the fish, but like the bruise. Problem is, once the dish is prepared, the two are pretty much indistinguishable. So the kids will be sitting there examining, and sniffing each morsel of food trying to determine what the heck it is...half the time they get it wrong, and fish comes flying back out in a projectile fashion, "nope not bread". Oh well, what can I say... they are "mainlanders".

Fish and Brewis

3 hard bread cakes
1 lb dried salt cod
1 cup cubed salt pork fat back (about 100g)

1. Soak the hard bread in a large bowl of cool water overnight at room temperature. Make sure you add a lot of water because these suckers really swell up.

2. Soak the dried salt cod overnight in cool water at room temperature. In the morning, you can change the water to help remove more of the salt.

3. When you are ready to eat, drain the fish and boil it for about 20 minutes in a fresh pot of water.

4. Meanwhile, fry up the cubes of pork fat in a large non-stick frying pan until they are golden brown and crispy. Remove the scrunchions with a slotted spoon and set aside.

5. Drain the hard bread, and the fish and add it to the frying pan with all the fat from the scrunctions. Fry this whole mixture up for about 5 minutes, breaking the larger chunks of fish and bread up with your spatula. Right before serving you can either mix the scrunchions back in, or sprinkle them on top.

6. Serve with a homemade tomato relish or chutney of some sort (mine is pictured with a caramelized onion chutney).

Sunday, March 22, 2009

Belikin Beer Battered Shrimp with Lisette's Secret Sauce


We just returned home, yesterday, from our annual family vacation to San Pedro, Belize. While there, I made a very important discovery... Janet is Hungry has a lot of fans in Belize. More than I could possibly count! (using one hand)

I am not kidding when I say that all this adulation has seriously gone to my head.

The President of the Belizean Chapter of the Janet is Hungry fan club, Jesse (of the San Pedro Daily), has made a personal request for more local Belize recipes on Janet is Hungry.

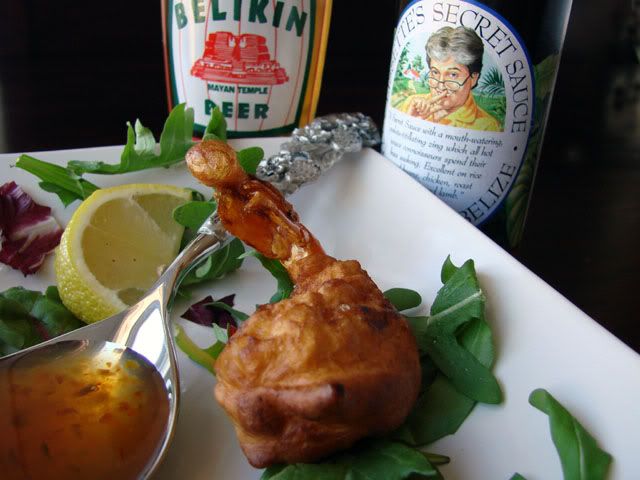
Not wanting to disappoint my only groupie, I scrambled to put together a recipe using some ingredients that I associate with my vacations in Belize: Belikin Beer (of course), shrimp (I would have used conch if it I could get it here) and Lisette's Secret Sauce (a staple in most Belizean kitchen's - well I think so anyway, having only ever been in one Belizean kitchen - my Mom's).

I have, on returning from previous vacations in Belize, experimented with some other local recipes, such as fish tacos, orange crusted snapper, and shrimp ceviche.

I also promised Jesse to take a stab at Belizean Stewed Chicken with Rice and Beans, but this will have to wait until another time when I am less travel weary. For those not familiar with Lisette's Secret Sauce, it is a sweet tangy sauce made with peppers, lime juice, carrots and sugar, etc.


Belikin Beer Battered Shrimp with Lisette's Secret Sauce

1 lb large shrimp (peeled and deveined with tail intact)
1 cup flour
1 egg
1/2 cup Belikin Beer (or other pale ale)
Lisette's Secret Sauce (or other dipping sauce)


1. Heat skillet with 1/2" of oil over medium-high heat.

2. Mix batter ingredients (flour, egg, and beer) until smooth. Should be the texture of thick pancake batter.

3. Wash and pat shrimp dry, season with pepper.

4. Dip shrimp in batter and fry in batches until golden brown on both sides (they cook very quick, about a minute per side).

5. Drain on paper towel, and serve with dipping sauce.


Wednesday, December 3, 2008

Shrimp and Sausage Jambalaya


Back in September, Mario and I decided to start a new tradition. We established a regular Friday restaurant night for our family. We didn't want this to be a fast food night, we believe the kids are getting old enough, and can be well behaved enough to eat in some nicer places. We also think that it's a good idea to expose them to some different cuisines.

So far we've taken them out for Indian, Lebanese, Cantonese and most recently we took them out to a Cajun restaurant. They loved all of it. Interestingly, they seem much more willing to sample new things when they are in a restaurant, than when they are at home. They loved the Indian food the most. Imagine that! I don't think I even tried Indian food until I was in my 30's.

As usual, I am making a really short story very long. What I am leading up to is the fact that I often get inspired by these dinners out, and when I saw my kids devour the healthy looking Jambalaya at the Cajun restaurant, I decided this dish would make a great addition to my at home repetoire.

So I set about finding a good recipe. I ended up using bits and pieces of several recipes that I found on-line. This recipe had quite a bit of kick, so if you don't like the heat (or if your kids won't eat spicy food) then ease back on the cayenne and paprika.

Shrimp and Sausage Jambalaya
(makes about 6 cups of Jambalaya)

1 tsp salt
1/2 tsp black pepper
1/4 tsp cayenne
1/4 tsp hot paprika
1/2 tsp thyme
1/2 tsp basil
1/4 tsp oregano
1 tbsp butter or oil
1 cup diced Andouille sausage
1/2 cup diced onion
1/2 cup diced pepper
1/2 cup diced celery
1/2 cup diced tomato
3/4 cup long grain white rice
1/2 cup tomato sauce
1 1/4 cup chicken stock
1 tbsp Worcestershire sauce
3-4 cloves garlic
1 1/2 cups shrimp (about 1/2 pound)
3 tbsp green onion

1. Mix the spices and seasonings together (first 7 ingredients).

2. Preheat the oven to 350F.

3. In a large oven proof dutch oven or skillet, saute onion, celery, green pepper and garlic in butter for a few minutes until softened.

4. Add sausage and cook another minute or so. (Note: I wasn't able to find Andouille in my local grocery store, so I used a lean Kolbassa instead, it worked fine, but Andouille would be the more "cajun" choice... or at least less "polish").

5. Add the tomatoes, tomato sauce, rice, stock, spices, and worcestershire. Bring to a boil and then set the pot in the oven uncovered for 25 minutes (most of the liquid will be absorbed).

6. Add the shrimp and the green onion and return to the oven for 10 more minutes, or until the shrimp is cooked through.


(Note: I weighed everthing with my digital food scale as I added it and calculated the nutrional information to be roughly 215 calories per 1/6th of the recipe. The recipe makes about 6 cups.)

Friday, November 28, 2008

Old Fashioned Cake Doughnuts


Nothing beats homemade doughnuts. Well, that is nothing except for Muskoka Cookies, Peach Squares, Peanut Butter Chocolate Cake, Butter Tart Squares, Fresno Pudding, and Chocolate Banana Cake. Not my Haupia though, joking aside, please don't ever make my Haupia, make somebody else's Haupia.

(Note: I hope everyone CLICKED on all those links! That's why I put them there people! And I can check, you know - well I think I can, anyway, well maybe not... I mean I'm sure I could if I was at all technology savvy, but I should probably just stick to cooking.... and rambling, I'm good at that - the rambling that is.)

OK, so where was I? Doughnuts. Right.


So the doughnuts are yummy.

You can either douse them in cinnamon sugar or icing sugar. I always keep a spice bottle in my cupboard filled with cinnamon sugar that I make with 3 parts sugar to 1 part cinnamon (for anybody who might be fractionally challenged that means I would add 1 tablespoon of cinnamon to 3 tablespoons of sugar). This is great to have on hand to sprinkle on toast. I used the whole bottle on these doughnuts.

These are best served still warm.

Old-Fashioned Cake Doughnuts

1 cup sugar
4 tsp baking powder
1 1/2 tsp salt
1/2 tsp nutmeg
2 eggs
1/4 cup butter, melted
1 cup milk
4 cups flour (plus a little more if dough is sticky)
oil for frying (lots)
Cinnamon Sugar (tons)

1. In a large bowl mix the sugar, baking powder, salt and nutmeg.

2. Add eggs, milk and melted butter. Beat well.

3. Add 3 cups of the flour, beating until blended. Add one more cup of flour and beat well. The dough should be soft and sticky but firm enough to handle. If you feel its necessary, add up to 1/2 cup more flour.

4. Cover with plastic wrap and chill for one hour (I once got a question from a reader as to whether when I said "chill" I meant in the refrigerator... um yes that's what I meant, but I can see how this could be confusing, I could have meant "Like OK, cover with plastic wrap, and then um like chill, ya know on the couch, for like an hour... like OK?")

5. After you're done chilling on the couch, remove your dough from the fridge and begin heating about 1" of oil to 360F in a large metal skillet. I actually don't have one of those fancy schmancy candy thermometres (hello Santa are you reading?)... somebody remember to ask me after Christmas how many candy thermometres I get...

6. Working half the dough at a time, roll it out on a floured surface to about 1/2" thickness. Cut out circles using a doughnut cutter. If you don't have a doughnut cutter (Santa?) then use a regular cookie cutter and cut out the hole with the screw cap off a 40oz bottle of Newfoundland Screech.

7. Decide that you are too cool for school and take a big swig of the Screech for no good reason. Once the burning subsides and you stop crying and sputtering, push the scraps of dough back together, re-roll and repeat steps 6 through 7 over and over until (a) all the dough is used up or (b) you pass out.*

8. Gently drop the doughnuts in batches into the hot oil. Flip them over as they puff and turn them a couple more times as they cook. They will take 3-4 minutes in total and they will be lovely and golden brown all over.

9. Remove from the oil and set them on paper towels (that removes all the fat, you know). Sprinkle generously with cinnamon sugar. Enjoy them hot, and eat at least four, you need some carbs in your belly to soak up all that Screech.


*Janet is Hungry will not be responsible for any mishap (foreseeable or unforeseeable) that may arise as a result of drinking alcohol in close proximity to a pan of hot oil.

Tuesday, November 18, 2008

Bacon and Cream Cheese Roll-Ups


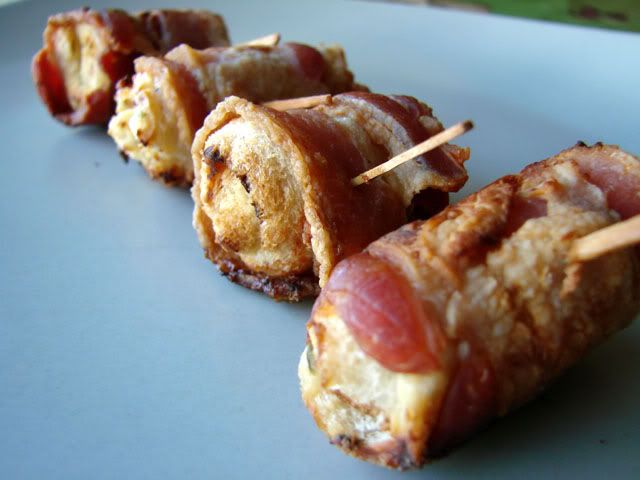
This recipe is a long time favorite of ours (and our friends). I made these most recently for a party that we hosted on Halloween. One of my friends specifically requested that I make "the bacon things" for the party... and they go pretty fast!

We actually had a little discussion about how you could pretty much wrap ANYTHING in bacon and improve on it! Then, much to the dismay of my guests, I happened to mention that, as many times as I have made these appetizers, I have never actually sampled one. They just seem a little "dangerous" to me.... I think they would be "more-ish".

People who know me well, know that I don't do things well in moderation, I have an ALL or NOTHING kind of mentality. I compare this to the day that I first tasted Poutine... I probably should have never had that first bite, because then I wouldn't know what I was missing everytime I walk past the chip wagon that parks itself right outside my office building (solely to taunt me, I know). Ask me if I have EVER ordered a "small" poutine.... yeah, I rest my case.


Bacon and Cream Cheese Roll-Ups

1/2 loaf white sandwich bread (square slices are best)
1 8oz package of cream cheese, softened
1 clove garlic minced
1 tsp italian seasoning blend
1 tsp dried parsley flakes
1/8 tsp pepper
1 lb bacon

1. Mix together the cream cheese, garlic, seasoning, parsley and pepper until well blended.

2. Cut the bacon slices in half.

3. Cut the crusts off the bread, and spread each slice evenly with cream cheese (I use about a heaping tablespoon per slice, then cut each slice of bread into 3 strips.

4. Roll up each strip of bread and wrap with 1/2 slice of bacon. Secure with a toothpick. I usually just keep going until I run out of bacon. This usually takes about 1/2 a loaf the bread and most of the cream cheese mixture. If you have leftover cream cheese, it is great spread on crackers or toasted bagels.

5. At this point, you can go ahead and bake them, or you can stash them in the fridge or the freezer to bake later (if baking from frozen, add about 5-10 minutes to your cooking time).

6. Bake at 375F for 15-20 minutes until the bacon is crisp. Drain on paper towels for about 5 minutes to cool a bit, and serve.

7. Get out of the way quickly, so you don't get trampled.