Home Page

Friday, December 11, 2009

Simple Dinner Rolls


Here is a no fail, super easy dinner roll recipe. The rolls come out light and buttery and simply delicious. They really aren't much work at all, and if I start them about an an hour and half before dinner is ready, then they are fresh out of the oven and straight to the table.

This is my go-to recipe for dinner rolls when I have guests. Homemade bread never fails to impress.


Simple Dinner Rolls

3 1/2 cups flour (plus a bit more during kneading)
2 tbsp sugar
2 envelopes Quick-rise yeast
1 tsp salt
3/4 cups milk
1/2 cups water
1/3 cups butter
1 egg

1. Reserve 1 cup flour.

2. Mix remaining flour, yeast, sugar and salt in large bowl.

3. Warm milk, water, and butter until very warm (approx 115F).

4. Stir warm liquid into dry ingredients and beat in 1 egg.

5. Mix in enough reserved flour to make a soft dough that does not stick to bowl.

6. Knead lightly for about 6 minutes. Adding flour to prevent sticking.

7. Cover and let rest 10 minutes. Shape as desired. (I shape into 18 rolls and put them 8 per pan in 8" round cake pans)

8. cover, let rise about 30 minutes. At this point you can brush butter, or egg on top and sprinkle with poppy seeds, or sesame seeds, if desired.

9. Bake in 375F oven about 20-25 minutes, until golden. Cool on wire rack.

Friday, September 18, 2009

Salmon with Tuscany Beans and Heirloom Tomatoes


Last night for dinner, I made a delicious Salmon recipe from the July/August edition of Clean Eating Magazine, my new FAVORITE cooking magazine. I have already made 3 recipes from this issue alone. This is unheard of for me, usually I buy cooking magazines a couple at a time (I have a cooking magazine habit) and then I will read them, drool over the pictures, chose a few that I want to make, then throw the magazine in a pile and never make the recipes. So when I find a magazine like this, that is actually worth the $6.99 cover price, I might actually subscribe!

This salmon was delicious. Marco ate it all up, he loved the bean salad, and was cajoled into eating the salmon with the lure of a chocolate covered jube jube from Candy Mountain (does that make me a bad mother? Hey, he ate the salmon! That's good for him right?). Unfortunately, Claire, at the mature age of 10 is no longer susceptible to such cajoling and would eat nothing on her plate. She went to bed hungry, I'm sure.

Will this prevent me from making this dinner again? Not a chance. My kids eat what they're served (or not), but I refuse to cater to their finickiness. Besides, my theory is that you will never LEARN to like something if you never eat any of it...


Salmon with Tuscany Beans and Heirloom Tomatoes
Serves 4

1 15oz can of white kidney beans
1/2 onion, thinly sliced
1 large red pepper, chopped
4 salmon filets
1/2 cup fresh dill, minced
cooking spray
2 large heirloom tomatoes, chopped (I used about 400g)
1/4 cup olive oil
1/4 cup balsamic vinegar
2 shallots, minced (I used 1/4 cup chives - that's what I had)
4 cloves garlic, minced
2oz capers, drained and rinsed (I didn't have any on hand)
salt and pepper to taste

1. To make the marinade, mix the olive oil, balsamic vinegar, shallots, garlic, and capers.

2. Pour half of the marinade over the salmon and sprinkle with the dill. Let the salmon sit for about 30 minutes (or up to a full day in the fridge).

3. In a bowl mix the beans (rinsed well) with the onion, and red pepper and toss with the remaining marinade. Let sit. Right before you are ready to serve, toss in the chopped tomatoes and season with salt and pepper to taste.

4. In a non stick pan, misted with cooking spray, cook the salmon (5-7 minutes per side depending on the thickness) until it is cooked through.

5. Serve with bean salad.


Tuesday, September 8, 2009

Camping Chocolate Orange Cakes


This is not a great picture, because it was taken in the dark, but I just really wanted to share this recipe. It was great.

We were camping last weekend, and my daughter's 10th birthday fell on the Saturday so I made these campfire cakes for everyone. The cake was cooked inside an orange peel and it just gave such a yummy refreshing orange flavour to the cake. I served the cake with a little bit of whipped cream. It was also fun to scoop your cake out of the orange peel with a spoon. You could also make this in the oven at home, and I intend to try that sometime (it was too good to save only for camping).

Campfire Chocolate Orange Cakes

1 package Devil's Food Chocolate Cake mix (enough for a one layer cake)
egg, oil and water etc (whatever is needed to prepare the cake according to the directions
8 medium size navel oranges (thick skinned are best)
Tin Foil
Whipped Cream

1. Slice the top off of each orange and scoop out all the flesh (a grapefruit knife and grapefruit spoon worked well). Keep the lids matched up with their respective orange peels. Don't throw all that great orange flesh out. I saved it in a ziploc bag and made orange creamsicles for the kids when we got home.

2. Prepare the cake mix according to the package and spoon it into the orange peels. Don't fill them more than about 2/3 full. (Hint: Set the oranges in plastic cups so they stand up while you fill them, muffin tins would work too).

3. Replace the lid and wrap the orange in tinfoil.

4. Place on the barbeque for 25 minutes. You could also put the foil wrapped orange right in the coals of the campfire. This gives off a fabulous orange aroma.

5. Wait a few minutes for the cakes to become less scorching hot and top with whipped cream.


Thursday, September 3, 2009

Huevos Rancheros


This isn't really much of a recipe and it's probably not all that authentic, but I wanted to post it anyway, due to it's deliciousness...

I made this for dinner the other night because I had to throw something together quickly for myself before Mario and the kids ate... I didn't have high expectations, having had scrumptious huevos rancheros at a local restaurant called George's Kitchen in Belize...

BUT... it was pretty darned good and very healthy. You can use homemade salsa with fresh tomatoes (if you want to feel more like you actually made a recipe) but mine was good with bottled salsa...

Huevos Rancheros
Serves 1

1 flour tortilla
2 eggs
1/4 cup grated Monterrey Jack Cheese (about 15g)
1/2 cup salsa
chopped fresh cilantro
cooking spray
salt and pepper to taste

1. Heat your oven to 300F, put the tortilla on a dinner plate and throw it in to warm up both the plate and the wrap...

2. Heat up the salsa (in the microwave if you want... gasp!)

3. Fry the eggs in a non-stick pan coated with cooking spray. I did mine sunnyside up (season with salt and pepper).

4. Remove the plate and tortilla from the oven (put on oven mitts first - OUCH) and slide the eggs onto the tortilla. Spoon the hot salsa around the eggs, and sprinkle with cheese and cilantro.


Wednesday, August 26, 2009

Penne with Roasted Tomatoes and White Beans


No, your computer monitor is not on the fritz!! I am actually posting TWO DAYS IN A ROW!

I just had something else to post, and I figured I'd better get it up now, before I forget.

About a month ago, I suggested to my husband Mario that we start having one meatless dinner per week. He was a little reluctant, but as long as I promised not to feed him anything strange (by his definition strange would include tofu), I managed to convince him that this was a good idea (or at least not a horrible idea)...

So, I'm working hard to show him how good meatless meals can be, and I think this dish went a LONG WAY towards that. It was delicious, and he went back for a second huge helping!

This recipe is from Ellie Krieger, and I got it from the Quick and Fresh, Fine Cooking Magazine. I remained true to the recipe, only I cut down the olive oil from 3 tbsps to 2 tbsps.

Penne with Roasted Tomatoes, Garlic, and White Beans

3 large ripe tomatoes (2 pounds)
6 cloves garlic, unpeeled
2 tbsp olive oil
salt to taste
Pepper to taste
1 15.5 ounce can of white kidney beans, drained and rinsed.
8 ounces of penne pasta
2 tbsp fresh lemon juice
1/3 cup fresh basil, chopped
1/4 cup freshly grated Parmesan

1. Slice each tomato into wedges and discard the seeds (I forgot to seed mine, and it made my sauce a little juicier, which was OK). Toss the tomatoes in 1 tbsp of the olive oil and spread on a baking sheet.

2. Throw the unpeeled garlic cloves on the baking sheet too.

3. Roast at 450F for about 35-40 minutes until the tomatoes are starting to char.

4. Bring a large pot of water to a boil, and cook the penne. When the penne is about 1 minute from cooked throw in the drained and rinsed beans (to get them hot).

5. Drain the pasta and beans and return to the pot.

6. For the sauce, remove the garlic from the baking sheet and squeeze the flesh out into a small bowl. Mash it, and add the lemon juice, 1 tbsp olive oil and a dash of salt. Stir to combine.

7. Add tomatoes to beans and pasta. Add the roasted garlic sauce and the basil. Season with salt and pepper to taste.

8. Serve with Parmesan.


Tuesday, August 25, 2009

Salmon with Yoghurt Dill Topping


My apologies for going so long without posting. It has been a busy busy summer. And yes, we have still been eating all summer long, but I've been a little boring with my recipes (reverting mostly to old already posted faves). I have also been trying to eat a cleaner, healthier diet... which often leads to less food-porn worthy blog material.

This meal here was healthy while also meeting my other unofficial blog material criteria... (1) I actually remembered to take pictures before I was halfway finished eating; (2) It is something new; and (3) It was picture worthy.... oh yeah and of course, (4) It tasted good.

We all loved this (kids included), and it will be making an unbloggable return appearance in my recipe line-up!


Salmon with Yoghurt Dill Topping

1 1/4 cups plain fat free yoghurt
20 kalamata olives, chopped
15 cherry tomatoes, chopped
1 1/2 tsp dried oregano
6 cloves garlic, minced
2 tbsp chopped fresh dill

1. Mix all ingredients together in a bowl.

2. If you are barbequeing this, as we did, it is easier to put the salmon on the barbeque and add the topping after (rather thay trying to transfer it onto the grill without spilling). So... arrange your barbeque for indirect grilling and cook the salmon with the topping for about 20 minutes (until is cooked through). Your cooking time will depend on the thickness of the salmon.

3. Alternatively, you can put this on a baking sheet in a 400F oven until cooked through.


Thursday, June 25, 2009

Shrimp Summer Rolls with Two Sauces


I have been wanting to try making homemade summer rolls for some time, and I finally found a good excuse. I made these for a party at my Mom and Dad's place last weekend. I made a trial run ahead of time at home for the family and we had them for dinner. The picture above is from the trial run.

I was a little worried that my kids wouldn't eat them, so I told them we were having Egg Rolls for dinner (they LOVE Egg Rolls... Egg Rolls and Chicken Balls ARE Chinese Food to them). So, we were about halfway through dinner, and Claire had eaten a couple of the summer rolls when she says, "Mommy, I think you might have done something wrong, these don't taste like Egg Rolls". So then I had to fess up and explain the difference between Egg Rolls, Spring Rolls and Summer Rolls.

I tried out two different dipping sauces in the hopes that one would emerge as a clear winner to take to the party. But, Claire and I favoured the Peanut Sauce, and Marco and Mario liked the Sweet Chili Sauce. Given the stalemate, I decided to go ahead and make both for the party. I had a lot of leftover Peanut Sauce the night that I made them at home, so I used it on a stir fry and it was fabulous. (Only the peanut sauce is pictured above, sorry!)

These aren't as finicky as one might think. The important part is to get a little system going with all your ingredients laid out in order. The night I made them at home, I had some trouble with the summer rolls sticking to each other. So for the party, I tried misting them lightly with non-stick cooking spray before I set them on the platter. Then I covered them with damp paper towels before I covered the tray in plastic wrap. This worked nicely. I made them about 2-3 hours ahead of time, and they didn't dry out, and the cooking spray kept them from sticking.

Summer Rolls

1 generous cup lettuce (I used mescalun mix)
1 cup bean sprouts
1 cup rice vermicelli noodles (about 2 oz uncooked)
1/2 cup shredded carrot
4 green onions, cut into 3" pieces
1/4 cup thinly sliced basil
1/4 cup chopped mint
6 oz cooked shrimp, roughly chopped
8 8” round sheets rice paper

1. Prepare all your ingredients and set into piles close to your work surface.

2. Set about 1" of hot tap water in a shallow dish that is a little bigger than the rice paper wrappers (I used a round cake pan).

3. Prepare your work surface with a couple of layers of paper towel in order to absorb the excess water from the wrappers.

4. One at a time dip the wrapper in the water. Hold each one in the water until softened (over soaking might make them easier to rip). After one or two, you'll get a feel for how soaked they should be.

5. Set the wrapper down on your paper towel and at one end stack the ingredients: noodles (about 20g per wrapper), shrimp (about 20g per wrapper), then the rest of the veggies (eyeball about 1/8 of each pile).

6. Roll burrito style. Fold the bottom up, sides in, and then roll the rest of the way. Spray with cooking spray if you are making ahead (very lightly - you don't want them to feel greasy).

7. If serving as a finger food, slice in half diagonally and set on a serving tray.

Sweet Chili Sauce

2 tbsp sugar
1/4 cup rice wine vinegar
1/4 cup fresh lime juice
2 tsp chili paste with garlic
2 tsp soy sauce

1. Mix all ingredients together. Chill until ready to serve.

Peanut Sauce
I got the Peanut Sauce recipe from the blog, The Chef and The Photographer, and it was fabulous.

2 tbsp finely chopped shallots
2 tbsp finely chopped lemongrass
2 tbsp minced garlic
2 tbsp finely chopped ginger
1 tsp sesame oil
1/2 cup chicken broth
1/4 cup peanut butter
2 tbsp brown sugar
2 tbsp rice wine vinegar
2 tbsp soy sauce
1 tbsp lime juice
salt and pepper to taste

1. In a small non-stick pan, saute the shallots, lemongrass, garlic and ginger in the sesame oil until soft.

2. Add broth, peanut butter, brown sugar, vinegar and soy sauce. Bring to a boil and simmer on low heat, covered, for about 5 minutes.

3. Strain through a fine sieve, pressing all the juice you can out of the garlic, shallots etc.

4. Add lime juice and salt and pepper to taste. Chill until ready to serve.


Friday, June 19, 2009

Roast Leg of Lamb with Tahini Sauce


When I was little, I really didn't like lamb, and consequently I avoided it completely for years. But then about 5 years ago my Mother-in-Law made a Rack of Lamb with a rosemary biscuit-like crust on it, and I loved it! I'll have to make and post that recipe sometime. Since then, I can't get enough, lamb has become one of my "go-to" favorites, especially when we are out in restaurants.

We are planning a trip to New Zealand for this upcoming December, and the part of our trip I am most looking forward too (aside from getting to visit with my Sister-in-Law and her Husband, of course)... is getting to eat lamb, lots and lots of lamb....

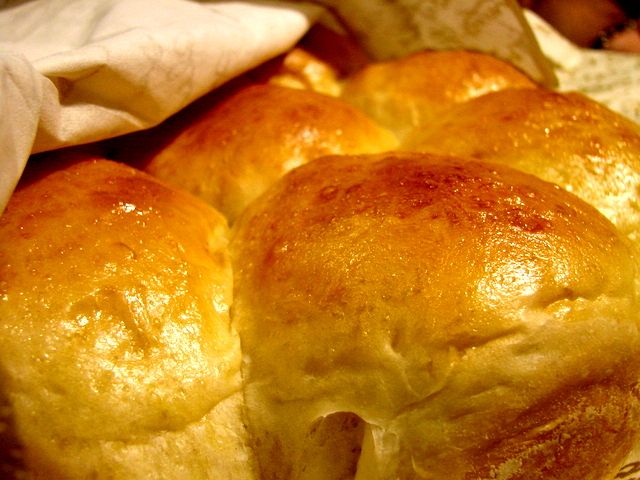
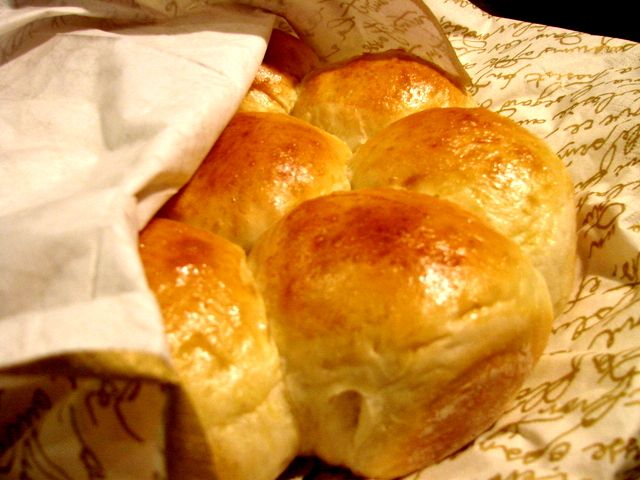
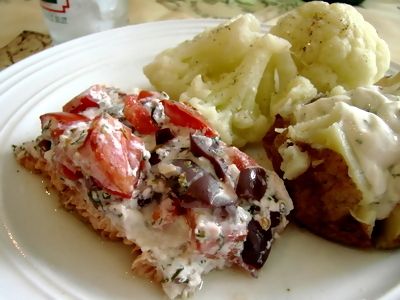
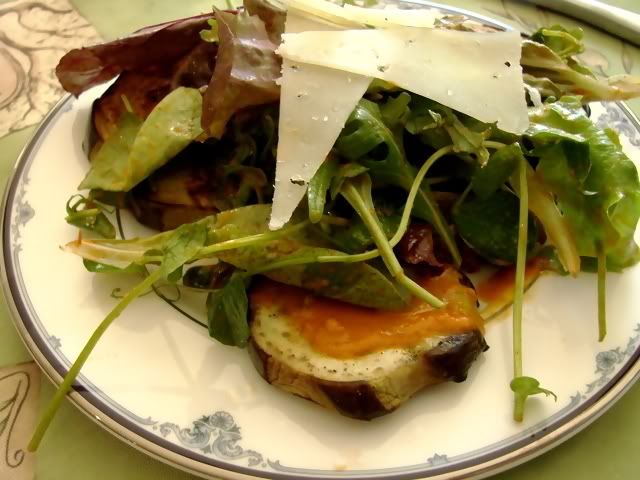
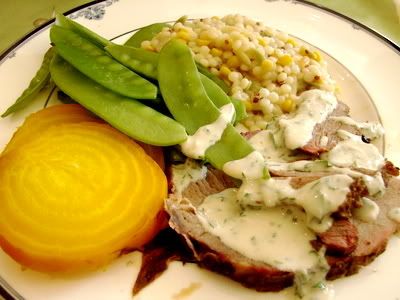
This meal, here, combines some of my favorite things - lamb, and Middle Eastern flavours. The next night for dinner, I made pita sandwiches with the left over lamb and tahini sauce with tomato, lettuce and onion. They were fabulous! It was actually pretty funny, I wrapped the sandwiches up using squares of waxed paper. My kids did not eat the lamb the first night, when it was served as in the picture, above (with roasted golden beets, steamed snow peas and Israeli couscous). However, when I made it into the wraps, they gobbled them up.

At one point while we were eating the sandwiches, I said to my husband, Mario, "This is the closest I've ever come to a good homemade shawarma sauce". Claire (looking a little stricken) says, "What do you mean, HOMEMADE, didn't these come from a restaurant?? How come they are wrapped in this paper???" I explained that I just did that myself to help make them easier to eat. Well, their enthusiasm for the meal vanished immediately and we had a job getting them to finish. How could they love something one minute (when they thought it came from a restaurant), and then hate it the moment they realized I made it! I was mortally offended (as I am most nights when they turn their noses up at my cooking!!).

Roast Leg of Lamb with Tahini Sauce
from Eating Well Website

8 medium cloves garlic, divided
2 1/2 tsp salt, divided
2 tbsp olive oil
1 1/2 tsp ground mace
1 tsp ground cardamom
1 tsp paprika
1 tsp ground cinnamon
1 tsp ground cumin
1/2 tsp cayenne pepper
1 4lb boneless leg of lamb, butterflied and trimmed
1/2 cup fresh lemon juice
1/2 cup tahini
1/2 cup minced fresh parsley
1/2 cup nonfat plain yogurt
1/2 teaspoon freshly ground pepper

1. Mince 6 garlic cloves. Place in a small bowl with 1 1/2 tsp salt and mash into a paste using the back of a spoon. Stir in the oil, mace, cardamom, paprika, cinnamon, cumin and cayenne until combined.

2. Lay lamb out flat, with the cut side up. Spread three-quarters of the spice paste over the cut surface. Roll the lamb closed and tie in several places so it is about the shape of a large football. Spread the remaining paste over the outside. Loosely cover with plastic wrap and refrigerate for 2 hours.

3. Mince the remaining 2 garlic cloves. Combine with the remaining 1 teaspoon salt in a medium bowl with lemon juice, tahini, parsley, yogurt, and pepper. Refrigerate until ready to serve.

4. About 20 minutes before you are ready to grill, preheat a gas grill (with all burners lit) to 400°F or build a fire in a charcoal grill and let it burn down to medium heat (about 400°F).

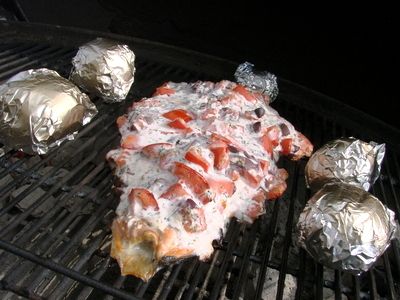
5. Roast Lamb in BBQ over indirect charcoal until it reaches an internal temperature of 140 degrees. (You can use a gas BBQ, by turning off the burners on the side where the lamb is, or roast in the over at 400F). Total cooking time will vary, but will be approximately 1 hour.

6. Transfer lamb to a platter and let stand for 10 minutes before slicing. Serve with the tahini sauce.


Monday, June 15, 2009

Grilled Eggplant Salad


This was a delicious salad that I made a few weeks back when my Mom came over for dinner on her 65th birthday. This salad was the appetizer, for the main course I made BBQ leg of lamb with tahini sauce (recipe coming soon!) and for dessert we had Hot Cross Bun Bread Pudding. The recipe for the salad dressing called for smoked paprika, but I only had hot paprika on hand. So, even though I cut down the amount a little, my salad dressing had some serious kick, or as my six year old, Marco, would say.... this salad "stings my tongue!"

Turns out I could have gone ahead and added a cup of hot paprika, my kids weren't going to touch this salad anyway (I think they ate the cheese curls only)... so in that case, I figure I might as well continue to make it the way the adults prefer it... stinging tongue and all!

Grilled Eggplant Salad
from Eating Well Website

2 small eggplants (about 1 pound total)
1 1/4 tsp salt
cooking spray
1/4 cup olive oil
1 tbsp sherry vinegar
1 plum tomato, diced
1 clove garlic, chopped
1 1/2 tsp smoked paprika (I used 1 tsp hot paprika)
3 cups mixed baby salad greens
2 oz Manchego cheese

1. Make decorative stripes down the length of the eggplant with a vegetable peeler, and then cut the eggplant crosswise into 1/2" thick slices. Spread on a baking sheet and sprinkle with 1 tsp salt. Let stand 15-20 minutes then rinse thoroughly and pat dry.

2. Preheat BBQ to medium. Lightly spray eggplant with cooking spray and grill for about 10 minutes total (turning halfway) until eggplant is soft and has grillmarks on both sides.

3. In a blender, puree the oil, vinegar, tomato, garlic, paprika and 1/4 tsp salt.

4. In a large bowl toss salad greens with half of the salad dressing.

5. On 6 salad plates, arrange a few slices of eggplant. Drizzle with remaining salad dressing, and then top with salad greens and a few curls of Manchego Cheese (make curls with a vegetable peeler).


Monday, June 1, 2009

Tomato Cream Penne with Artichokes and Chorizo


I apologize, everyone must be getting so bored with seeing this same soup bowl over and over again. I'll have to start trying to be more creative with my photo staging.

Years ago when Mario and I were in University, we had a standing date night every Wednesday with another couple at a local Italian restaurant. This restaurant, which is now closed, had half price night on Wednesdays. The four of us would order 1 medium pizza with Italian Sausage, Tomatoes and Onion and have a slice each for an appetizer, and then we would each have a main course. Mario and I usually ordered the same thing (a testament to how good this meal was, because normally Mario won't order the same thing as me). We loved a dish called "Tortellini Hayden", it had bacon, artichoke hearts, onion, and tortellini in a tomato cream sauce. It was so good and it came with a nice hunk of baguette toasted with garlic butter (all this for around 10$ a person).

I have made numerous attempts over the years to re-create "Tortellini Hayden", sometimes more successfully than others, but I have never recorded exactly what I did, so each time I have to start from scratch figuring it all out.

This dish isn't exactly the same, it has chorizo along with the bacon and penne instead of tortellini, but overall it was inspired by the original "Tortellini Hayden" and if anything, the chorizo was an improvement.

This time, I wrote it down...

Tomato Cream Penne with Artichoke and Chorizo

1 can artichoke hearts (quartered)
4 slices bacon, chopped
1 cup chopped chorizo sausage
1/2 cup chopped onion
1 clove garlic
1/2 tsp oregano
1/4 tsp each basil and thyme
ground black pepper to taste
1/2 lb dry penne
2 cups strained tomatoes
1/2 cup heavy cream
Freshly grated Parmesan

1. Saute bacon and drain fat, reserving about 1 tsp of the drippings.

2. Return bacon and tsp of dripping to pan and add chorizo, garlic and onion. Saute until onion is soft.

3. Put penne on to boil.

4. Add artichokes, tomato sauce and spices and allow everything to simmer while pasta cooks.

5. Drain pasta and add to sauce along with cream. Stir until cream is incorporated and heated through.

6. Sprinkle with fresh grated Parmesan and serve.


Friday, May 29, 2009

Black Bean Soup


I have discovered a great recipe for black bean soup. Although I don't really consider myself a "soup" person, the rest of my family loves their soup. There are a few soups which I do enjoy - they are mostly the hearty, meal in a bowl type of soups. A favorite of mine is pea soup - I'll have to get that posted someday soon.

This is a soup that simmers all day long in the crock pot. I love coming home from work to the smell of dinner already prepared. This recipe would be great for those rainy summer "non-BBQ" type of days, and makes a fine meal with a hunk of crusty bread and a side salad. It wasn't as spicy as I would have liked, so next time I might opt not to remove the seeds from the jalapeno pepper. I also throw a bit of grated Monterrey Jack cheese on the top for the sake of my kids, because for some reason it helps them see past the little bits of "green stuff".

Black Bean Soup
from Cooking Light Magazine, March 2009

1 lb dried black beans
4 cups low sodium chicken broth
2 cups chopped onion
1 cup water
1 tbsp ground cumin
3 bay leaves
1 jalapeno pepper (seeded and finely chopped)
2 tbsp lime juice
1 tsp salt

Garnish
Chopped cilantro
Sour cream
Grated Cheese

1. Sort and rinse the beans, cover with water and let stand overnight to soak.

2. The following morning, drain the beans, and add them to your crock pot along with the chicken broth, onion, water, cumin, bay leaves and jalapeno.

3. Cook on low all day (about 10 hours or so).

4. Just before serving, stir in lime juice and add salt to taste. Spoon into bowls and top with sour cream, cheese, and cilantro.


Thursday, May 21, 2009

Hot Cross Bun Pudding


This is the dessert that I made for dinner at Easter. I know this is almost cruel, since it calls for Hot Cross Buns and you probably won't be able to find those in the grocery store to make this recipe until next spring. Yet, it is worth the wait, and I decided that I should post this now, before it gets buried in my alarmingly sizeable photo archive of unposted recipes.

I usually buy Hot Cross Buns for the kids as soon as I see them in the store each spring. They love to eat them split and toasted with a little butter for breakfast. Well at least LAST year, they loved them. Children, however, can be fickle (especially mine) and a favorite treat last year, can turn into one step up from fried liver this year.

So, I took my regular everyday Bread Pudding recipe with a few tweaks and made this delicious bread pudding with the surplus buns. We loved it so much (even the kids), that I ran back out to the grocery store and bought three more packages of Hot Cross Buns, so I will be able to make this six more times before next Easter!

Hot Cross Bun Pudding

4 Hot Cross Buns
2 eggs slightly beaten
⅓ cup sugar
¼ tsp salt
3 cups unsweetened almond milk

1. Cut buns into 1" cubes. Spray an 8" round cake pan with cooking spray and dump the cubes in.


2. Mix together the eggs, sugar, salt and almond milk (you can certainly use regular milk instead, I've discovered that I like almond milk in bread puddings because it adds nice flavour and it is thick like using whole milk without as many calories).

3. Pour the milk/egg mixture over the cubed buns and let it sit for about 30 minutes. Preheat your oven to 325F.

4. Bake for 1 hour. Serve warm with vanilla ice cream.

Sunday, April 12, 2009

Fish and Brewis


I made fish and brewis (pronounced "bruise") for dinner on Good Friday. This is a meal that has a lot of nostalgic appeal to me. I associate fish and brewis with my childhood, and it is something that my Mom made fairy often whenever she could find the ingredients. The recipe originated a long time ago in Newfoundland, where it was prepared by sailors who were often at sea for long periods of time without access to fresh ingredients. Fish and brewis is very simple to make, as it only has three ingredients. Some of the ingredients are only readily available in Eastern Canada, but nowadays thanks to the internet, I can order them on-line.


Here are the ingredients: Purity Hard Bread, Dried Salt Cod, and Salt Pork Fat. The hard bread is a hard block of dried biscuit that will literally crack your teeth if you try to bite into it (sounds yummy eh?)... wait, it gets better. The Pork Fat gets fried up into little bits of heaven that Newfie's like to call, "scrunchions". So, you have to soak both the hard bread and the salt fish overnight to make them edible and then the next day it all gets fried up in the fat that has been rendered from the scrunchions. In Newfoundland, this meal is often served for breakfast to patients undergoing cardiac and pulmonary rehabilitation. OK, I made that last bit up (about the cardiac patients, not the breakfast!)

I can honestly say that this was one of my all time favorite meals as a child (yes, I was a peculiar child). Apparently, my own children are NOT as peculiar because they hate fish and brewis. It is actually a little stressful for them, you see they hate the fish, but like the bruise. Problem is, once the dish is prepared, the two are pretty much indistinguishable. So the kids will be sitting there examining, and sniffing each morsel of food trying to determine what the heck it is...half the time they get it wrong, and fish comes flying back out in a projectile fashion, "nope not bread". Oh well, what can I say... they are "mainlanders".

Fish and Brewis

3 hard bread cakes
1 lb dried salt cod
1 cup cubed salt pork fat back (about 100g)

1. Soak the hard bread in a large bowl of cool water overnight at room temperature. Make sure you add a lot of water because these suckers really swell up.

2. Soak the dried salt cod overnight in cool water at room temperature. In the morning, you can change the water to help remove more of the salt.

3. When you are ready to eat, drain the fish and boil it for about 20 minutes in a fresh pot of water.

4. Meanwhile, fry up the cubes of pork fat in a large non-stick frying pan until they are golden brown and crispy. Remove the scrunchions with a slotted spoon and set aside.

5. Drain the hard bread, and the fish and add it to the frying pan with all the fat from the scrunctions. Fry this whole mixture up for about 5 minutes, breaking the larger chunks of fish and bread up with your spatula. Right before serving you can either mix the scrunchions back in, or sprinkle them on top.

6. Serve with a homemade tomato relish or chutney of some sort (mine is pictured with a caramelized onion chutney).

Sunday, March 22, 2009

Belikin Beer Battered Shrimp with Lisette's Secret Sauce


We just returned home, yesterday, from our annual family vacation to San Pedro, Belize. While there, I made a very important discovery... Janet is Hungry has a lot of fans in Belize. More than I could possibly count! (using one hand)

I am not kidding when I say that all this adulation has seriously gone to my head.

The President of the Belizean Chapter of the Janet is Hungry fan club, Jesse (of the San Pedro Daily), has made a personal request for more local Belize recipes on Janet is Hungry.

Not wanting to disappoint my only groupie, I scrambled to put together a recipe using some ingredients that I associate with my vacations in Belize: Belikin Beer (of course), shrimp (I would have used conch if it I could get it here) and Lisette's Secret Sauce (a staple in most Belizean kitchen's - well I think so anyway, having only ever been in one Belizean kitchen - my Mom's).

I have, on returning from previous vacations in Belize, experimented with some other local recipes, such as fish tacos, orange crusted snapper, and shrimp ceviche.

I also promised Jesse to take a stab at Belizean Stewed Chicken with Rice and Beans, but this will have to wait until another time when I am less travel weary. For those not familiar with Lisette's Secret Sauce, it is a sweet tangy sauce made with peppers, lime juice, carrots and sugar, etc.


Belikin Beer Battered Shrimp with Lisette's Secret Sauce

1 lb large shrimp (peeled and deveined with tail intact)
1 cup flour
1 egg
1/2 cup Belikin Beer (or other pale ale)
Lisette's Secret Sauce (or other dipping sauce)


1. Heat skillet with 1/2" of oil over medium-high heat.

2. Mix batter ingredients (flour, egg, and beer) until smooth. Should be the texture of thick pancake batter.

3. Wash and pat shrimp dry, season with pepper.

4. Dip shrimp in batter and fry in batches until golden brown on both sides (they cook very quick, about a minute per side).

5. Drain on paper towel, and serve with dipping sauce.