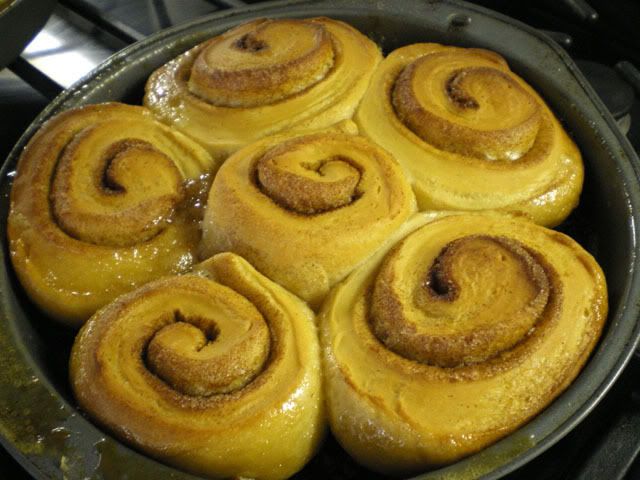
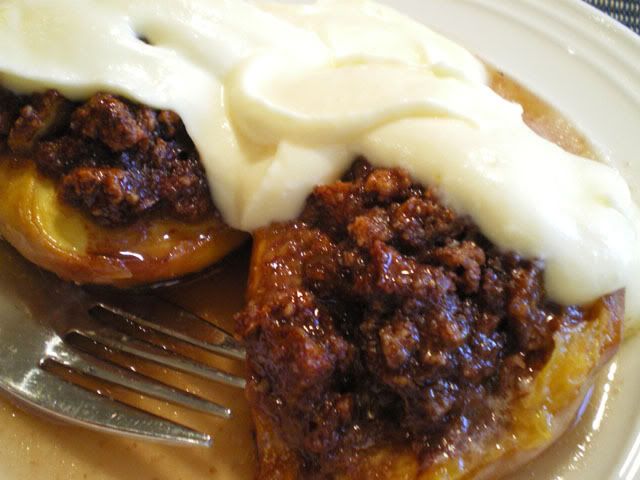
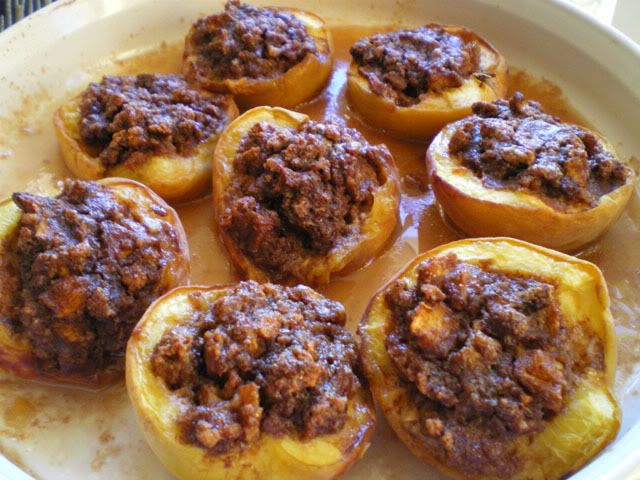
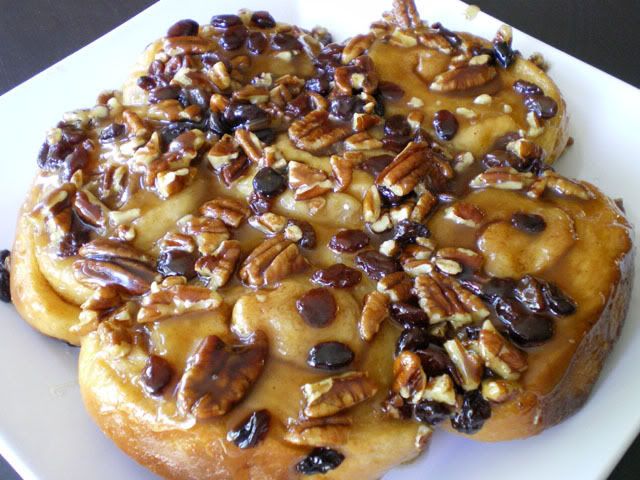
Home Page

Sunday, September 30, 2007

Sticky Buns


I was incredibly excited to see that this month's Daring Baker Challenge was going to be Cinnamon Rolls or Sticky Buns. Sticky Buns are a huge favorite of mine, and something that I have never actually made at home before.

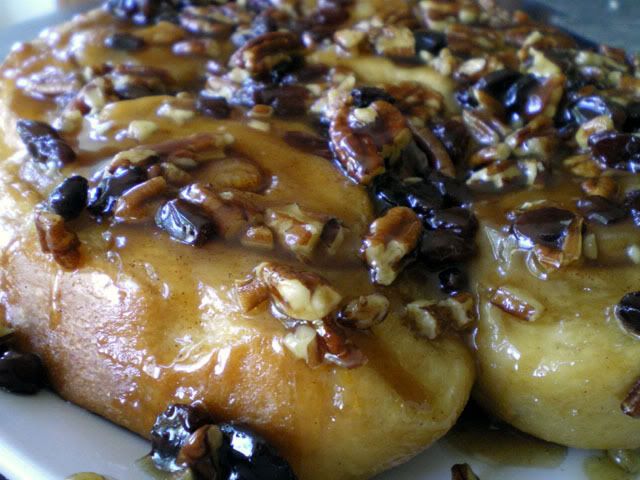
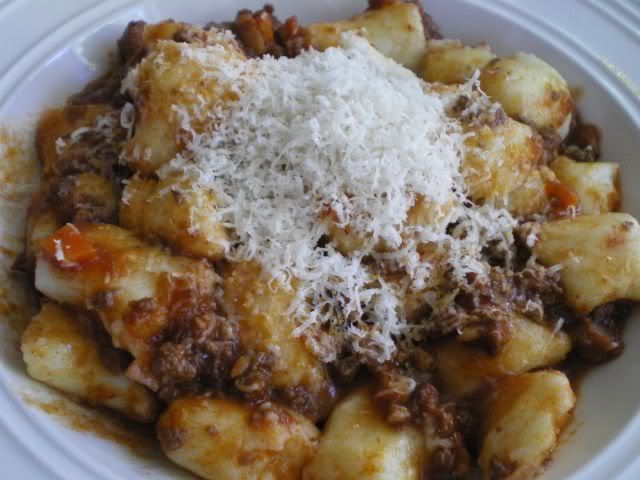
The recipe turned out great, and everything went smoothly, with no hitches. There was a base recipe for the rolls and then everyone had a choice to make cinnamon rolls, sticky buns or a combination of both. I went with the sticky buns, and they were so good, I will probably go back at some point and try out the cinnamon buns too.

Check out all the other Daring Baker posts (I guarantee LOTS of mouthwatering pictures), at the Daring Baker Blogroll.
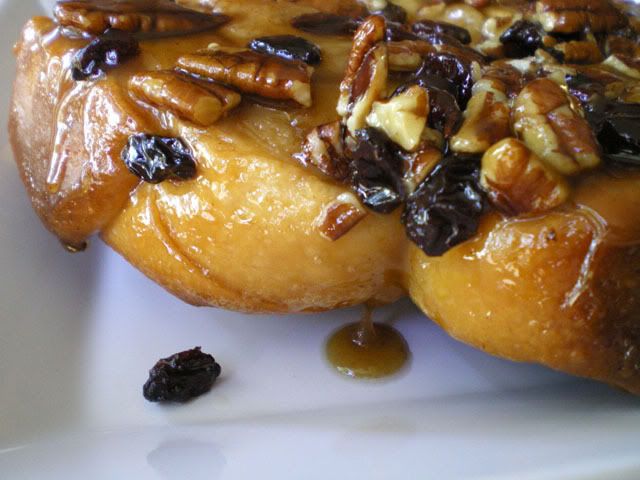

Sticky Buns
Makes 8 to 12 large sticky buns

6 1/2 tbsp sugar
1 tsp salt
5 1/2 tbsp shortening or unsalted butter or margarine
1 large egg, slightly beaten
1 tsp lemon extract OR 1 teaspoon grated zest of 1 lemon
3 1/2 cups unbleached bread or all-purpose flour
2 tsp instant yeast (also called rapid rise or quick rise)
1 1/8 to 1 1/4 cups whole milk or buttermilk, at room temperature
1/2 cup cinnamon sugar (6 1/2 tablespoons granulated sugar plus 1 1/2 teaspoons ground cinnamon)

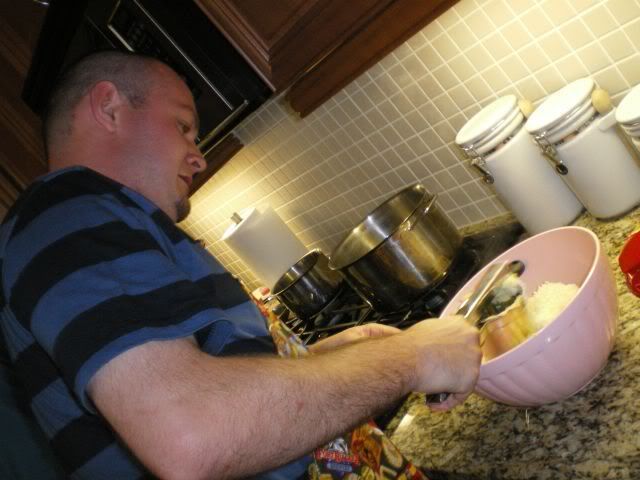
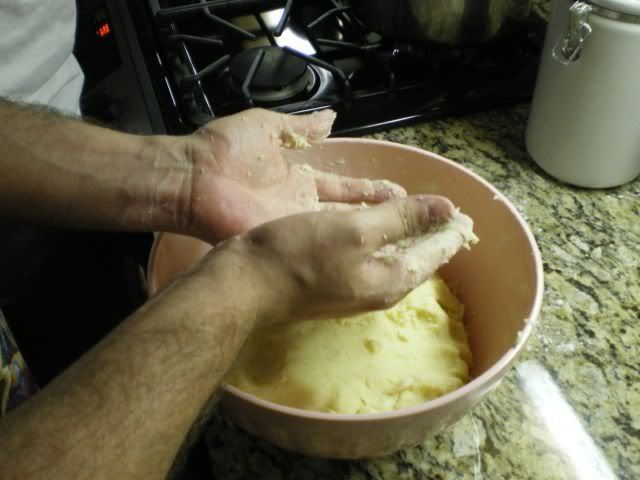
1. Cream together the sugar, salt, and shortening or butter on medium-high speed in an electric mixer with a paddle attachment (or use a large metal spoon and mixing bowl and do it by hand). Whip in the egg and lemon extract/zest until smooth. Then add the flour, yeast, and milk. Mix on low speed (or stir by hand) until the dough forms a ball. Switch to the dough hook and increase the speed to medium, mixing for approximately 10 minutes (or knead by hand for 12 to 15 minutes), or until the dough is silky and supple, tacky but not sticky. You may have to add a little flour or water while mixing to achieve this texture. Lightly oil a large bowl and transfer the dough to the bowl, rolling it around to coat it with oil. Cover the bowl with plastic wrap.

2. Ferment at room temperature for approximately 2 hours, or until the dough doubles in size.

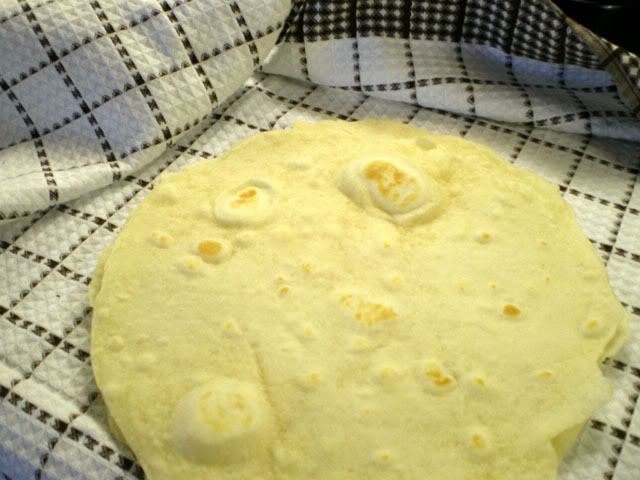
3. Mist the counter with spray oil and transfer the dough to the counter. Roll out the dough with a rolling pin, lightly dusting the top with flour to keep it from sticking to the pin. Roll it into a rectangle about 2/3 inch thick and 14 inches wide. Don´t roll out the dough too thin, or the finished buns will be tough and chewy rather than soft and plump.

4. Sprinkle the cinnamon sugar over the surface of the dough and roll the dough up into a cigar-shaped log, creating a cinnamon-sugar spiral as you roll. With the seam side down, cut the dough into 8 to 12 pieces each about 1 3/4 inches thick.

5. Make Caramel Glaze.

Caramel Glaze
1/2 cup granulated sugar
1/2 cup firmly packed brown sugar
1/2 teaspoon salt
1/2 pound unsalted butter, at room temperature
1/2 cup corn syrup
1 tsp lemon extract
Walnuts, pecans, or other nuts (for sticky buns.)
Raisins or other dried fruit

5. In the bowl of an electric mixer, combine sugar, brown sugar, salt and butter.

6. Cream together for 2 minutes on high speed with the paddle attachment. Add corn syrup and 1 teaspoon lemon extract. Continue to cream for about 5 minutes, or until light and fluffy.

7. Coat the bottom of 1 or more baking dishes or baking pans with sides at least 1 1/2 inches high with a 1/4 inch layer of the caramel glaze. Sprinkle on the nuts and raisins Lay the pieces of dough on top of the caramel glaze, spacing them about 1/2 inch apart. Mist the dough with spray oil and cover loosely with plastic wrap or a food-grade plastic bag.

8. Proof at room temperature for 75 to 90 minutes, or until the pieces have grown into one another and have nearly doubled in size.

9. Preheat the oven to 350°F (175°C) with the oven rack in the middle shelf for cinnamon buns but on the lowest shelf for sticky buns.

10. Bake the sticky buns 30 to 40 minutes, or until golden brown
.


Thursday, September 27, 2007

Pumpkin Tortellini with Brown Butter Sauce


In order to say thank you to my site sponsor, E-meals for You, for maintaining their very lonely and solitary spot over on my sidebar, I thought it would be nice to cook up another one of their recipes and post about it. You can see the last recipe that I posted from their site, right here.

Well. WOW. That about sums up this recipe. I fell in love with this. It is a great combination of fall flavours and I think this would be a great meal to serve for guests. You can make it a little in advance and just lay a damp tea towel over the tortellini so they don't dry out. Then just plop them into a pot of boiling water when you are ready to eat.

Claire and Marco loved this. Well, Marco picked out the hazelnuts, and Claire picked out the figs, but in the grand scheme of things that's nothing! They ate the tortellini stuffed with the pumpkin and goat cheese! The filling inside the tortellini was very good. It made the whole house smell wonderful while I was cooking it, and I have to admit I had more filling than I had wonton wrappers, but that's NOT a complaint, I just grabbed a spoon... voila, problem solved!


Pumpkin Tortellini
from E-meals for You

3 tbsp olive oil
1/2 small onion, diced fine
3 cloves garlic, minced
1/2 tsp salt
1/4 tsp pepper
1 15oz can pumpkin puree
1/2 tsp thyme, dried
1/2 tbsp sage, fresh
1/2 tsp nutmeg
8 oz goat cheese, room temperature
1 packet wonton wrappers

1. Saute onion and garlic in olive oil until onions are soft.

2. Add pumpkin, salt, pepper, thyme, nutmeg and sage. Reduce heat and simmer for 10 minutes.

3. Remove from heat, stir in goat cheese and blend until combined.

4. Cut wonton wrappers into 2" squares. Place 1 tsp of filling in the center of each square. Dampen edges and fold into a triangle. Pinch edges to secure. Pinch the two ends together to form a tortellini.

5. Cook in boiling, salted water for 4-5 minutes, until tortellini float.

Brown Butter Sauce with Figs and Toasted Hazelnuts
from E-meals for You

14 tbsp butter
2 tbsp fresh sage, chopped
1/2 cup toasted hazelnuts
1/2 cup dried figs, roughly chopped
1/2 tsp salt
1/2 tsp pepper
1/3 cup romano cheese
2 tbsp honey

1. Melt butter in small non-stick pan. Add sage, hazelnuts, figs, salt and pepper.

2. Cook until butter turns light brown. Remove from heat and serve over pasta.


***WARNING*** CONTINUE READING ONLY IF YOU THINK YOU MAY BE INSANE

For those of you that would like to make your own wonton wrappers, as I did, here's how:

Wonton Wrappers

1 egg
1/3 cup water
2 cups flour
1/2 tsp salt

1. In a medium bowl, beat the egg. Mix in the water.

2. In a large bowl, combine the flour and salt. Slowly add egg and water, mix well.

3. On a lightly floured surface, knead the dough until elastic. Cover dough and allow to rest for 10 minutes.

4. Divide dough into four balls and roll out, very thin (about 1/16"). Cut into small squares.

5. Use in any recipe that calls for wonton wrappers.


Tuesday, September 25, 2007

Lemony Scallop and Spinach Pasta


This is what we had for dinner last night. On Monday nights Mario and I play Dodgeball, so I needed a nice quick dinner. The kids complained because usually when Mario and I are going out and there's a babysitter coming, it means chicken nuggets or kraft dinner for them (and they love that!). However, since we had time to eat before our game, I wanted to have a proper dinner.

This was so quick. In the amount of time it took the spaghetti to boil, I was able to prepare everything else, and then just toss it all together in a big bowl. Claire and Marco weren't too keen on the scallops, but they ate everything else.

I got this recipe from one of my all time favorite cookbooks, "The New Dieter's Cookbook" from Better Homes and Gardens. The recipes in this book are low in calories without sacrificing flavour AND (this is the important part....) without having serving sizes that wouldn't be enough to satisfy a 2 year old. You know when you make a recipe from a diet cookbook and you think its gonna be great, then you realize that the nutritional information is based on 8 servings, but the recipe only makes enough to realistically serve 2? Well that won't happen with this book. The Lemony Scallops served 4 with 358 calories and 8 grams of fat per serving, and I only ate about a sixth of the recipe.

I have never made a recipe from this book that I didn't love! Here are some of the others that I've already posted:

Stuffed Peppers
Dark Chocolate Souffles
Pork Chops Stuffed with Barley and Apricot
Orange Crusted Snapper
Chicken Breasts with Dumplings
Saffron Chicken with Peppers

Lemony Scallop and Spinach Pasta

1 lb fresh or frozen scallops
8 oz dried spaghetti
1/2 tsp lemon zest
1/4 tsp crushed red pepper
3 cloves garlic, crushed
2 tbsp butter
2 tbsp lemon juice
2 cups fresh baby spinach
1 cup coarsely grated carrot

1. Rinse scallops and dry with paper towel (if large cut in half).

2. Boil pasta, drain and cover to keep warm.

3. Saute scallops in butter with garlic, lemon zest and red pepper flakes over medium heat until cooked through (about 3 minutes).

4. Add lemon juice, spinach leaves, grated carrot and pasta. Toss to coat.


Monday, September 24, 2007

Fresno Pudding


I was flipping through my recipe file at home on the weekend looking for an old favorite that I could make. This is not my "to try" file, this is the file that contains all my tried and true family favorites. A recipe has to be REALLY good to find its way into my recipe file. I discovered that there aren't too many of them left that I haven't already made and posted about.

Then I saw my recipe for Fresno Pudding. I was a little startled to realize that I haven't posted this yet. This is a recipe that I got from my Mom. My entire family loves this. The cake bakes in the sauce and it comes out juicy and delicious. It is tasty enough to serve for guests, but simple enough that you will always have the ingredients on hand.


Fresno Pudding

1 cup flour
2/3 cup sugar
1 1/2 tsp baking powder
1/4 tsp salt
1 cup raisins
1/2 cup milk
2 cups water
1 cup brown sugar, packed
2 tbsp butter

1. Mix flour, white sugar, baking powder, salt and raisins.

2. Stir in 1/2 cup milk, just until batter is moistened. Spread batter in a greased 9" x 9" square baking dish.

3. In microwave, heat 2 cups water, 1 cup brown sugar and 2 tbsp butter. Stir and pour gently over batter.

4. Bake at 350F for 35 to 40 minutes. When it comes out of the oven, the cake is floating on the sauce. Cut and serve the cake then spoon some sauce over top. Serve warm.


Friday, September 21, 2007

Braised Cucumbers


This is just a nice simple and refreshing side dish that I like to make sometimes. Claire and Marco actually both really like cucumbers so its a good way to get green stuff into them. I served this for dinner the other night with oven baked sweet potato fries and Shake n' Bake chicken thighs. Yes you read that right, Shake n' Bake from a package. Even I get lazy once in a while, you know.

Braised Cucumbers

1 large cucumber
1 tbsp butter
1 tbsp olive oil
1 small onion
salt and pepper
1/4 cup chopped chives

1. Peel cucumber and slice lengthwise. Scoop out seed and chop into slices.

2. Slice onion into thin rings.

3. Saute onion and cucumber in butter and oil over medium heat for about 10 minutes or until soft. Season with salt and pepper and add chives.


Wednesday, September 19, 2007

Ginger Chicken Stir-Fry


Autumn is upon us, and I've noticed we are slowly reverting back to our winter menu in the Janet is Hungry household (otherwise known as "Planet Janet"). Stir frys are a staple for us in the winter. If I had a nickle for every different stir fry sauce recipe I've ever tried, I could quit my job and blog full time!

I think it is that elusive beef and broccoli sauce from the take-out Chinese places that I am really trying to emulate. I've never quite gotten there, but this recipe is very good all the same. Since I first made this stir fry sauce last winter, I've pretty much stopped experimenting. This one is keeper. I think it is the brandy that really makes this sauce good.

I was very disappointed though, because I added bean sprouts with the veggies and Claire wouldn't eat them. She said they were "worms"... and of course she convinced Marco that he shouldn't eat them either. Both of them ended up leaving the table without eating very much dinner. When Marco asked to be excused from the table I warned him that he was going to be hungry later. He says "I'm not hungry, but for breakfast can I have eggs and bagel and toast and cereal?"

Ginger Chicken Stir-Fry

4 chicken breasts, in 1" pieces
1 egg white
4 tbsp brandy
3 tbsp cornstarch
1 1/2 cups water
2 tbsp soy sauce
1 heaping tsp chicken bouillon
1/2 tsp salt
1 pkg blanched almonds
1 tsp minced ginger
2 carrots, sliced diagonally
2 stalks celery, sliced diagonally
8 medium mushrooms, sliced
1/2 red onion, chopped in large pieces
1 cup bean sprouts
1 green pepper, chopped in large pieces (I used red and yellow pepper)
handful of snow peas

1. Mix 1 tbsp cornstarch, 1 tbsp brandy and egg white. Stir in chicken pieces to coat.

2. For sauce, mix water, chicken bouillon, soy sauce, salt and remaining brandy and cornstarch. Set aside.

3. In a wok, heat a small amount of oil (I use peanut oil) and cook chicken until no longer pink. Remove from pan and set aside.

4. Add a little bit more oil and start to stir fry the veggies beginning with the ones that take longer to cook. Here's the order I followed (carrots, celery, peppers, onions, snow peas, mushrooms, bean sprouts).

5. When the veggies are all cooked to your liking, add the chicken back in with the almonds. Give the reserved sauce another stir (because the cornstarch settles) and pour it in. Stir until the sauce thickens.

6. Serve with rice or noodles.


Tuesday, September 18, 2007

Stuffed Peaches with Mascarpone Cream


I was watching the Food Network the other evening and Giada DeLaurentiis made a recipe eerily similar to this one (with a few differences). I watched slack-jawed as she made this recipe.... OH (gasp) MA (trying to breath) GAWD (feeling lightheaded).... Giada has been READING MY BLOG!!!

Tears of joy are streaming down my face, I've done it! I've hit the BIG TIME!! There's violin music inside my head...I'm picturing guest spots on "Everyday Italian"... me and Giada, arm and arm enjoying our "Weekend Getaways", laughing and giving each other "air kisses"..... then Mario says "oh, I didn't think you'd posted that recipe yet".

And I came crashing back down to earth. This post was still sitting in my draft folder, unpublished and definitely NOT providing inspiration to Giada.

But I still do just want to say, for the record... honest... I promise, I made this recipe BEFORE I saw it on "Everyday Italian". I swear.


Stuffed Peaches with Mascarpone Cream
from Mediterranean Food of the Sun, Jacqueline Clark and Joanna Farrow

4 large peaches
1.5oz amaretti biscuits, crumbled
2 tbsp ground almonds
3 tbsp sugar
1 tsp cocoa powder
2/3 cup sweet white wine
2 tbsp butter

For Mascarpone Cream:
2 tbsp sugar
3 egg yolks
1 tbsp sweet white wine
1 cup mascarpone cheese
2/3 cup heavy cream

1. Wash peaches and cut in half. Remove pits and some of the flesh to make a space for stuffing (leave about 1/2" thick shell). Roughly chop the peach flesh that was removed.

2. Mix together the amaretti biscuits, almonds, sugar, cocoa and chopped peach flesh. Add enough wine to make the mixture into a thick paste.

3. Place peach halves in a greased casserole dish and fill with the stuffing. Dot with butter and pour the remaining wine into the baking dish.

4. Bake for 35 minutes at 400F.

5. Meanwhile, make mascarpone cream. Beat the sugar and egg yolks until thick and pale. Stir in the wine and fold in the mascarpone.

6. Whip the cream until soft peaks form and fold cream into the mascarpone mixture.

7. Remove peaches from oven and allow to cool slightly. Serve with mascarpone cream.


Monday, September 17, 2007

Pasta


This is a recipe that my Mom has been making for as long as I can remember. Growing up in our house this meal was simply known as "Pasta". We'd come home from school and throw our bags and our coats on the floor and yell out, "Mom. What's for dinner?", and when my Mom replied, "pasta" we knew that this was what she meant. It could never mean something else. Macaroni and Cheese was one thing, Spaghetti was another, but pasta was always THIS.

I still remember the first time, years ago, that I made this for Mario. I told him, "Honey, you are going to LOVE this meal!". He replies, "Great, what is it?"...."Pasta!" He kept looking at me, eyebrows raised with expectation.... finally he asks, "so...what's in it?"

Duh! Pasta! Geesh, it's really a fortunate thing for Mario that he found me, I brought a little sophistication into his life (he grew up on a farm, you know).

Oh, and last night at dinner, 4 year old Marco declares: "Mommy, this is the best Pasta in the whole wide world"... See? he gets it.


Pasta

1 lb lean ground beef
1 envelope onion soup mix
1 tsp oregano
1 28oz can diced tomatoes
1 5.5oz can tomato paste
2 cups water
2 cups small pasta shells
1/3 cup parmesan cheese, grated
2 cups mozarella cheese, grated

1. In a large pot, brown beef and drain fat. Stir in onion soup mix.

2. Add tomatoes, tomato paste, oregano, and water. Bring to boil. Stir in pasta and let simmer, covered for 20 minutes.

3. Stir in Parmesan cheese and pour everything into a 9"x13" dish.

4. Top with Mozarella and bake at 350F for 30 minutes. Let stand 5-10 minutes before cutting.


Thursday, September 13, 2007

Chocolate Sheet Cake


First of all, I just wanted to say... if you look closely at the picture you can see a fuzzy little hair on top of the icing on the right hand side of the cake. Well, we did NOT serve cake with fuzz on it, that is dust on your computer monitor... so go ahead and brush it off.... (right now as you are reading this, my Mom is sitting in her kitchen reading this post on her laptop, and she's trying to brush the dust off her monitor. Aren't you Mom?)

This cake was Mario's contribution to the dinner party that we had a few weekends ago. It is taking me a while to get all the posts together, but in my defense, as the evening wore on and the wine was flowing more freely, my pictures started to get a little blurry. At the time I thought it was just my eyes that had lost focus not the camera. But unfortunately most of my pictures look exactly like they were taken by a slightly off-kilter tipsy person....so I need to 're-make' a few of the recipes to get better pictures.

Mario spent forever choosing his recipe for the party, at which all the men did the cooking. I think he wanted to impress everyone... you know show everyone that I am not the only one in our family who can cook. And he's right, he is a good cook, and he likes to cook. If I wasn't around, I am very confident that our children would continue to eat well. Perhaps a lot of the same things over and over, but they would be home cooked and healthy.

First Mario was going to try Crepes Suzette because he really wanted to "Flambee" something. Eventually I vetoed that, because I was having nightmares involving 18 drunk people and open flames...

So what I did was point Mario in the direction of one of my favorite food blogs. I sat him down in front of the computer and pulled up the blog. I told him he could make anything from that blog and it would be guaranteed to turn out good. The blog was....The Pioneer Woman Cooks. I love this blog for two reasons. First, it is piss your pants funny; second, the recipes are wicked; and third, (OK 3 reasons) the photography is impressive. I have tried several recipes from this site - check out the Olive Cheese Bread, and I've never been disappointed. I also thought it was good for Mario since there aren't hundreds of recipes on there, so it wouldn't be overwhelming for him to choose.

Mario picked the Chocolate Sheet Cake. It was a perfect choice, and it made enough to give a generous slice to all 18 guests with a few pieces leftover (we cut the cake into 20 pieces). The cake was delicious, it was moist and perfect (with all that butter, it better be!)

Chocolate Sheet Cake
from The Pioneer Woman Cooks

2 cups flour
2 cups sugar
1/4 teaspoon salt
2 sticks (1 cup) butter
4 heaping tbsp cocoa
1 cup boiling water
1/2 cup buttermilk
2 eggs, beaten
1 tsp baking soda
1 tsp vanilla

Icing:
1/2 cup finely chopped pecans
1 3/4 sticks butter (1 cup minus 2 tbsp)
4 heaping tbsp cocoa
6 tbsp milk
1 tsp vanilla
1 lb minus 1/2 cup powdered sugar

1. In a mixing bowl, combine the flour, sugar and salt.


2. In a saucepan melt, 1 cup of butter, add cocoa, and water. Let mixture boil for 30 seconds, then turn off heat.

3. Pour chocolate mixture over flour mixture and stir lightly.

4. In a measuring cup, mix buttermilk, baking soda, eggs and vanilla. Stir buttermilk mixture into cake batter. Pour into sheet pan (use a large cookie sheet with a rim or a jelly roll pan. Mario used a cookie sheet that is about 11" x 17").

5. Bake at 350F for about 20 minutes.

6. While cake is baking, make icing. Melt 1 3/4 sticks of butter (equals 1 cup less 2 tbsp) in a saucepan. Add cocoa and stir to combine. Turn off heat.

7. Add milk, vanilla, and icing sugar. Add pecans and stir together. Pour over warm cake. Use a spatula to spread out to the edges, if necessary.

8. Cut into squares and serve.


Wednesday, September 12, 2007

Pork Chop and Rice Bake


I don't know about the rest of you, but for me, nothing quite beats a nice simple one-dish meal. Put it in the oven and forget about it!

I threw together a salad for the side and voila! Somehow serving a portion of green vegetables to my children each night (even when they don't eat them) makes me feel like I've done my job. So to go with this I made a Mexican Chopped Salad. I know there is nothing Mexican about this meal, but it's a favorite salad of mine, and I happened to have the some leftover tortilla chips in the cupboard - you know when they get too small and broken to dip into salsa? That is when they are perfect for this salad.

You can also make this casserole with chicken pieces, although I find if you use chicken with the skin, the entire dish gets a little greasy (but still good) and if you use chicken breasts, they dry out. I think the pork works better.


Pork Chop and Rice Bake

1 can cream of mushroom soup
1 1/2 cups water
1 cup long grain rice
2 tsp fresh thyme
4 pork chops
1 tsp olive oil
1/2 cup sliced mushrooms
1/2 cup sliced onions
salt and pepper

1. Season the pork chops. Brown them in a small amount of olive oil for just a few minutes per side.

2. In a covered casserole dish, mix together the soup, water, rice, and thyme. Place the onions and mushrooms on top. (you can mix those in, but I have to pick out the onions for Claire and the mushrooms for Marco - so layering makes this easier).

3. Place browned pork chops on top. Cover and bake for about 1 hour at 350F(or until liquid is absorbed by rice). Let stand a few minutes before serving.


Tuesday, September 11, 2007

Spaghetti Squash Fritters


I made this recipe the other night when I was scrambling for a side dish to go alongside some stuffed pork tenderloin that I made. I was a little low on veggies in the house, but I happened to have half of a spaghetti squash on the verge of becoming blue and fuzzy . I had the idea of making spaghetti squash fritters. I used almost the exact same recipe that I nornally use to make Potato Pancakes. The differences were that I cooked the spaghetti squash first, and I added more flour and omitted the sour cream because the mixture already seemed wet enough.

These fritters were very nice tasting. The consistency was a little soft and they didn't get as crispy as I had hoped, but the kids ate them, and I think it was the first time I've been able to get them to eat any sort of squash (except for when I make cream of pumpkin soup in the fall).


Spaghetti Squash Fritters
makes about 8 fritters

1/2 spaghetti squash
1 egg
1/4 cup flour
salt and pepper
small amount of oil for frying (I used cooking spray)

1. Cook spaghetti squash by placing cut side down on a baking sheet at 375F for 45 minutes.

2. Remove the flesh from the spaghetti squash by raking across the sqash sideways with a fork.

3. Mix the squash with one beaten egg, flour and salt and pepper.

4. Drop by about 1/4 cup spoonfuls onto a hot frying pan. Flatten slightly with a spatula and fry on each side until golden brown.


Monday, September 10, 2007

Apple Caramel Dip


The best part of having a party and getting everyone to bring food, is the potential to discover great new recipes. Our friend, Al made this dessert for our potluck dinner, and it is a recipe that I can't wait to make again. It was so simple, yet just delicious. My Mom would call this one "more-ish" because you can't eat just one apple slice and stop.

We had quite a bit leftover after the dinner party, and Claire and Marco went crazy for it. I had trouble getting them to stop eating (I guess they thought it was "more-ish" too). I was trying to keep an eye on them to make sure they didn't make themselves sick. They could obviously sense that any second I was going to cut them off and take it away, so they were cramming the apples slices in as fast as they could (see how I encourage healthy eating habits?).


Apple Caramel Dip

1 pkg (8oz) cream cheese
3/4 cup brown sugar
1 container caramel (usually found in the produce section)
1 pkg skor bits
Granny Smith apples, sliced

1. Beat the cream cheese with brown sugar until smooth. Spread thinly onto large serving plate.

2. Heat the caramel slightly (about 15 second in microwave) to make spreadable. Spread on top of cream cheese.

3. Sprinkle the package of Skor bits all over the top. Serve with sliced Granny Smith apples for dipping.


Friday, September 7, 2007

Napa Cabbage Salad


This is another recipe from the party at my house on the weekend where all the men cooked. I kicked things off yesterday with my post for Roger's Gnocchi and Mario's Meat Sauce.

Mark brought a Napa Cabbage Salad. Mark was the only man to decide on and bring a salad. In fact after perusing the list of recipes the men were bringing, my friend Kristen and I decided they were very meat and dessert centric and we thought she should bring an extra salad, just in case (and also because as women, we are control freaks and we really just can't leave well enough alone).

Mark's salad was quite original, and unlike some of his male co-chefs, Mark picked a new recipe which his better-half, Krista (of Krista's Couscous Salad fame) had never prepared either.

There were leftovers, and I am also happy to report that this salad keeps very well. The cabbage did not get wimpy. The oriental noodles got a little soft, but you could always avoid that by sprinkling them on each individual portion as you serve them. We did try to feed some of the leftovers to the kids, but we couldn't close the sale.

Nonetheless, I think I will be adding this recipe to my permanent repertoire. Thanks Mark!

Napa Cabbage Salad
made by Mark

Salad:
1 large Napa Cabbage, shredded
8 green onions, chopped
1/2 cup fresh parsley, chopped
1 red pepper, diced
1 pkg oriental noodles (beef or chicken) crumbled
1 cup slivered almonds
1/2 cup sesame seeds

Dressing:
1 cup olive oil
6 tbsp rice wine vinegar
3 tsp granulated sugar
1/2 tsp fresh ginger, grated
1 envelope of soup mix from the oriental noodle package

1. Toast almonds and sesame seeds on baking sheet at 375F for 3-6 minutes or until golden. Let cool.

2. Mix together all ingredients for salad dressing.


3. Combine shredded Napa Cabbage, onions, parsley and red pepper. Add salad dressing and mix.

4. Just before serving, add noodles, almonds and sesame seeds.


Wednesday, September 5, 2007

Gnocchi with Meat Sauce


So... what do you get when you assign 9 men the task of whipping up a fabulous dinner for 18 people? You get a fabulous dinner.... and a very very messy kitchen!

We had 18 people for dinner and a party on the weekend and to make things fun, we had the men do ALL the cooking. They had to pick the recipes, bring the ingredients and do all the preparation at my house (without any help from the girls).

The primary objective of this exercise was to allow us girls to stand off to the side with our drinks and laugh at their ineptitude. But unfortunately they all turned out to be modern men who know their way around a kitchen, and aside from a "plastic wrap injury", there are really no major casualties, and no major flops to report.

It was a great party, although I am not sure my neighbours would agree. One of the guys who shall remain nameless (it was Roger) kicked a soccer ball and hit their window. They moved in just a few days ago, way to make a great first impression, huh?

I will be posting everyone's photos and recipes (in no particular order) over the next week or so. I am going to start with Roger's Gnocchi recipe, because I think he was most excited to see his recipe in print. Roger did everything by "feel" and didn't really have amounts to give me, so I watched him fairly closely and made the gnocchi again myself a few nights later so that I could measure the amounts (and use up all the extra sauce).

The sauce was prepared by Mario (yes my Mario - just because I don't normally let him near the kitchen, doesn't mean he can't cook!!)

Gnocchi
made by Roger (Ladies... he is single, and he cooks!)


6 medium size russet potatoes (about 750g)
1 egg
1 tbsp salt
2 tbsp butter
2-3 handfuls of flour (I used just a little over 1 cup)

1. Boil the potatoes in the skin until soft, but not falling apart.

2. While still warm, peel the skin off the potatoes.


3. Mash the potatoes (preferable with a potato ricer). No lumps please.


4. Add egg and butter. Begin adding flour, a handful at a time until the mixture forms a soft dough that can be worked, but is not sticky.


5. Divide into 4 smaller balls and roll out on a floured surface into a 1" diameter log. Cut into 1" sections (these will look like little pillows). Cover with a tea towel and let sit.


(Don't let those doughy hands keep you from your beer!)

6. Bring a large pot of water to a rolling boil and add salt. Drop gnocchi in batches into the water. Cook until they float (about 2-3 minutes). Scoop out and add next batch. Serve warm with meat sauce (recipe to follow).

Meat Sauce
made by Mario (not single, so don't even think about it!)


1 1/2 lbs ground beef
6 oz pancetta, diced
2 tbsp olive oil
1 large onion, diced
2 carrots, diced
1 large stalk celery, diced
1 1/2 cup dry red wine
1 28oz can crushed tomatoes
2 cups (approx) beef broth
salt and pepper to taste

1. Saute Pancetta with onions, carrots, and celery. When the onions are almost cooked, add the beef. Cook until beef is no longer pink.

2. Add the wine and simmer until mostly reduced. Add the tomatoes and about half of the beef broth.

3. Simmer for about 2 hours, adding more broth if the sauce is starting to dry out. Salt and pepper to taste.


Flour Tortillas


On Monday, we had a large amount of leftover roast beef from the weekend, and I decided to make beef quesadillas. I make them with sauteed onions and peppers, strips of beef, and Monterrey Jack cheese. I serve them with salsa and sour cream.

You know how sometimes you decide in the morning what you are going to make for dinner, and then it's on your mind all day (making you hungry), and you get your heart all set on that exact meal, and then you realize you are missing a key ingredient? Well that's what happened to me, and the key ingredient was very very KEY... the flour tortillas. I almost always have a package or two in the freezer, but when I went to check, I couldn't find any. It was Labour Day and the grocery store was closed.

I was so looking forward to the quesadillas that I just couldn't relinquish the plan, so I made my own flour tortillas from scratch.

I have done this before. It takes a bit of time, but it is overall pretty easy. The thing that happened to me the last time was that when I put the tortilla dough on the frying pan to cook it, it shrunk up. That didn't happen to me this time, and the only thing I did differently was to let the dough rest a bit after I rolled it out.

I have decided that NOTHING quite beats homemade tortillas, they are just so far superior to the store bought ones, it will be hard to go back. I tried freezing the leftovers, so I will be able to determine if they freeze well. If they do, then I can see myself making these in large quantities so I'll never have to go back to store bought. Next, I am going to try some corn tortillas.

Flour Tortillas
makes eight 10" tortillas

2 cups flour
1/4 cup shortening
1/2 tsp salt
1/2 tsp baking powder
1/2 to 3/4 cup warm water

1. Whisk together the flour, salt and baking powder.

2. Cut in the shortening until mixture resembles course meal.

3. Add warm water a little at a time, until mixture forms a soft dough without being sticky.

4. Knead until smooth and elastic. Roll into 8 equal size balls and cover with plastic wrap. Let rest for 30 minutes.

5. Roll each ball out on a lightly floured surface until very thin and about 10" in diameter. Layer them between sheets of plastic wrap and let rest for 10-15 more minutes (or until you are ready to cook them).

6. Place in a dry (no oil please) non-stick frying pan over med-high heat for about 1 minute on each side. You know its read to flip when it starts to puff up a bit.

7. Wrap with a tea towel while you are cooking the rest, so they don't dry out. Serve warm.