Home Page

Tuesday, July 31, 2007

Mango Chutney and Curry Cheese Dip


I got this recipe a few months back from my Mom, who in turn got it from a friend of hers. It is a really nice refreshing change to your typical Mexican Layered dip. Chances are, if you bring this to a party, there won't be anyone else there who brought the same thing.

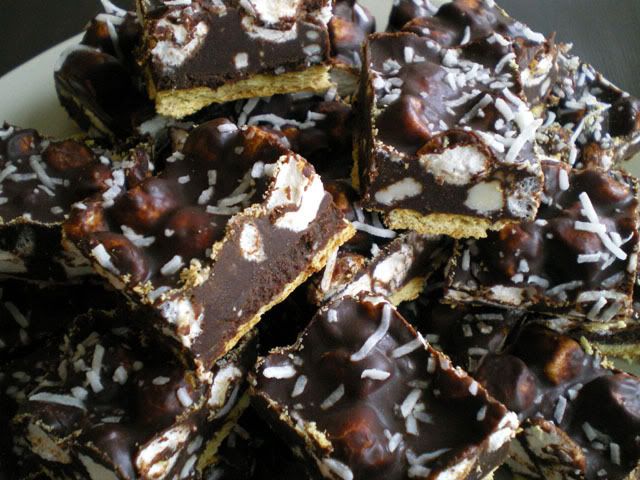
The dip in the picture was actually made by my Mom who served it with some thin crackers. The recipe calls for some coconut to be sprinkled over the top, but my Mom left it off because Mario doesn't like coconut (I'm not usually so nice to him). Claire and Marco didn't even try a bite (not a huge shock) but that was OK, because usually even a few bites of some sort of appetizer before dinner will spoil their appetites.


Mango Chutney and Curry Cheese Dip

1 8 oz package cream cheese, softened
1 cup cheddar
1 tsp curry powder
1/2 jar of peach jam
1/2 jar of mango chutney
green onions
slivered almonds
shredded unsweetened coconut

1. Mix cream cheese with curry. Stir in the cheddar.

2. Spread on the bottom of a large plate or serving dish.

3. Mix together the peach jam and mango chutney. Spread over cheese.

4. Sprinkle with almonds, green onion and coconut.

5. Chill. Remove from fridge about 30 minutes before you want to serve, or else it will be a little hard and you will keep breaking your crackers.


Monday, July 30, 2007

Penne with Mascarpone and Walnuts


I had a really nice weekend. Mario and I were invited to a dinner party Saturday night, so I got to eat a fabulous meal (prepared by somebody else - YAY). On Sunday, I got to meet a fellow food blogger from Ottawa. I got together with Quellia from All Things Edible for a coffee and a nice chat. It was really nice to hang out with somebody who understands this weird food blogging obsession of mine!

I actually didn't end up doing that much cooking this weekend, so I had to go back to last week to find something to post this morning. This was our dinner Thursday night, and you don't hear me say this too often.... the kids loved it. This was the first time we had these Barese sausages, we really enjoyed the flavour and the kids were drawn to the spiral shape. There is absolutely no recipe to go along with the sausages, we just grilled them on the barbecue.

The sidedish, however, was a nice creamy pasta that I made because I needed to use up the rest of the tub of Mascarpone that I bought to make the Mascarpone, Fig and Proscuitto Bruschetta. The pasta was delicious.


Penne with Mascarpone and Walnuts
adapted from Better Homes and Gardens Website

6 oz dry whole wheat penne
1/4 cup chopped green onion
1 tbsp butter
4 oz marsarpone cheese (you could also use cream cheese)
1/4 cup freshly grated Parmesan
1/4 cup chopped walnuts
freshly grated pepper

1. While the penne is boiling, heat the butter in a saucepan and cook green onions for about a minute.

2. Add cheese and stir until melted. Stir in Parmesan and walnuts.

3. Drain pasta and toss with sauce. Season with freshly ground pepper.


Saturday, July 28, 2007

Blogging by Mail


Well everyone, I now have it on very good authority that I am genius! If you doubt me, please go and see for yourself on Graeme's Blog, Blood Sugar.

Let me explain...about a month ago I discovered for the first time a neat little blogging event called Blogging by Mail. This event is hosted by Stephanie (a fellow genius, in my opinion) over at Dispensing Happiness. The idea behind Stephanie's event is that everyone signs up to send and receive a secret stash of goodies by mail. So Stephanie sent me an e-mail with a link to Graeme's blog and his mailing address. My task was to put together a little stash of treats for Graeme that would include some of my favorite things. Graeme has now received my package and he had posted about it on his site.


It wasn't easy thinking of good things to include, but here is what I came up with:

1. A Cookbook. A collection of Pumpkin and Squash recipes from various Canadian Chefs.
2. A little photo album with a collection of some of my favorite recipes and photos.
3. A picture of my family and a picture from Newfoundland (where I come from)
4. A bottle of Maple Syrup
5. Some Maple Sugar
6. Smoked Sockeye Salmon
7. A package of Summer Savoury
8. A pewter magnet that says "Ottawa"
9. A maple leaf shaped cookie cutter
10. A bag of Clodhopper chocolates

I completely forgot to take pictures of my package before I shipped it, so these ones that I posted here today are courtesy of Graeme, who is a photography student at the University of Lincoln. Please visit his site, Blood Sugar, to see the rest of the fun pictures he took of my package as well as some of his other fantastic posts.


This was a great blogging event, and now all I have to do is sit back and wait for MY package to arrive. I am so excited... I wonder where/who it will come from?

Friday, July 27, 2007

Mascarpone, Fig and Proscuitto Bruschetta


I had a six friends and their kids over for dinner this past Sunday. We had quite a good time. It was a beautiful hot day and we ate outside. I live in a newly built house and our backyard is big, but we haven't had a chance to do much with it yet. So... no fence, no deck, no patio, no patio furniture. No problem, I just moved my dining room table out to the backyard! It worked out fine. And because there was NO shade, Mario put up a big blue tarp over the "picnic" table. And THAT is why there is a slightly blue tinge to my pictures. If you make these at home, and they turn out blue... you did something wrong!!

These mascarpone, fig and proscuitto bruschetta's were inspired by a recipe that I saw over on Kirsten's Home Cooking.... I tend to make a lot of her recipes....to the point where I wonder if I should just stop writing a blog, and just post a link to Kirsten's site everyday. I can't say I followed her recipe exactly because true to form, I took one look at her pictures and assumed I knew how to make it (my relationship with recipes could be equated to a man's relationship instruction manuals.... to be referred to only in dire circumstances). So it wasn't until after I made this recipe that I realized I was supposed to put garlic somewhere.


At any rate, I thought these were fabulous, and I got many compliments on the recipe from my guests.

Whenever I entertain, I always try my best to choose recipes that I can do mostly in advance. Here was my menu plan for Sunday, some of these recipes haven't been posted yet, but they will be... someday:

Appetizers
Hot Artichoke Dip
Shrimp Ceviche
Mascarpone, Fig and Proscuitto Bruschetta.

Main Course (Buffet Style)
Barbecued Boneless Rib Roast
Crusty Rolls
Tray of "fixings" (lettuce, tomato, cheese, fried onions)
Condiments
Krista's Couscous Salad
Bean Salad
Potato Salad

Dessert
Peanut Butter and Chocolate Brownies
Banana Split Bars
Fruit Skewers (except I completely forgot to make those)

Mascarpone, Fig and Proscuitto Bruschetta

1 baguette, sliced into diagonal 1/2" slices
olive oil
1 clove garlic, peeled and sliced in half
mascarpone cheese
dried mission figs, sliced
prosciutto

1. Rub bread with garlic (I missed this step, but they were still really good). Brush with olive oil, and toast in the oven until slightly browned.

2. Spread toasts with Mascarpone cheese and top with some sliced figs.

3. Slide the toasts down the counter to your helper (I commandeered a dinner guest, thanks Bill!) who will place a third of a slice of proscuitto on each toast.

Thursday, July 26, 2007

Krista's Couscous Salad


My dishwasher is broken. My dishwasher has been broken for 83 days and counting (my dishwasher naturally waited only 32 days past the expiry of the warranty period to stop washing my dishes). Mario seems to think it should be my job to schedule a repairman to come and fix the dishwasher. I wonder why? Is it because dishwashing is my responsibility? (don't get me started on that).

So, I am refusing to schedule the dishwasher repair! (Yes, I know... maybe I LIKE to shoot myself in the foot... OK?) Mario also seems to have dug his heels in on this one. I don't know what to do. I am tempted to just go out and buy a NEW dishwasher, because my stubborn streak could never extend to a shopping embargo. So if anyone would like to take pity on us, and save our marriage, could you please call a repairman?.... My dishwasher is a Frigidaire model #PLD2855RFC, and I think it has an electrical problem. Phew thanks.

Alright, well here's a recipe that doesn't dirt too many dishes! This is a delicious couscous salad recipe that I 'borrowed' from my friend Krista. Krista used to bring this salad to a lot of parties but she doesn't anymore because the recipe has 'jumped the shark'. FYI - Jumping the Shark is my new favorite expression, check it out on Wikipedia.

Krista's Couscous Salad

1 cup couscous
1 cup boiling water
1 tsp chicken bouillon
1/4 cup white wine vinegar
1/2 cucumber, chopped
2 roma tomatoes, diced
1/4 cup red onion, diced
1/2 cup crumbled feta
2 cloves garlic, minced
1/4 cup olive oil
salt and pepper to taste
parsley to garnish

1. In a bowl mix cucumbers, vinegar and garlic. Let sit 20 minutes to marinate.

2. In another bowl (see only 2 dirty bowls), add boiling water to couscous and chicken stock. Mix and let cool.

3. Once couscous is cool, add cucumber mixture, onion, tomatoes, olive oil, salt and pepper. Stir in feta. Garnish with parsley. (Note: the Feta was my addition and not in Krista's original recipe).

Wednesday, July 25, 2007

Poutine


Several weeks ago, I was tagged by Cherry at Diet-Meals-Recipes to write about my favorite food. It took me a while because frankly, you just can't go around whipping up an order of Poutine everyday. I also, don't know if I need to point out the irony of a blog dedicated to healthy eating and dieting encouraging me to prepare and consume one of the most unhealthy (blissfully unhealthy) foods on the planet. But I would like to thank Cherry for helping me to rationalize eating this meal!

Poutine is my all-time favorite food. No joke, if I had to pick my "last meal" this would be it. It is the perfect food to eat at a chip wagon at 3:00 in the morning, it is the perfect hangover cure, and it is the perfect food to satisfy pregnancy cravings (warning: eating Poutine 3 times a week while pregnant may cause excessive weight gain - and that little nugget was provided from a position of great authority on the topic).

Poutine, for those who don't know, basically consists of french fries, fresh cheese curds and gravy. The best Poutine will be made with thick, fresh cut french fries, real cheese curds (not grated mozzarella) and a beef veloute sauce. If you have never had Poutine, my advice is DO NOT make this recipe. Once you get a taste of this, you will be hooked like me.


Poutine
makes 4 side servings or 2 main servings

4 large russet potatoes
oil for deep frying
salt
2 cups beef stock
1/4 cup butter
1/4 cup flour
1 1/2 cups cheese curds

1. Peel and slice the potatoes into thick fries (at least 1 cm thick).

2. Soak the potatoes in ice water for about 30 minutes. Remove and drain well.

3. Heat oil for frying to about 325F and deep fry potatoes for about 8 minutes.

4. Remove from oil and set on paper towel. Turn the oil up to 375F.

5. In a saucepan melt the butter and stir in the flour. Add the beef broth and stir over medium-high heat until thickened. Reduce heat and keep hot. (I use a tiny bit of gravy browning to get that nice dark colour).

6. Return the french fries to the oil and continue frying until golden and crispy. This should take about 5 more minutes. Remove fries to drain on paper towel and salt to taste.

7. Assemble the poutine quick while everything is still HOT. (Poutine is best made in a bowl or other container which will contain the heat and help melt the curds. Also, the curds should be at room temperature before assembling the Poutine). Start with a layer of fries. Put some cheese curds in the middle. Add more fries and top with more cheese curds.

8. Ladle gravy over the fries and cheese curds.

Tuesday, July 24, 2007

Spaghetti Squash with Tomato Sauce


So, you want your kids to eat more vegetables? Here's a little trick that I do not recommend. Serve Spaghetti Squash and try to pass it off as real Spaghetti. This will not make you popular and your kids won't be fooled.

Personally, I love this dish. It is a really nice alternative to pasta, and when you eat your spaghetti this way you don't have to feel bad about that nice slice of bread you are having on the side, because you aren't doubling up on your carbs.

It takes a little longer to make than pasta because the squash needs 45 minutes in the oven. I have read that you can microwave the squash, although I've never tried it that way.

Normally when I make spaghetti sauce, I will throw all the raw veggies (carrot, onion, mushroom, green pepper etc) in the food processor for a few seconds before I cook them. That way the kids don't even notice all the healthy stuff in the sauce. In order to wean them off of that habit, because Mario and I like to actually taste our vegetables, I am gradually starting to dice the vegetables into bigger and bigger pieces.

Consequently, Marco methodically picked out every single little piece of mushroom in the sauce, and not that much actual squash was consumed by anyone under the age of 10.

Oh, and just to join in the whiny, petulant fun, Mario complained that I didn't put any meat in the sauce.


Spaghetti Squash with Tomato Sauce

1/2 large spaghetti squash
4 large tomatoes
1 tbsp olive oil
2 cloves garlic, minced
1/2 onion, diced
2 stalks celery, diced
3/4 cup diced mushrooms
1/2 green pepper, diced
1 can tomato paste
1 sprig fresh rosemary, chopped
1 tsp dried oregano
1 tso dried basil
salt and pepper
Parmsan cheese

1. Saute the onion and garlic in olive oil. When the onion is translucent, add celery, mushrooms and green pepper. Saute for a 5 minutes.

2. Seed and chop the four tomatoes and add to the vegetables. Add the rosemary, oregano and basil and the tomato paste. Simmer for one hour. Season to taste.

3. Cut the spagetti squash in half, brush the cut side with olive oil and lay cut side down on a baking sheet. Bake at 375F for 45 minutes.

4. Remove the squash from the oven. Using a fork, scrape across the inside of the spaghetti squash to loosed the strands, then spoon them onto plates.

5. Top with tomato sauce and Parmesan cheese.

Monday, July 23, 2007

Pam's Marshmallow Cookies


My Mom used to make these cookies a lot when we were little, and judging by the name of the recipe, I am guessing that she got this one from my Aunt Pam.

I made these last week to take to a barbecue and my kids were very disappointed that I didn't bring any leftovers back home. The cookies are very simple to make, so if I was a nice Mom, I'd just make another batch for the kids.... but I'm afraid I'd eat them all myself, so Claire and Marco are pretty much out of luck! Sorry kids! (Maybe I'll show them the pictures, instead)

Pam's Marshmallow Cookies

1 egg
1/2 cup butter
1 cup icing sugar
1 tsp vanilla
6 oz chocolate chips
2 cups mini marshmallows
Graham crackers
shredded coconut

1. line a 8"x8" baking dish with graham crackers.

2. Put the first 5 ingredients in the top of a double boiler and melt.

3. Remove from heat and stir in the marshmallows. Pour mixture over the graham crackers.

4. Sprinkle with coconut and chill. Cut into squares.


Saturday, July 21, 2007

Belgian Waffles


I never realized that true Belgian Waffles were made with yeast until I got my own Waffle Maker for Mother's Day and I read the book that came with it. It seemed like a lot of extra work (and compared to adding water to a pancake mixture, it was), but MAN were these good waffles.

Belgian Waffles
from the book that came with my waffle maker

1 package active dry yeast
1/4 cup warm milk (about 110F)
3 eggs
2 3/4 cups warm milk (about 110F)
3/4 cup butter, melted and cooled to lukewarm
1/2 cup sugar
1 1/2 tsp salt
2 tsp vanilla extract
4 cups flour

1. Dissolve yeast with 1/4 cup warm milk. Let sit about 10 minutes.

2. Separate the eggs. In a large bowl, whisk the egg yolks, 1/4 cup of the warm milk and the melted butter.

3. Add the yeast mixture, sugar, salt and vanilla. Stir in the remaining milk, alternating with the flour.

4. Beat the egg whites until they form soft peaks; fold into the batter.

5. Let sit for one hour, stirring every once in a while.

6. Preheat the waffle iron. Brush with oil and spoon in the amount suggested by your waffle maker. Serve immediately.


Friday, July 20, 2007

Champagne Cucumber Risotto with Pan Seared Scallops


This meal started out with a package of frozen scallops defrosting in the kitchen and me scratching my head, trying to figure out what to do with them. It sort of evolved from there.

I decided that it would be really nice to have the scallops with Risotto. I usually make my Risotto with white wine, but I had an open bottle of near-flat champagne sitting on the counter from a disastrous attempt at homemade Bellini's last week (well it wasn't a complete disaster because I did get tipsy). Just don't be looking for any accompanying cocktail recipes on this site anytime soon because apparently, 'drink mixology' is not my forte. But then again I learned from my friends, who invented the shooter: "Fire in the Front Bum" (don't ask). Note to my friends: this recipe would also work well with Baby Duck.

Back to my Risotto. Using the champagne in place of white wine turned out to be a stroke of genius (if I do say so myself!). It added a wonderful flavour to the Risotto and it is a great way to use up the leftovers. Has anyone ever actually finished a bottle of champagne they popped open to celebrate a special occassion? (or make pukey bellini's?). Exactly!

At some point, while I was cooking, I realized there was no green vegetable with this meal. I am a bit of a stickler for serving some green with every meal. I couldn't throw together a salad, because I didn't have any lettuce. So here is where this meal gets a little odd. I put grated cucumber in my risotto. And you know what? It was good! Then I sauteed the scallops with just a tiny bit of bacon for flavour.

This meal turned out to be very nice. See that nice photo with the five perfectly placed scallops? After I snapped the pics, I put 4 more scallops on my plate....yu-mmy!


Champagne Cucumber Risotto with Pan Seared Scallops

1 tbsp olive oil
1/4 cup finely chopped onion
1 cup champagne
1 1/2 cups Arborio rice
5 cups chicken broth
1 cup shredded cucumber (squeeze out excess moisture)
1/3 cup Parmesan
1/4 cup chives
1 tbsp chopped fresh cilantro
1 tbsp butter
400g scallops
1 tbsp bacon bits (about a half a slice)
1 tbsp olive oil

1. Bring chicken broth to a boil in a saucepan.

2. In a non-stick saute pan, saute onion in 1 tbsp olive oil until translucent. Add rice and cook another minute.

3. Add champagne and cook until mostly absorbed.

4. Begin adding hot chicken broth, about 1/2 cup at a time, stirring each addition until mostly absorbed. Continue until about 1 cup of broth remains.

5. Heat 1 tbsp olive oil with bacon bits in a saute pan. Cook scallops for about 2 minutes per side until cooked through. Do not overcook.

6. While the scallops are cooking, add the last of the broth and the grated cucumber. Stir until absorbed.

7. Finish the Risotto by stirring in Parmesan, chives, cilantro and 1 tbsp butter. Serve immediately with scallops on top.


Thursday, July 19, 2007

Stuffed French Toast


This was breakfast from a couple of weeks ago. I did really good that weekend, I didn't have any fatty breakfast food. Sometimes though when I am minding my calorie intake and not eating anything that is very fattening (or really any good) I feel a little guilty for depriving my family of their nice treats. So on this particular Sunday, I made french toast stuffed with banana, chocolate and peanut butter for Claire and Marco. Mario got egg and cheese on a bagel with homefries and I had cornflakes with 1/2 a sliced banana.... talk about a short order cook!

Needless to say it was agonizing to sit across the table and watch them eat this, I very nearly leapt across the table and ripped the fork out of Marco's chubby little hands (I figured I could take the 4 year old easier than the 7 year old).

Stuffed French Toast

4 slices of bread
1 ripe banana
2 tbsp chocolate chips
2 tbsp peanut butter
2 eggs
2 tbsp milk
oil for frying

1. Assemble french toast sandwiches. Spread 2 slices of bread with peanut butter. Sprinkle chocolate chips on peanut butter. Layer with sliced banana, and top with remaining slices of bread.

2. Beat eggs with milk. Dip sandwiches into egg mixture and let sit for about 10 minutes.

3. Fry in a small amount of oil on both sides until golden brown. Serve drizzled with maple syrup.


Wednesday, July 18, 2007

Maple Bourbon Barbecued Chicken


I saw this recipe over on one of my favorite food blogs, Kirsten's Home Cooking. Kirsten made this recipe with pork, but it appealed to me so much, I just needed to make it right away even though I didn't have pork in the house.

I mixed the marinade up in the morning before I left for work. I put the marinade and the chicken breasts into a Tupperware container and went to give it a little shake to coat all the sides of the chicken. Well, the container wasn't shut properly so I squirted marinade all over my work clothes. I hate it when my days start out like that.

It turned out to be worth the wrecked blouse though, it was absolutely delicious. I cooked the chicken with the skin to retain the moisture, but I peeled it off and discarded it after the pictures (it nearly made me cry to do that).

And, yes, that is the exact same rice that you saw in my pictures yesterday AND the day before, and there are still leftovers....

I also made steamed green beans. When I steam green beans I like to take a big bowl and put in 1 tsp of butter, 1 tbsp Parmesan, 1 tbsp real bacon bits, and a squirt of fresh lemon juice. When the beans are finished steaming dump them in the bowl and toss them around until the butter is melted. That's only 1 tsp of butter between four people, but it makes it so much better.

Maple Bourbon Barbecued Chicken

4 chicken breasts (bone-in, skin on)
1/2 cup bourbon
1/4 cup maple syrup
1 heaping tbsp whole grain mustard
1-2 cloves garlic (I used two)
1 tsp each salt and pepper

1. Combine all marinade ingredients in a bowl, mix well.

2. Add chicken and marinate for 4-8 hours. (Tip: to save time I throw the chicken in the marinade frozen right out of the freezer, and then it is thawed and ready to go when I get home).

3. Remove chicken breasts from marinade and give to your husband to BBQ. Warn him that if he returns them burnt, there will be hell to pay.


Tuesday, July 17, 2007

Rice Pilaf with Walnuts


Yesterday, Pam from Sidewalk Shoes left a comment asking for the recipe for the Rice Pilaf that I served as a side dish with my Crunchy Lime Tilapia. I wasn't planning on posting it (hence the strangely microscopic zoomed in picture of 7 grains of rice). But what the heck, I've always said that I take requests...

Rice pilaf is something that I make often, yet I rarely follow the same recipe twice. Even this recipe is already lost. In fact I literally tore my house apart looking for it after I got the request for the recipe. I printed it off the internet, but I can't remember where I got it from. I did make some changes to the original recipe, so at least it isn't a blatant rip off from somebody else's site (I'm really sorry if it is yours).

Here's my change.... I hate peas (gasp... don't tell my kids, PLEASE) so I left them out!

Rice Pilaf with Walnuts

1 small onion, diced
1 tablespoon olive oil
1 stalk celery, diced
2 carrots, diced
1/2 green pepper, diced
1/2 cup green peas (yuck! It was hard for me to even TYPE that)
1 tomato, seeded and diced
1 cup rice
2 cups chicken stock
salt and pepper
1/8 cup toasted walnuts
1/4 cup fresh parsley, chopped

1. Saute onion, celery, carrots, green pepper in olive oil for 2-3 minutes until onion is translucent.

2. Add rice, chicken stock, and tomato (and peas, if you must). Bring to a boil and let simmer, covered for about 20 minutes (or until rice is tender and liquid is all absorbed).

3. Fluff with a fork and stir in toasted walnuts and parsley. Season with salt and pepper (I used homemade chicken stock, but if you use powdered go easy on the salt).


Monday, July 16, 2007

Crunchy Lime Tilapia with Almonds


We try to eat some sort of fish or seafood at least a couple of times per week. It is very healthy and Mario and I love it in just about any form. Getting the kids to eat it, however, is another matter. But when I served this meal, Marco picked the fish right up in his hands and ate it like it was a big cookie. I was so excited he ate it, that I supressed my usual lecture about utensils and table manners.

This recipe got a great reaction from Mario too. Usually, I have to actually ASK him if he liked something. It is very rare that I get an UNSOLICITED compliment. But this time, when he took the first bite, it elicited an almost involuntary "hmmm". Then he dug right in for more. I said, "I guess that means you like it?" Mario: "mmmm, hhhhmm, mmhhhh, mwah". Well, I didn't need an on-line translator to tell me that was man-grunt for: "This is the best meal you ever made, I hereby pronounce you Ruler of this House".

Crunchy Lime Tilapia with Almonds
adapted from the Kellogg's Website

1 pound Tilapia fillets
2 cups Rice Krispies (crushed to about 1 cup)
1/4 cup chopped almonds
1 tbsp fresh parsley
1/4 cup flour
2 egg whites
3 tbsp fresh lime juice
1/4 tsp ground ginger
1/4 tsp salt
1/4 tsp pepper
cooking spray

1. In one bowl mix together Rice Krispies, almonds and parsley.

2. In another bowl mix egg whites, lime juice, salt, pepper and ginger.

3. Dredge fish fillets with flour, dip into egg/lime mixture and press into Rice Krispies. Press crumbs on firmly so the fish gets well coated.

4. Place fish on a baking sheet sprayed with cooking spray. Spray a little more cooking spray on top of the fish. Bake at 400F for about 15 minutes, turning halfway, until browned and cooked through.

5. Serve with Mango-Lime salsa or Chipotle Sauce (I mixed some Chipotle Dip with light Miracle Whip for the sauce)


Saturday, July 14, 2007

Caramel Pecan Brownies


I have to say these brownies were the tastiest flop I've ever made, unlike my most famous flop, Haupia, which came out tasting nasty. Actually, it might not even be fair to call these brownies a flop, it is just that they didn't really turn out how I had imagined they would.

It simply didn't seem to matter how long I left them in the oven, they never cooked! In fact at one point, after I had left them in twenty minutes beyond the recommended cooking time, I took them out thinking, they have to be cooked now. I waited for them to cool and tried to cut them.... they were still like all squishy in the middle. So I committed a cardinal sin and put them BACK in the oven at that point, for about 30 more minutes. Same result.

In the end, just to be able to cut them into squares, I put the whole pan in the freezer for an hour. Then I hacked away at them until they were all cut. I stored them in the fridge, and to be honest they were the yummiest little things. They were just a lot more fudge-like than brownie-like.

So I guess I could have just called them "Caramel Pecan Fudge" and not fessed up about the flopped-ness of the recipe. But I like to think I am honest blogger, and as anyone who cooks much will know, not everything turns out they way you were hoping it would!


Caramel Pecan Brownies

4 squares (1 oz each) unsweetened chocolate
3/4 cup butter
2 cups sugar
4 eggs
1 cup flour
1 package (14 oz) caramels
1/4 cup heavy cream
2 cups pecans, coarsely chopped
1 package (12 oz) chocolate chips

1. Heat unsweetened chocolate and butter in a saucepan until melted. Stir in sugar. Beat in eggs. Stir in flour until well blended.

2. Spread half the mixture in a greased 9" x 13" baking dish. Bake for 20 minutes at 350F.

3. Meanwhile combine caramels and cream in a saucepan and melt over low heat. Stir until smooth. Stir in 1 cup pecans.

4. Spread caramel mixture over partially baked brownies. Sprinkle with half the chocolate chips. Pour remaining brownie batter over the top. Sprinkle with last of pecans and chocolate chips.

5. bake for 25 to 30 more minutes. Cool in pan on wire rack.

6. Hope for the best.


Friday, July 13, 2007

Garlic and Olive Oil Bruschetta


I feel like I am cheating today for posting this recipe. It is not even really a recipe, it is more like an idea and it wasn't even my idea. I guess it was some old Italian person's idea. But, boy was it ever a GOOD idea!! This is "authentic" bruschetta. Although my Bruschetta with Tomatoes is also really good, I actually prefer this more simple bruschetta as a bread to go alongside pasta. The tomato bruschetta is nicer as a starter dish.

This is something that I should do more often, we always have the ingredients around, but I tend to forget about it sometimes. Then every couple of years, I will remember that I haven't made it in a while, and we will we eat it every other night for a month! Then I'll forget about it again for a while. Well right now we are on another Garlic and Olive Oil Bruschetta kick.

We grill the bread on the BBQ and then let everyone fix it themselves so they can control the amount of garlic and oil that goes on it. It is so good, you really have to try it.


Garlic and Olive Oil Bruschetta

1 loaf crusty italian bread
peeled whole garlic cloves (allow about 1 per person)
olive oil (I put some in a bowl on the table with a brush)
freshly ground pepper

1. Slice bread into nice thick 3/4" to 1" slices.

2. Grill bread on the Barbecue (or alternatively broil it in the oven) until is it nicely browned on both sides.

3. Rub each slice with a clove of garlic (I rub until the garlic is about half worn down).

4. After the garlic, brush with olive oil and sprinkle with pepper.


Thursday, July 12, 2007

Mixed Green and Peach Salad with Creamy Chive Vinaigrette


Continuing with my healthy food kick, here is a nice salad recipe that I found in the Bon Appetit August 2007 issue. The original recipe called for Arugula, but I just used mixed greens. It was really tasty, and definitely something I will make again when peaches are in season.

Marco gobbled this up and asked for seconds. Claire is staying with her Grandparents for the week, but had she been here I'm sure she would have hated it. Claire is only 7, but she continues to completely shock (and scare the heck out of) me at how computer/internet savvy she is. So, Claire, if you are reading my blog from Grandma and Gramp's house, we really miss you! When you come home on Sunday, I am going to make your favorite dinner... Spaghetti.

Mixed Green and Peach Salad with Creamy Chive Vinaigrette
adapted from Bon Appetit, August 2007

2 large ripe peaches
2 tbsp fresh lemon juice, divided
6 tbsp olive oil
1 1/2 tbsp heavy cream
salt and pepper
1/3 cup finely chopped fresh chives
12 cups mixed greens (or arugula)

1. Wash peaches and slice thinly. Toss peach slices with 1/2 tbsp of the lemon juice.

2. Mix dressing: In a bottle add remaining lemon juice, oil, cream and chives. Shake bottle. Season to taste.

3. Add mixed greens to the bowl with the peaches and toss with dressing.


Wednesday, July 11, 2007

Penne with Grilled Eggplant, Goat Cheese and Mint


I've been cooking up a healthy, nutritious storm ever since I got home from my camping trip. I think I just ate one more roasted marshmallow than my metabolism (or even the metabolism of a marathon runner) could reasonably handle. So prepare yourselves for a bit of a calorie slow-down on Janet is Hungry (don't worry though, it never lasts long).

This was what I made for dinner on Sunday night when we got home from camping. It has no meat. I seldom make dinner with no meat, because Mario is a real "meat and potatoes" sort of guy. But he really liked this. The recipe made so much that he was able to take it for lunch on Monday and Tuesday. He ate it cold for lunch, and said it was just as good cold as it was hot.

I found this recipe in the August 2007 issue of Bon Appetit magazine. I made some changes (as usual). The original recipe called for zucchini, but my regular grocery store had sold out and I really didn't feel like traipsing all over the city for zucchini. I also used goat cheese instead of Ricotta Salata which is a firmer salty Ricotta that I would have probably had to get at a specialty store.

I served the pasta with garlic and olive oil bruschetta and a salad with fresh peaches.


Penne with Grilled Eggplant, Goat Cheese and Mint

1 large eggplant
olive oil, for brushing
coarse salt
freshly ground black pepper
2 tbsp balsamic vinegar
1/4 cup fresh mint leaves, thinly sliced
2 pinches dried red pepper flakes
1 pound penne
3 tbsp olive oil
3/4 cup crumbled goat cheese (about 3oz)

1. Slice eggplant in 1/2" slices and brush lightly with olive oil. Sprinkle with coarse salt and pepper.

2. Put the pasta on to boil.

3. While the pasta is cooking, grill eggplant on BBQ for about 5 minutes per side, until browned.

4. In a large bowl add balsamic vinegar, olive oil, red pepper flakes and fresh mint.

5. When the eggplant comes off the BBQ, cut it up into bite size chunks and add to bowl. Add pasta to bowl and toss. Toss in the crumbled cheese (save a few pieces to sprinkle on top).


Tuesday, July 10, 2007

Camp Fire Bread


This past weekend we went camping and I decided throw caution to the wind and bake some homemade bread over the camp fire. It was an interesting experiment to say the least. Doesn't that picture above look nice? Well...before you become too impressed, scroll to the bottom of the post for the pictures of the other side of that loaf, and the second loaf. Yeah oops.

I made the bread dough at home the day before we headed out camping. I wrapped each ball of dough in plastic wrap and placed them inside a ziploc bag in the cooler. My plan was to take them out Saturday morning at the campsite to rise. Here comes Mistake #1. I had also pre-baked some potatoes at home in the oven to make homefries for breakfast and I guess they were still a tad warm when I put them in the cooler, right beside my bread dough... (that was dramatic foreshadowing)

When we woke up early Saturday morning and emerged from the tent, the first thing we noticed was that the cooler lid was ajar. OH NO! Racoons! I ran over with dread to survey the damage. My bread had risen inside the cooler, it completely burst through the Ziploc bag (yes it was a GLAD bag not the cheap kind) and then popped the cooler open.

That was some SERIOUS bread! It was all over the cooler, sort of like "attack of the killer bread dough". I managed to gather it back up into balls and I set it to rise. Well, Murphy's Law of course dictated that it wouldn't rise when I WANTED it too..... So I put it in the back of the mini-van with the heater running. Would you like some carbon monoxide with your bread?

Eventually it doubled in size. Here comes Mistake #2... believing Mario. I told him he needed to fix me up a makeshift "oven" in the firepit with a temperature of about 325°F. He said that would be "no problem". He lit about 3000 coals and covered the entire firepit with approximately 75 meters of tin foil. It looked like a space station (which is funny because my second loaf looks a little like an asteroid).

Well the disastrous results of this experiment are plainly obvious. At first I decided not to post this recipe (don't want to become a laughing stock). But my brother, Colin, said that if I didn't he would start his own blog to post all my cooking disasters, it would be called: "Are you still Hungry?"

Surprisingly, the bread tasted very good on the inside, after you cut off the burnt crust. My Mom (who is my biggest fan) ate it burnt crust and all and said it was "quite lovely". I will try this again next time we go camping, but I will reduce the amount of coals by about 2985.


....it gets worse....


Burnt White Camp Fire Bread
original recipe: "Overnight White Bread" from "Breads" by the California Culinary Academy

2 packages active dry yeast
1/2 cup warm water (105°F to 115°F)
2 tbsp honey
1 1/2 cup warm milk (105°F to 115°F)
1 1/2 tsp salt
2 tbsp butter
5 1/2 to 6 cups flour

1. Sprinkle yeast over warm water and 1 tsp honey, let stand five minutes.

2. Stir in milk, rest of honey, salt and butter.

3. Add three cups of flour. Beat until smooth and elastic. Stir in 2 cups more flour to make a soft dough.

4. Turn dough out onto floured board and knead for 10 to 15 minutes (adding just enough flour to prevent from sticking).

5. Divide into two balls, cover with plastic wrap and refridgerate for up too 24 hours.

6. When ready to bake, remove from refridgerator, and let come to room temperature. Shape into loaves and let rise until doubled in bulk.

7. Bake at 375°F for 35 to 40 minutes, until loaves are well browned.