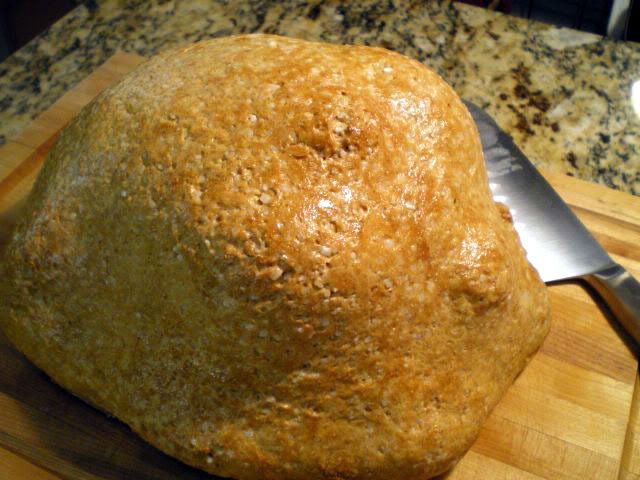
Dinosaur Egg Chicken
Unfortunately I have to start off this post by telling everyone that I am a moron (As if everyone doesn't already know)! In my last post, I thought I had a brilliant spur of the moment idea for a contest.... one that would send all my readers scouring through my archives, reading all my old recipes looking for that elusive can of soup. Well, I had my winner exactly 2 minutes and 42 seconds after I published the ill-fated post. AND, as I discovered, any enterprizing individual who wanted to go to Google and type in "Janet is Hungry can of soup" would have had the results returned to them in 0.23 seconds.
Mario sent me an e-mail: "Sweetheart, you might want to think your contests through a little better in future"... yeah thanks, hon. But its OK, I think I just ran my first and last contest on Janet is Hungry. (Don't quote me on that, I'm a notorious liar).
So without further ado, first prize of my favorite cookbook goes to Deeeeeeena who writes the blog, Miche Mache. (Deeeeeena send me an e-mail using the "Contact Me" button with your mailing address).
An honourable mention goes to Suzanne, a coworker of mine, who found BOTH recipes that use canned soup. Pork Chop and Rice Bake and Chili.
Today's recipe is one that I have been meaning to try for a long time. I've seen this prepared several times before. The recipe that I used came from Laura Calder.
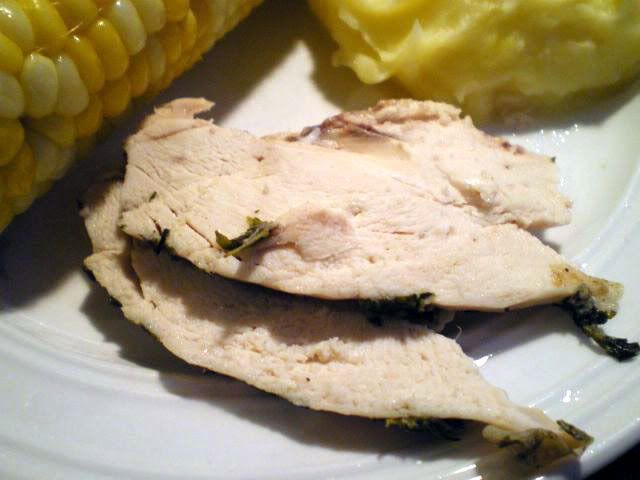
Although the skin doesn't crisp up at all, the meat of the chicken stays so moist and juicy and the flavours from the fresh herbs really penetrate. My kids actually did think I'd cooked a dinosaur egg... they were gathered around me in a sort of "hushed awe" when Mario and I were cracking it open (those are HIS hand in the picture for anyone who thought I might have "Man-Hands"). I think the kids were actually expecting a baby dinosaur to pop out... boy were they disappointed when it was only a chicken. Yet still confused... Claire: "Um, so do you think it was the Mommy or the Daddy that was a chicken"...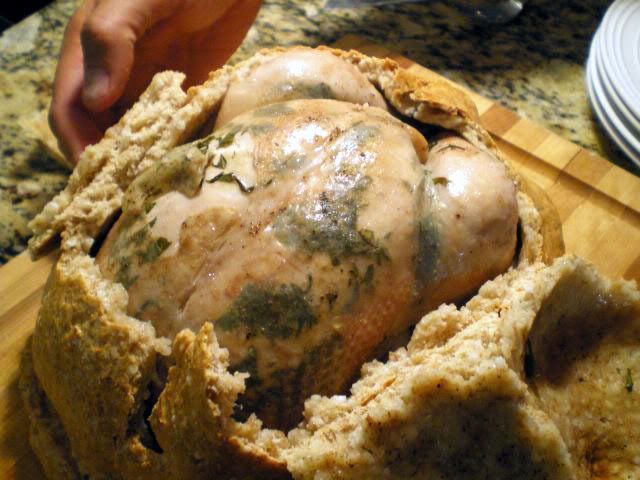
Dinosaur Egg Chicken
3lb whole chicken
Fresh herbs (I used rosemary and thyme)
4 - 5 garlic cloves, minced
pepper to season
A drizzle of olive oil
Salt Crust:
4 cups flour
6 egg whites
500g coarse salt (about 2 cups)
Water
1 egg yolk
1. Slide plenty of herbs under the chicken skin. Put garlic in the cavity, along with any remaining herbs. Rub the chicken with pepper and olive oil.
2. Make the crust: mix the flour, egg whites and salt well, then add enough water to make a pliable dough (the consistency of play-doh).
3. Roll out 1/4 the dough to make a base for the chicken to sit on. Set the dough base on a baking sheet. Lay the chicken on top. Roll out the remaining dough, drape it over the chicken, and seal the edges. Becareful to patch any holes or rips. Add a splash of water to an egg yolk and paint the pastry case all over.
4. Bake for 1 1/2 hours at 325ºF. Let the chicken sit out of the oven 10 minutes before serving.
5. Cut off the crust and discard it. Carve the meat and serve.