Home Page
Showing posts with label Fish and Seafood. Show all posts

Friday, September 18, 2009

Salmon with Tuscany Beans and Heirloom Tomatoes


Last night for dinner, I made a delicious Salmon recipe from the July/August edition of Clean Eating Magazine, my new FAVORITE cooking magazine. I have already made 3 recipes from this issue alone. This is unheard of for me, usually I buy cooking magazines a couple at a time (I have a cooking magazine habit) and then I will read them, drool over the pictures, chose a few that I want to make, then throw the magazine in a pile and never make the recipes. So when I find a magazine like this, that is actually worth the $6.99 cover price, I might actually subscribe!

This salmon was delicious. Marco ate it all up, he loved the bean salad, and was cajoled into eating the salmon with the lure of a chocolate covered jube jube from Candy Mountain (does that make me a bad mother? Hey, he ate the salmon! That's good for him right?). Unfortunately, Claire, at the mature age of 10 is no longer susceptible to such cajoling and would eat nothing on her plate. She went to bed hungry, I'm sure.

Will this prevent me from making this dinner again? Not a chance. My kids eat what they're served (or not), but I refuse to cater to their finickiness. Besides, my theory is that you will never LEARN to like something if you never eat any of it...


Salmon with Tuscany Beans and Heirloom Tomatoes
Serves 4

1 15oz can of white kidney beans
1/2 onion, thinly sliced
1 large red pepper, chopped
4 salmon filets
1/2 cup fresh dill, minced
cooking spray
2 large heirloom tomatoes, chopped (I used about 400g)
1/4 cup olive oil
1/4 cup balsamic vinegar
2 shallots, minced (I used 1/4 cup chives - that's what I had)
4 cloves garlic, minced
2oz capers, drained and rinsed (I didn't have any on hand)
salt and pepper to taste

1. To make the marinade, mix the olive oil, balsamic vinegar, shallots, garlic, and capers.

2. Pour half of the marinade over the salmon and sprinkle with the dill. Let the salmon sit for about 30 minutes (or up to a full day in the fridge).

3. In a bowl mix the beans (rinsed well) with the onion, and red pepper and toss with the remaining marinade. Let sit. Right before you are ready to serve, toss in the chopped tomatoes and season with salt and pepper to taste.

4. In a non stick pan, misted with cooking spray, cook the salmon (5-7 minutes per side depending on the thickness) until it is cooked through.

5. Serve with bean salad.


Tuesday, August 25, 2009

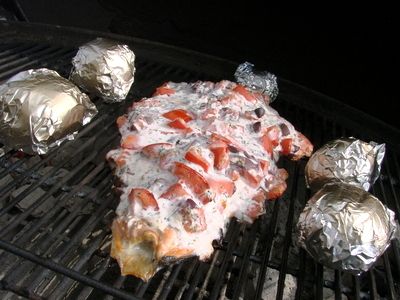
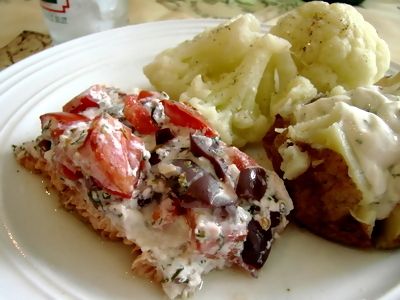
Salmon with Yoghurt Dill Topping


My apologies for going so long without posting. It has been a busy busy summer. And yes, we have still been eating all summer long, but I've been a little boring with my recipes (reverting mostly to old already posted faves). I have also been trying to eat a cleaner, healthier diet... which often leads to less food-porn worthy blog material.

This meal here was healthy while also meeting my other unofficial blog material criteria... (1) I actually remembered to take pictures before I was halfway finished eating; (2) It is something new; and (3) It was picture worthy.... oh yeah and of course, (4) It tasted good.

We all loved this (kids included), and it will be making an unbloggable return appearance in my recipe line-up!


Salmon with Yoghurt Dill Topping

1 1/4 cups plain fat free yoghurt
20 kalamata olives, chopped
15 cherry tomatoes, chopped
1 1/2 tsp dried oregano
6 cloves garlic, minced
2 tbsp chopped fresh dill

1. Mix all ingredients together in a bowl.

2. If you are barbequeing this, as we did, it is easier to put the salmon on the barbeque and add the topping after (rather thay trying to transfer it onto the grill without spilling). So... arrange your barbeque for indirect grilling and cook the salmon with the topping for about 20 minutes (until is cooked through). Your cooking time will depend on the thickness of the salmon.

3. Alternatively, you can put this on a baking sheet in a 400F oven until cooked through.


Sunday, April 12, 2009

Fish and Brewis


I made fish and brewis (pronounced "bruise") for dinner on Good Friday. This is a meal that has a lot of nostalgic appeal to me. I associate fish and brewis with my childhood, and it is something that my Mom made fairy often whenever she could find the ingredients. The recipe originated a long time ago in Newfoundland, where it was prepared by sailors who were often at sea for long periods of time without access to fresh ingredients. Fish and brewis is very simple to make, as it only has three ingredients. Some of the ingredients are only readily available in Eastern Canada, but nowadays thanks to the internet, I can order them on-line.


Here are the ingredients: Purity Hard Bread, Dried Salt Cod, and Salt Pork Fat. The hard bread is a hard block of dried biscuit that will literally crack your teeth if you try to bite into it (sounds yummy eh?)... wait, it gets better. The Pork Fat gets fried up into little bits of heaven that Newfie's like to call, "scrunchions". So, you have to soak both the hard bread and the salt fish overnight to make them edible and then the next day it all gets fried up in the fat that has been rendered from the scrunchions. In Newfoundland, this meal is often served for breakfast to patients undergoing cardiac and pulmonary rehabilitation. OK, I made that last bit up (about the cardiac patients, not the breakfast!)

I can honestly say that this was one of my all time favorite meals as a child (yes, I was a peculiar child). Apparently, my own children are NOT as peculiar because they hate fish and brewis. It is actually a little stressful for them, you see they hate the fish, but like the bruise. Problem is, once the dish is prepared, the two are pretty much indistinguishable. So the kids will be sitting there examining, and sniffing each morsel of food trying to determine what the heck it is...half the time they get it wrong, and fish comes flying back out in a projectile fashion, "nope not bread". Oh well, what can I say... they are "mainlanders".

Fish and Brewis

3 hard bread cakes
1 lb dried salt cod
1 cup cubed salt pork fat back (about 100g)

1. Soak the hard bread in a large bowl of cool water overnight at room temperature. Make sure you add a lot of water because these suckers really swell up.

2. Soak the dried salt cod overnight in cool water at room temperature. In the morning, you can change the water to help remove more of the salt.

3. When you are ready to eat, drain the fish and boil it for about 20 minutes in a fresh pot of water.

4. Meanwhile, fry up the cubes of pork fat in a large non-stick frying pan until they are golden brown and crispy. Remove the scrunchions with a slotted spoon and set aside.

5. Drain the hard bread, and the fish and add it to the frying pan with all the fat from the scrunctions. Fry this whole mixture up for about 5 minutes, breaking the larger chunks of fish and bread up with your spatula. Right before serving you can either mix the scrunchions back in, or sprinkle them on top.

6. Serve with a homemade tomato relish or chutney of some sort (mine is pictured with a caramelized onion chutney).

Sunday, March 22, 2009

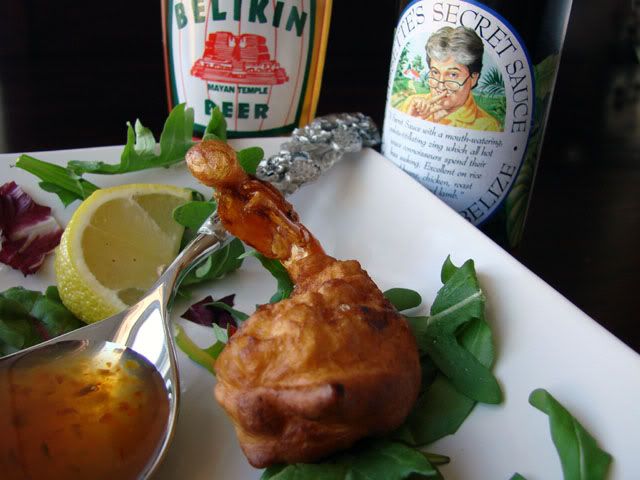
Belikin Beer Battered Shrimp with Lisette's Secret Sauce


We just returned home, yesterday, from our annual family vacation to San Pedro, Belize. While there, I made a very important discovery... Janet is Hungry has a lot of fans in Belize. More than I could possibly count! (using one hand)

I am not kidding when I say that all this adulation has seriously gone to my head.

The President of the Belizean Chapter of the Janet is Hungry fan club, Jesse (of the San Pedro Daily), has made a personal request for more local Belize recipes on Janet is Hungry.

Not wanting to disappoint my only groupie, I scrambled to put together a recipe using some ingredients that I associate with my vacations in Belize: Belikin Beer (of course), shrimp (I would have used conch if it I could get it here) and Lisette's Secret Sauce (a staple in most Belizean kitchen's - well I think so anyway, having only ever been in one Belizean kitchen - my Mom's).

I have, on returning from previous vacations in Belize, experimented with some other local recipes, such as fish tacos, orange crusted snapper, and shrimp ceviche.

I also promised Jesse to take a stab at Belizean Stewed Chicken with Rice and Beans, but this will have to wait until another time when I am less travel weary. For those not familiar with Lisette's Secret Sauce, it is a sweet tangy sauce made with peppers, lime juice, carrots and sugar, etc.


Belikin Beer Battered Shrimp with Lisette's Secret Sauce

1 lb large shrimp (peeled and deveined with tail intact)
1 cup flour
1 egg
1/2 cup Belikin Beer (or other pale ale)
Lisette's Secret Sauce (or other dipping sauce)


1. Heat skillet with 1/2" of oil over medium-high heat.

2. Mix batter ingredients (flour, egg, and beer) until smooth. Should be the texture of thick pancake batter.

3. Wash and pat shrimp dry, season with pepper.

4. Dip shrimp in batter and fry in batches until golden brown on both sides (they cook very quick, about a minute per side).

5. Drain on paper towel, and serve with dipping sauce.


Wednesday, December 3, 2008

Shrimp and Sausage Jambalaya


Back in September, Mario and I decided to start a new tradition. We established a regular Friday restaurant night for our family. We didn't want this to be a fast food night, we believe the kids are getting old enough, and can be well behaved enough to eat in some nicer places. We also think that it's a good idea to expose them to some different cuisines.

So far we've taken them out for Indian, Lebanese, Cantonese and most recently we took them out to a Cajun restaurant. They loved all of it. Interestingly, they seem much more willing to sample new things when they are in a restaurant, than when they are at home. They loved the Indian food the most. Imagine that! I don't think I even tried Indian food until I was in my 30's.

As usual, I am making a really short story very long. What I am leading up to is the fact that I often get inspired by these dinners out, and when I saw my kids devour the healthy looking Jambalaya at the Cajun restaurant, I decided this dish would make a great addition to my at home repetoire.

So I set about finding a good recipe. I ended up using bits and pieces of several recipes that I found on-line. This recipe had quite a bit of kick, so if you don't like the heat (or if your kids won't eat spicy food) then ease back on the cayenne and paprika.

Shrimp and Sausage Jambalaya
(makes about 6 cups of Jambalaya)

1 tsp salt
1/2 tsp black pepper
1/4 tsp cayenne
1/4 tsp hot paprika
1/2 tsp thyme
1/2 tsp basil
1/4 tsp oregano
1 tbsp butter or oil
1 cup diced Andouille sausage
1/2 cup diced onion
1/2 cup diced pepper
1/2 cup diced celery
1/2 cup diced tomato
3/4 cup long grain white rice
1/2 cup tomato sauce
1 1/4 cup chicken stock
1 tbsp Worcestershire sauce
3-4 cloves garlic
1 1/2 cups shrimp (about 1/2 pound)
3 tbsp green onion

1. Mix the spices and seasonings together (first 7 ingredients).

2. Preheat the oven to 350F.

3. In a large oven proof dutch oven or skillet, saute onion, celery, green pepper and garlic in butter for a few minutes until softened.

4. Add sausage and cook another minute or so. (Note: I wasn't able to find Andouille in my local grocery store, so I used a lean Kolbassa instead, it worked fine, but Andouille would be the more "cajun" choice... or at least less "polish").

5. Add the tomatoes, tomato sauce, rice, stock, spices, and worcestershire. Bring to a boil and then set the pot in the oven uncovered for 25 minutes (most of the liquid will be absorbed).

6. Add the shrimp and the green onion and return to the oven for 10 more minutes, or until the shrimp is cooked through.


(Note: I weighed everthing with my digital food scale as I added it and calculated the nutrional information to be roughly 215 calories per 1/6th of the recipe. The recipe makes about 6 cups.)

Wednesday, September 17, 2008

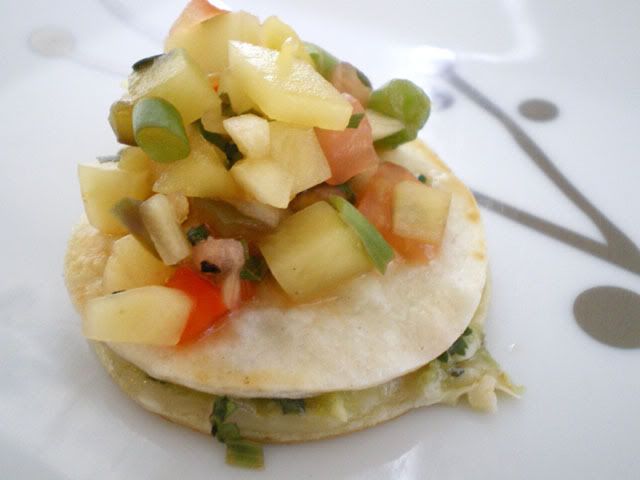
Crab and Avocado Mini Quesadillas


Every once in a while, I absolutely love to just cook appetizers for dinner. I will make 4 or 5 different hot appetizers and put them all in the middle of the table along side some veggie sticks, dip, bread and assorted cheeses. It's a great dinner that everyone loves (especially the kids, since they can pick and choose what they want - which is usually just a lot of bread and cheese). It is also a great way to experiment and test out some new recipes before springing them on unsuspecting friends at a potluck!

This recipe has become a real favorite of ours. If you think it seems fussy, you can always make the quesadillas full-size and cut them into wedges for serving. The original inspiration for this recipe came from a 2007 Holiday Appetizer edition of Fine Cooking Magazine.

Crab and Avocado Mini Quesadillas
makes about 60 appetizers

Mango Salsa
1 ripe mango (peeled, pitted and diced)
1/2 red bell pepper, diced
1 large ripe tomato, seeded and diced
2 tbsp finely chopped chives
2 tbsp finely chopped cilantro
2 tbsp fresh lime juice
1 fresh jalapeno, seeded and finely chopped
salt and pepper

Crab and Avocado Quesadillas
12 8-inch flour tortillas
1 1/2 cups cooked crabmeat
1 1/2 cups shredded Monterrey Jack cheese
2 ripe avocados, diced
1/3 cup green onion, finely chopped
1/3 cup cilantro, finely chopped
2 tbsp fresh lime juice
salt and pepper
olive oil for frying

1. To make the salsa, combine all of the salsa ingredients and let stand for at least one hour before serving.

2. Cut 120 circles out of the tortillas using a 2 inch cookie cutter.

3. Mix together the crab meat, cheese, avocado, green onion, cilantro, and lime juice. Season with salt and pepper.

4. Spread about 1 tablespoon of crab mixture on each of 60 tortilla circles and top with the remaining circles (you can get this far and the chill the circles until it is time to cook them).

5. Heat a small amount of oil in a non stick pan over medium heat and fry in batches until golden brown. An alternative I have used a couple of times is to spray a baking sheet with cooking spray, load it up with quesadillas, spray the top of the quesadillas lightly with cooking spray, and bake in the oven at 400F until golden. About 10-15 minutes or so.

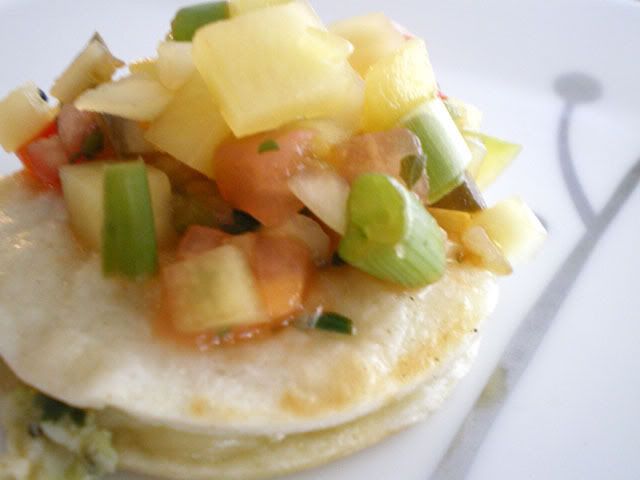
6. Serve warm with a small spoonful of salsa on top.


Tuesday, August 26, 2008

Stuffed Calamari with Roasted Jalapeno Sauce


I've never bought whole squid before. I've bought the little frozen rings and made breaded calamari or pasta with them, but this was my first experiment with whole squid. It was a great success!

We loved this recipe, which I got from Emeril Lagasse. As usual, I made a few small changes (e.g., he used poblano peppers, real mayo and shallots... I couldn't find poblanos, wanted something lower fat than mayo, and was too lazy to go buy shallots).

The only issue we had was that the squid cooks so fast that the stuffing inside really only got warm and not hot. I'd be afraid to cook them any longer for fear of making the squid tough. For me this didn't take away from the taste at all, I still loved it, and will make it again. Next time, I might not let the filling cool down as much before I stuff the squid. Also, I might warm the sauce a bit (or at least make sure it is room temperature, and not chilled). The sauce was great, we loved it! There was enough leftover that we had it the next night on fish tacos, and we used some as a spicy sandwich spread.

Needless to say, Mario and I had this meal on an evening when we weren't eating with the kids. About once a week, we try to feed the kids and put them to bed early and then have a nice late dinner on our own. It's usually a nice quiet, CALM meal. Marco, my 5 year old always says, "Mommy and Daddy are having an o-mantic dinner tonight". He keeps asking when he can have an "o-mantic dinner" with me. I wonder if that means I have to put Mario to bed early? He might be OK with that.

Stuffed Calamari

4 large whole calamari
2 cloves minced garlic
1/2 cup finely chopped onion
1/2 cup goat cheese, crumbled
1 roasted red pepper, diced small
1/2 cup soft fresh bread crumbs
Salt and pepper
2 tsp olive oil

Roasted Jalapeno Sauce

2 jalapeno peppers, roasted, peeled, seeded, and diced
2 cloves garlic, minced
1 cup mayonnaise (I used light miracle whip)
Juice of one lemon
Salt and pepper

1. Preheat the grill.

2. For the sauce, combine the roasted jalapenos and
garlic in a food processor and puree until smooth. Add the mayonnaise,
lemon juice and season with salt and pepper. Set aside.

3. In a saute pan cook the onions and garlic until soft. Season with salt and pepper. Set aside to cool slightly.

4. In a medium bowl, combine goats cheese, roasted red pepper, and bread
crumbs. Mix in the onion and garlic.

5. Stuff each calamari tube with the filling until nice and plump (secure the larger end with a metal skewer or toothpick). Brush each stuffed tube with a little oil to prevent from sticking on the grill.

6. Grill each tube for 1-2 minutes on each side, leaving pretty grill marks on
each side.

7. Cut each tube into five nice pieces on the bias. Spoon a nice amount of the sauce over the top.


Tuesday, October 16, 2007

Calamari with Red Wine and Tomato Sauce


I had a pound of frozen squid rings in the freezer, they've been on my mind for the last week or so as I really couldn't decide how to prepare them. What I WANTED to do with them was bread them and deep fry them, but in the end, I was a good girl and I made this tomato based recipe instead.

It was pretty good, and the kids ate it well. Even the squid. When they asked what it was, I just said "calamari" which sounds a lot more palatable to an 8 year old than "squid". They both ate it up. About halfway through dinner, Claire asked, "Is calamari a fish?" Actually, it is a mollusk (related to the Octopus) but I didn't think that would go over too well, so I just said, "yup, it's fish". Claire thought about it then said, "how did you get the fish into little circles?"

....well, I am just a REALLY good cook!!

Calamari with Red Wine and Tomato Sauce

1 onion, chopped
2 cloves garlic, minced
1 tbsp olive oil
1 28oz can diced tomatoes
1 small can tomato paste
1/2 cup dry red wine
1/4 tsp cinnamon
1 bay leaf
salt and pepper to taste
1 lb squid rings
1/4 cup flour
2 tbsp olive oil
lemon wedges
Rice or Pasta

1. For the sauce, saute onion and garlic in 1 tbsp olive oil until soft. Add diced tomatoes, tomato paste, red wine, cinnamon, bay leaf and salt and pepper. Simmer for about an hour.

2. Meanwhile, prepare the rice or pasta.

3. When everything is ready, heat 2 tbsp olive oil over medium-high heat in a non-stick skillet. Dredge squid rings in 1/4 cup flour, and saute in oil for about 3-5 minutes until cooked through.

4. Serve rice/pasta with sauce and topped with squid. Garnish with lemon.


Tuesday, September 25, 2007

Lemony Scallop and Spinach Pasta


This is what we had for dinner last night. On Monday nights Mario and I play Dodgeball, so I needed a nice quick dinner. The kids complained because usually when Mario and I are going out and there's a babysitter coming, it means chicken nuggets or kraft dinner for them (and they love that!). However, since we had time to eat before our game, I wanted to have a proper dinner.

This was so quick. In the amount of time it took the spaghetti to boil, I was able to prepare everything else, and then just toss it all together in a big bowl. Claire and Marco weren't too keen on the scallops, but they ate everything else.

I got this recipe from one of my all time favorite cookbooks, "The New Dieter's Cookbook" from Better Homes and Gardens. The recipes in this book are low in calories without sacrificing flavour AND (this is the important part....) without having serving sizes that wouldn't be enough to satisfy a 2 year old. You know when you make a recipe from a diet cookbook and you think its gonna be great, then you realize that the nutritional information is based on 8 servings, but the recipe only makes enough to realistically serve 2? Well that won't happen with this book. The Lemony Scallops served 4 with 358 calories and 8 grams of fat per serving, and I only ate about a sixth of the recipe.

I have never made a recipe from this book that I didn't love! Here are some of the others that I've already posted:

Stuffed Peppers
Dark Chocolate Souffles
Pork Chops Stuffed with Barley and Apricot
Orange Crusted Snapper
Chicken Breasts with Dumplings
Saffron Chicken with Peppers

Lemony Scallop and Spinach Pasta

1 lb fresh or frozen scallops
8 oz dried spaghetti
1/2 tsp lemon zest
1/4 tsp crushed red pepper
3 cloves garlic, crushed
2 tbsp butter
2 tbsp lemon juice
2 cups fresh baby spinach
1 cup coarsely grated carrot

1. Rinse scallops and dry with paper towel (if large cut in half).

2. Boil pasta, drain and cover to keep warm.

3. Saute scallops in butter with garlic, lemon zest and red pepper flakes over medium heat until cooked through (about 3 minutes).

4. Add lemon juice, spinach leaves, grated carrot and pasta. Toss to coat.


Friday, August 31, 2007

Snapper with Coffee Butter


This is going to be a strange one. Because although I did make this recipe, I'm not exactly sure what it is. You see, I tend to buy things like meats and fish in large quantities and package them up for freezing with my Foodsaver machine... greatest invention EVER. I've been known to go a little crazy with the Foodsaver machine, once I tried to vacuum seal a loaf of bread before I froze it, and flattened it down like a pancake (resuscitation efforts prooved futile). Anyway... usually, I label things, but this time I forgot. So this is really "Mystery fish with Coffee Butter", I'm not actually positive that it is snapper. But, I thought it was still worth it to post the recipe, since I think any white fish would work well.

I didn't know what to expect when I tried this recipe, because it actually calls for a fair amount of coffee and you can taste it. It was unusual, but also quite good. I would make this again, but the kids didn't touch it, and I do feel it is important for them to EAT (you know once in a while anyway). I would have thought that they'd at least eat the rice I served, but apparently, the fish TOUCHED the rice... saucy fish!


Grilled Snapper with Coffee Butter
from The Catfish Institute

1 tbsp fresh lemon juice
1 tbsp instant coffee powder
1/4 cup butter, melted
1/4 tsp onion powder
1/2 tsp salt
4-6 mystery fish fillets

1. Combine all ingredients except fish fillets.

2. Brush mixture very thickly onto fillets.

3. Grill over direct coals for about 5 minutes per side until fish flakes with a fork (you can broil in oven also).

4. Brush the fillets with the coffee butter again (if you have any left)and serve.


Friday, July 20, 2007

Champagne Cucumber Risotto with Pan Seared Scallops


This meal started out with a package of frozen scallops defrosting in the kitchen and me scratching my head, trying to figure out what to do with them. It sort of evolved from there.

I decided that it would be really nice to have the scallops with Risotto. I usually make my Risotto with white wine, but I had an open bottle of near-flat champagne sitting on the counter from a disastrous attempt at homemade Bellini's last week (well it wasn't a complete disaster because I did get tipsy). Just don't be looking for any accompanying cocktail recipes on this site anytime soon because apparently, 'drink mixology' is not my forte. But then again I learned from my friends, who invented the shooter: "Fire in the Front Bum" (don't ask). Note to my friends: this recipe would also work well with Baby Duck.

Back to my Risotto. Using the champagne in place of white wine turned out to be a stroke of genius (if I do say so myself!). It added a wonderful flavour to the Risotto and it is a great way to use up the leftovers. Has anyone ever actually finished a bottle of champagne they popped open to celebrate a special occassion? (or make pukey bellini's?). Exactly!

At some point, while I was cooking, I realized there was no green vegetable with this meal. I am a bit of a stickler for serving some green with every meal. I couldn't throw together a salad, because I didn't have any lettuce. So here is where this meal gets a little odd. I put grated cucumber in my risotto. And you know what? It was good! Then I sauteed the scallops with just a tiny bit of bacon for flavour.

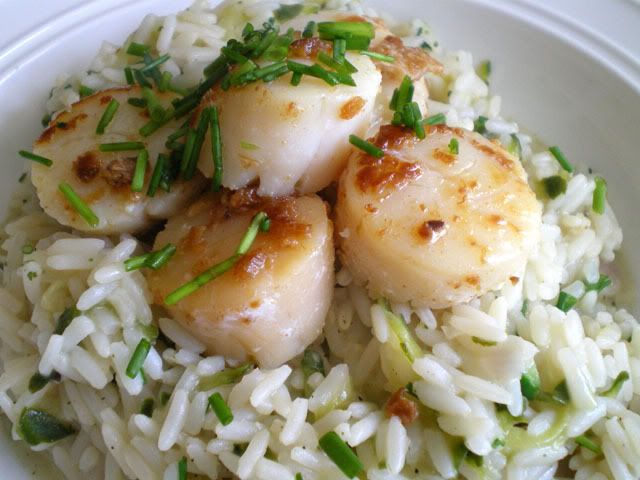
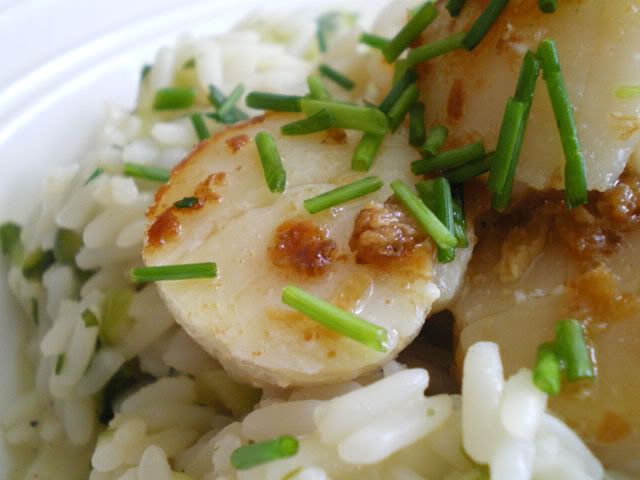
This meal turned out to be very nice. See that nice photo with the five perfectly placed scallops? After I snapped the pics, I put 4 more scallops on my plate....yu-mmy!


Champagne Cucumber Risotto with Pan Seared Scallops

1 tbsp olive oil
1/4 cup finely chopped onion
1 cup champagne
1 1/2 cups Arborio rice
5 cups chicken broth
1 cup shredded cucumber (squeeze out excess moisture)
1/3 cup Parmesan
1/4 cup chives
1 tbsp chopped fresh cilantro
1 tbsp butter
400g scallops
1 tbsp bacon bits (about a half a slice)
1 tbsp olive oil

1. Bring chicken broth to a boil in a saucepan.

2. In a non-stick saute pan, saute onion in 1 tbsp olive oil until translucent. Add rice and cook another minute.

3. Add champagne and cook until mostly absorbed.

4. Begin adding hot chicken broth, about 1/2 cup at a time, stirring each addition until mostly absorbed. Continue until about 1 cup of broth remains.

5. Heat 1 tbsp olive oil with bacon bits in a saute pan. Cook scallops for about 2 minutes per side until cooked through. Do not overcook.

6. While the scallops are cooking, add the last of the broth and the grated cucumber. Stir until absorbed.

7. Finish the Risotto by stirring in Parmesan, chives, cilantro and 1 tbsp butter. Serve immediately with scallops on top.


Monday, July 16, 2007

Crunchy Lime Tilapia with Almonds


We try to eat some sort of fish or seafood at least a couple of times per week. It is very healthy and Mario and I love it in just about any form. Getting the kids to eat it, however, is another matter. But when I served this meal, Marco picked the fish right up in his hands and ate it like it was a big cookie. I was so excited he ate it, that I supressed my usual lecture about utensils and table manners.

This recipe got a great reaction from Mario too. Usually, I have to actually ASK him if he liked something. It is very rare that I get an UNSOLICITED compliment. But this time, when he took the first bite, it elicited an almost involuntary "hmmm". Then he dug right in for more. I said, "I guess that means you like it?" Mario: "mmmm, hhhhmm, mmhhhh, mwah". Well, I didn't need an on-line translator to tell me that was man-grunt for: "This is the best meal you ever made, I hereby pronounce you Ruler of this House".

Crunchy Lime Tilapia with Almonds
adapted from the Kellogg's Website

1 pound Tilapia fillets
2 cups Rice Krispies (crushed to about 1 cup)
1/4 cup chopped almonds
1 tbsp fresh parsley
1/4 cup flour
2 egg whites
3 tbsp fresh lime juice
1/4 tsp ground ginger
1/4 tsp salt
1/4 tsp pepper
cooking spray

1. In one bowl mix together Rice Krispies, almonds and parsley.

2. In another bowl mix egg whites, lime juice, salt, pepper and ginger.

3. Dredge fish fillets with flour, dip into egg/lime mixture and press into Rice Krispies. Press crumbs on firmly so the fish gets well coated.

4. Place fish on a baking sheet sprayed with cooking spray. Spray a little more cooking spray on top of the fish. Bake at 400F for about 15 minutes, turning halfway, until browned and cooked through.

5. Serve with Mango-Lime salsa or Chipotle Sauce (I mixed some Chipotle Dip with light Miracle Whip for the sauce)


Monday, July 9, 2007

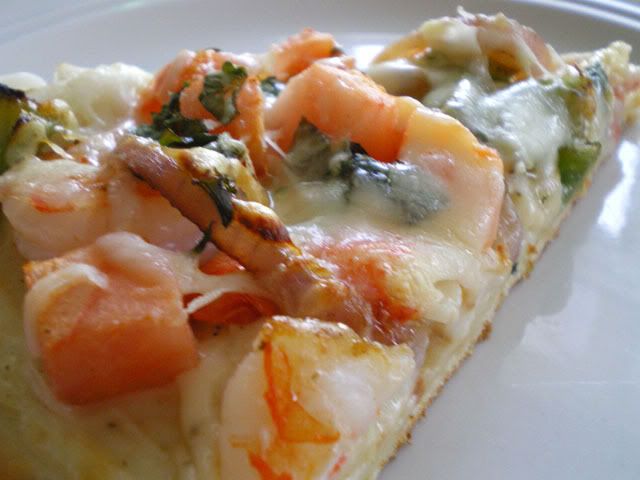
Seafood Pizza


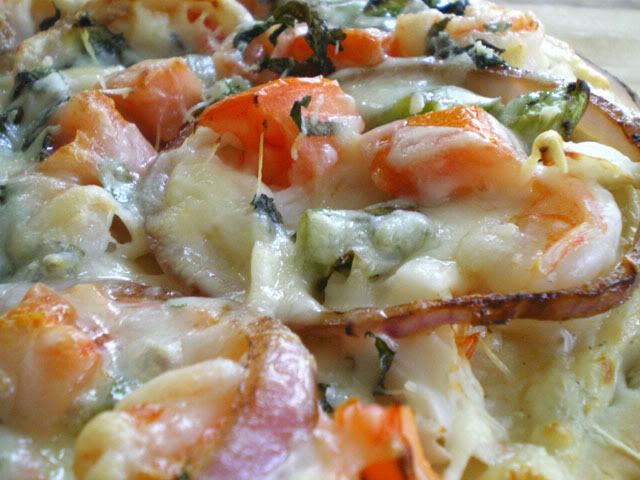
I made this pizza last week, I had planned to make grilled fish for dinner but the kids started whining and complaining that they wanted Pizza. Finally, I relented, but I made Pizza entirely out of stuff they don't like [insert evil laugh here]. In the end the joke was on me, they ate two pieces each, and Mario and I were left hungry for more.

As with any Pizza, the recipe for this can be adjusted depending on what you like.


Seafood Pizza

1 large flatbread (store bought)
1/2 cup of bechamel sauce (recipe follows)
250g raw shrimp, peeled
250g fresh cooked crab meat (or imitation crab meat)
1/2 red onion, sliced
1/2 green pepper, chopped
1 ripe tomato, diced
2 tsbp cilantro, chopped
1/2 cup mozarella cheese
1/4 cup Parmesan Cheese

Bechamel Sauce
1/2 cup milk
1 tbsp butter
1 tbsp flour
dab of dijon mustard
salt and pepper

1. Saute the onion and green pepper for about 3 minutes, add shrimp and saute a few more minutes until mostly cooked.

2. Make Bechamel Sauce: in a microwave safe dish melt butter. Whisk in flour. Stir in milk and dijon. Cook on HI until thickened (a couple of minutes depending on your microwave). Stir and season to taste.

3. Spread Bechamel sauce on flatbread. Add Sauted Shrimp, onion and green pepper. Add crab meat and diced tomato.

4. Sprinkle with Mozarella, Parmesan and cilantro. Bake at 400°F for about 15 minutes (keep a close eye) until everything is HOT and the cheese has started to brown.


Thursday, July 5, 2007

Grilled Garlic Shrimp


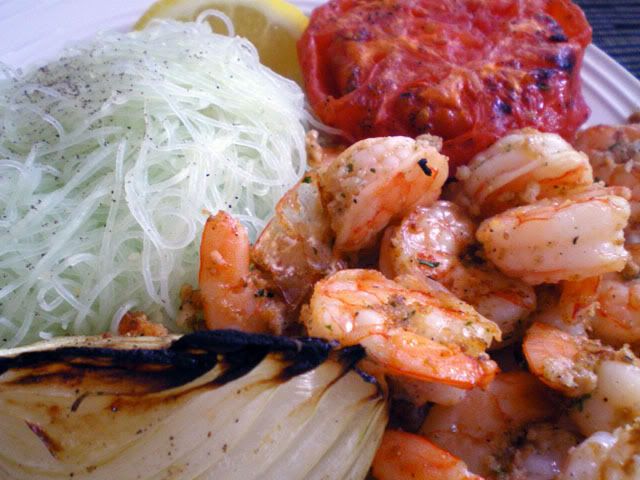
I wanted to have shrimp for dinner Tuesday night, and I wanted to try something new. I was hampered by a serious lack of ingredients at home because we were away last weekend and are going away again next weekend so I didn't make my usual insane 2-cart-load trip to the grocery store.

Considering I didn't have much on hand, this dinner turned out quite nicely. I wanted to grill the shrimp on the barbecue in the grill basket, but we discovered that we were out of charcoal. So...onto Plan B...everything came in the house and went under the broiler instead. I had envisioned that the breadcrumbs I mixed in with the shrimp would get crunchy but they didn't. They were still delicious, but maybe on the barbecue they would have browned better.

Pictured with the shrimp are tomatoes and onions that I brushed with olive oil and seasoned with salt and pepper before broiling. The spinach vermicelli is tossed with a tiny bit of butter, Parmesan, garlic, lemon and pepper.

Grilled Garlic Shrimp

30 raw shrimp, peeled
2 cloves garlic
1 tbsp olive oil
1/4 cup fresh breadcrumbs
2 tbsp cilantro
2 tbsp fresh lemon juice
1/4 tsp paprika
salt and pepper

1. Toss all ingredients with the raw shrimp.

2. Spread on a broiler pan and broil for about 2 minutes per side.


Saturday, June 23, 2007

Fish Tacos


This is one of the only ways that I can really get my kids to eat much fish. But that is OK, because we all really enjoy eating our fish this way. The first time I had a fish taco was in Belize and the fish was deep fried and it was unbelievably good. I certainly don't want to deep fry at home, so I broil the fish and it still turns out very nice.

I lightened this recipe by using egg whites, and cooking spray and low fat miracle whip in the Tartar sauce. But you don't have to do it that way. If you use a whole egg to bread the fish, pan fry in a little oil and make the tartar sauce with full fat mayo, it would probably be even yummier...

In the picture, the tacos are served with a mixed green salad and a carrot and raisin salad. Yes, that was one heck of a lot of lettuce!

Fish Tacos

4 flour tortillas
4 fillets of white fish (I used snapper)
1/4 cup flour
1/4 cup egg whites
1/4 cup yellow cornmeal
1/4 cup bread crumbs
cooking spray

Tartar Sauce:
1 cup mayonnaise (I used light Mirable Whip)
2 tbsp finely diced green onion
1/2 cup finely diced dill pickles
1 1/2 tsp chopped capers
1/8 tsp cayenne pepper

1. Mix all the ingredients for the tartar sauce and set aside.

2. On a plate, mix together the cornmeal and the breadcrumbs.

3. Dry the fish on paper towel. Dredge with flour, dip into egg whites and then into cornmeal/breadcrumb mixture.

4. Spray the outside of the fish on both sides with cooking spray and place under pre-heated broiler rack for about 5 minutes on each side or until the fish is cooked.

5. Meanwhile, heat a dry skillet over high heat and heat the tortillas one at a time for about 30 seconds on each side, until they puff up slightly.

6. Assemble the tacos with the fish, a spoonful of tartar sauce and some crispy iceberg lettuce.

Thursday, May 10, 2007

Grilled Teriyaki Salmon and Salad with Japanese Ginger Dressing


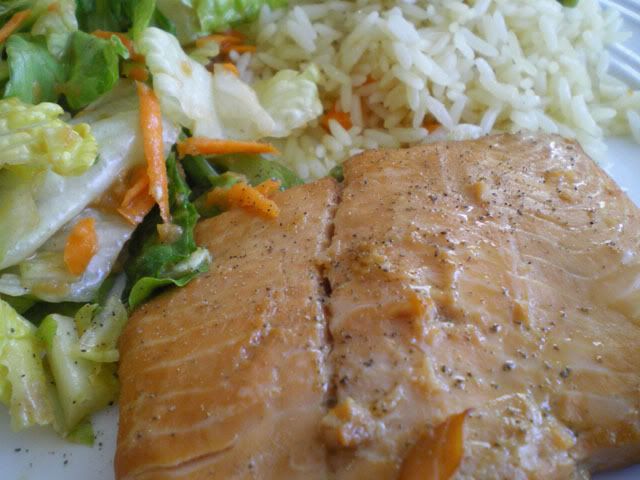
I have always loved the Ginger Salad Dressing that you are served in most Japanese restaurants (it's a "lick the plate" sort of love). So, I embarked on a quest to re-create this dressing at home. I think I was fairly successful, but I honestly don't know if I will make this again just due to the sheer number of ingredients involved. Besides, its such a treat go out and have it served to me in a restaurant. For the salad itself, I used roughly chopped iceberg lettuce, one grated carrot, and one chopped stalk of celery. For the life of me, I couldn't really remember what other vegetables are typically found in this sort of salad...

Also for dinner I made Grilled Teriyaki Salmon which was very simple. I served the salmon and salad with some leftover rice that came from a local takeout greek place called Greek on Wheels. The kids pretty much only ate the rice. Figures.

Japanese Ginger Salad Dressing

1/2 cup minced onion
1/2 cup olive oil
1/4 cup rice wine vinegar
2 tablespoons water
3 tablespoons minced fresh ginger root
2 tablespoons minced celery
1 tablespoons ketchup
4 teaspoons soy sauce
2 teaspoons white sugar
2 teaspoons lemon juice
1/2 teaspoon minced garlic
1/2 teaspoon salt
1/4 teaspoon ground black pepper

1. Put all ingredients in a blender or food processor and whiz until well blended and vegetables are pureed.

Grilled Teriyaki Salmon

4 salmon fillets
1/3 cup teriyaki sauce
1 clove garlic, minced
1 tbsp minced ginger
1 tbsp minced onion

1. Mix teriyaki with garlic, onion, and ginger.

2. Pour over salmon in a shallow dish. Let marinate about 30 minutes.

3. Grill salmon on BBQ or under broiler about 3 minutes per side.

Saturday, May 5, 2007

Garlic Shrimp with Barley Salad


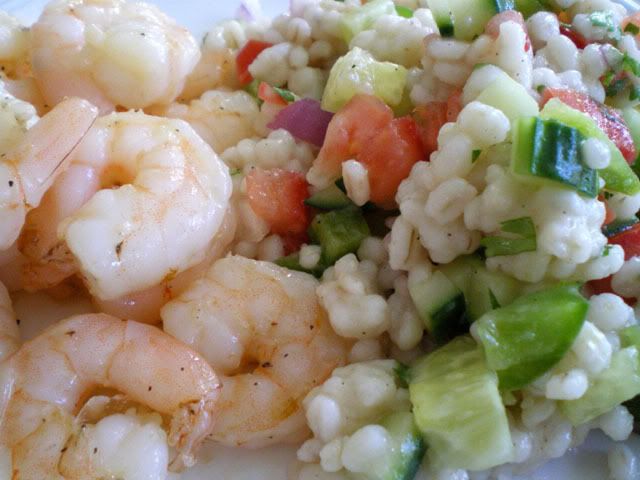
Many nights for dinner I actually follow recipes, even making special trips to the grocery store for just the right ingredients (ask Mario about my grocery shopping addiction...). But sometimes, I get lazy and I just toss something together on the fly. Sometimes that works out fabulously and other times.... well those dinners don't get posted. This one was pretty adequate.

I rummaged around in the deep freeze before breakfast, totally undecided about what I would make.... roast pork - takes too long, ribs - ditto, chicken breast - don't feel like it, italian sausages - too fattening, chicken nuggets - too pre-made.... then ah-ha from the scary depths of the freezer I pulled a bag of frozen (duh) raw peeled tiger shrimp. I can ALWAYS figure out something to do with shrimp.

Before I left for work I put the shrimp in a covered dish with about a 1/4 cup of olive oil and 2 cloves of minced garlic to marinate in the fridge. Then I sat at my desk at work all day, thinking about my shrimp, and surfing the internet (but just a little bit I promise) for ideas on how to complete what I started.

Sometime after my second cup of coffee, I remember that I had a container of leftover cooked barley in the fridge, and so I concocted a "barley salad" that is loosely based on my friend, Krista's, recipe for "couscous salad" (which I may post someday, if she doesn't mind).

Sautéed Garlic Shrimp

1lb raw shrimp
1/4 cup olive oil
2 cloves garlic
Splash of white wine
salt and pepper

1. Marinate shrimp in garlic and olive oil.

2. When ready to eat scoop shrimp out of the marinade with a slotted spoon (don't need to get ALL that oil). Place in a skillet over medium-high heat and sauté for a few minutes, until the shrimp is pink and cooked through. Add a splash of white wine and season while cooking.

Barley Salad

1 1/2 cups cooked barley
2 tbsp fresh lemon juice
1 tbsp olive oil
1 chopped tomato
1/2 cup chopped green pepper
1/2 cup chopped cucumber
1/4 cup chopped red onion
2 tbsp fresh cilantro, chopped
salt and pepper

1. Mix together lemon juice, and olive oil and pour over all remaining ingredients. Mix it all up until everything is coated. Season to taste.

Friday, May 4, 2007

Red Snapper Veracruz


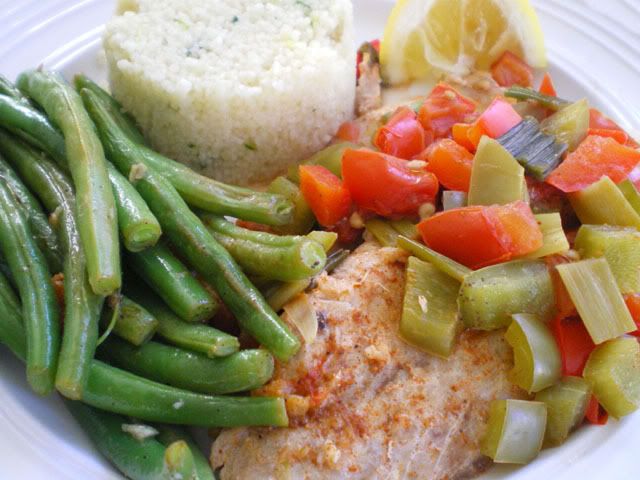
I am always on the lookout for new, interesting, and healthy fish recipes. This one is very healthy, as you will notice there is no added oil or butter in this recipe. I searched for Red Snapper Veracruz on the internet and ended up creating a recipe based on my favorite parts of two or three of the recipes I found. I served this with couscous (made with vegetable stock, grated zucchini, diced green onion and cilantro) and green beans (parboiled then sautéed in 1 tsp of butter with garlic and lemon). Marco gobbled up his dinner, Claire didn't touch hers.

Red Snapper Veracruz

4 snapper fillets
1/4 cup fresh lime juice
1 tbsp fresh lemon juice
1 clove garlic, minced
1 tsp chili powder
1/2 cup red pepper, chopped
1/2 cup green pepper, chopped
4 green onions, chopped
1 tomato, chopped
cilantro for garnish

1. Mix lime, lemon, garlic and chili powder. Pour over snapper fillets in a shallow baking dish that has a cover. Let marinate for about 10 minutes.

2. Sprinkle, peppers, onions and tomatoes over top of the snapper. Bake covered at 350F for about 30-40 minutes, or until the fish is white and flaky.

Saturday, April 7, 2007

Orange Crusted Snapper


This was the dinner that I made on Good Friday. It was quite nice. Neither of my kids touched a bite of anything, but what can you do? I refuse to eat chicken nuggets every night, so I figure eventually their hunger might get the best of them and they'll eat a vegetable! I served the snapper with mashed plaintains and steamed green beans. For dessert we had leftover cherry and pear clafouti. The snapper recipe calls for soft breadcrumbs. To make this easy, every time I have some stale bread (or crusts that no one wants to eat) I throw them in the food processor and then dump the crumbs into a ziploc bag that I always keep in the freezer. Because of this, my breadcrumbs are usually mostly whole wheat. The only advice I can give for this recipe, is make more than one snapper fillet per person - in the end we were secretly happy the kids wouldn't eat theirs.....

Orange Crusted Snapper

4 fresh snapper fillets
2 tsp butter, melted
salt and pepper
3/4 cup soft breadcrumbs
2 tbsp chopped cilantro
1 tsp finely shredded orange peel
1 tbsp orange juice
2 tbsp butter, melted
1 clove garlic, minced
1/4 tsp dried oregano
salt and pepper to taste

1. Get the fish ready. Pat the fillets with a papertowel and season on both sides with salt and pepper. Brush lightly with the 2 tsp of butter and place on a broiler rack that has been lightly coated with cooking spray.

2. Make the crust. Mix breadcrumbs, cilantro, orange zest, oragano, and garlic. Stir in orange juice and 2 tbsp melted butter. Season to taste.

3. Place fish under the broiler. Broil for about 3 minutes, then remove and turn over. Divide breadcrumb mixture evenly between the four fillets (press it down a bit, if its falling off). Broil for about 3 more minutes on second side, until fish is flaky and topping is browned. (Three minutes per side was perfect for my fillets, which were about 3/4 inch thick, if your fillets and thinner or thicker, you may have to adjust the cooking time).

Wednesday, March 28, 2007

Crab Cakes and Creamy Coleslaw


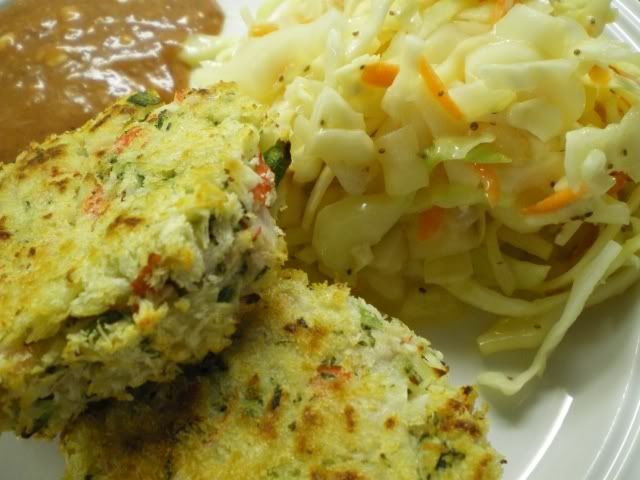
I entered "Crab Cake Recipe" into my search engine and I got 1,390,000 hits, so I really don't expect anyone to think that my recipe is anything special, but it is popular at my house. I actually intended my first recipe post to be "Chayote Spaghetti with Cilantro", but after spending the better part of the day searching various grocery stores for Chayote Squash, I resigned myself to saving that one for another day (stay tuned).

Instead, I found myself in the usual scramble to figure out something for dinner without having taken anything out of the freezer this morning before I left for work. Solution? An old favorite, Crab Cakes and Creamy Coleslaw. For a nice quick dipping sauce to serve with the crab cakes I mixed a couple tablespoons of miracle whip into a half cup of bottled seafood sauce. I also used dehydrated potato flakes to make the mashed potatoes, but I omitted the butter from the instructions on the box.

Crab Cakes
450g (1 pound) imitation crab meat
1 cup mashed potato
2 tsp dried summer savoury
1/4 cup egg beater (or 1 large egg)
2 green onions, chopped
2 tbsp fresh cilantro, chopped
salt and pepper to taste
1/2 cup panko
cooking spray

1. Coarsely chop imitation crab meat.

2. In large bowl mix crab with potato, savoury, onion, cilantro and egg. Season with salt and pepper.

3. Using 1/3 cup per patty, shape into 8 patties about 3" in diameter and coat lightly in panko.

4. Place on parchment lined baking sheet sprayed lightly with cooking spray. Spray a little bit more cooking spray on the tops of the crab cakes.

5. Bake at 400F for 20 minutes or until nicely browned.

I like to serve my crab cakes with coleslaw. My favorite recipe is a creamy coleslaw that still has a vinegary tang to it. My daughter's favorite coleslaw; however, is bright green and comes from KFC. I have actually considered using green food colouring, but somehow I don't think she'll be fooled. I like to cut up my cabbage to make skinny strips, but if pressed for time I just throw it in the food processor. I often get my husband, Mario, to make the first cut down through the big cabbage with the heavy duty chef's knife, because... well... better his fingers than mine.

Creamy Coleslaw
1/2 head of large cabbage, chopped
1/2 medium onion, diced small
1 large carrot, grated
1 tsp celery seed

For Dressing:
1 1/2 tbsp flour
1 tbsp sugar
1 tsp dry mustard
2 egg yolks, beaten
1/8 tsp cayenne pepper
1 tbsp butter, melted
3/4 cup milk
1/4 cup vinegar
1/2 tsp salt

1. For dressing, combine flour, mustard, and sugar in a saucepan. Add egg yolks, cayenne pepper, melted butter, milk and vinegar. Turn stove to medium heat, stirring constantly until thickened and smooth. Let cool

2. Mix cabbage carrots, onion, celery seed and dressing. Depending on how big your cabbage was, your coleslaw may not seem wet enough, add a little more milk.